In this guide, we will discuss how to add a Student Selector to a Quick Report. This allows the user to run the Report for specific Students, rather than the Report running for all Students by default.
- Note: This is NOT AVAILABLE in the Students (Basic) Domain
- The Student Selector is essentially a Filter which can be added when the report is first built or added to an existing Report later on. This guide will detail the latter option of creating a new Quick Report and adding the Student Selector.
- Dependant on the domain chosen this can be done in two ways as shown in the examples below.
See Also: How to Add a Student Selector to Adhoc Report & How to Create a Quick Report
Students Domain
Navigate to Reports > Quick Reports> Create a New Report > Quick Reports.

Select the Domain from the dropdown at the top. Bear in mind that the Students (Basic) Domain will not work for this. In the example below we have chosen the Students domain.
Students Domain
Please note depending on the Domain chosen the pathway shown in the example below is not always available in ‘All Date Intervals & Filters’ but can be added via the Students branch in the data items list. See the next example in this guide for Student Timetables Domain

After adding a Data Item from the left hand side, Click on the All Date Intervals & Filters box

This will present you with the All Date Intervals & Filters popup where you need to tab across to Filters and then Click on + Add Filter

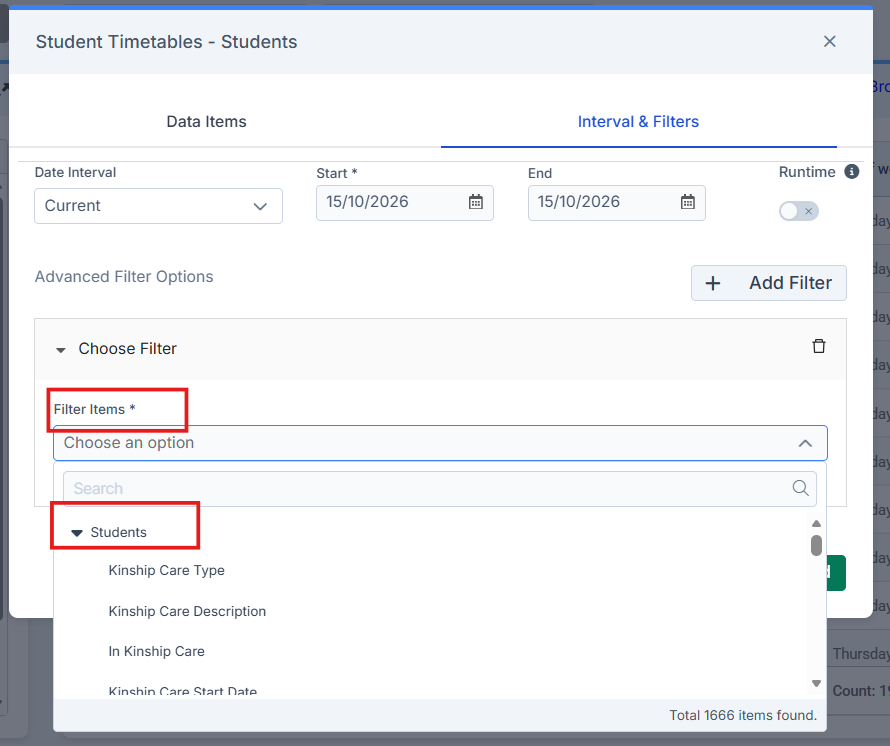
Click on the Choose an Option drop down under Filter Items, and select Students at the top of the list

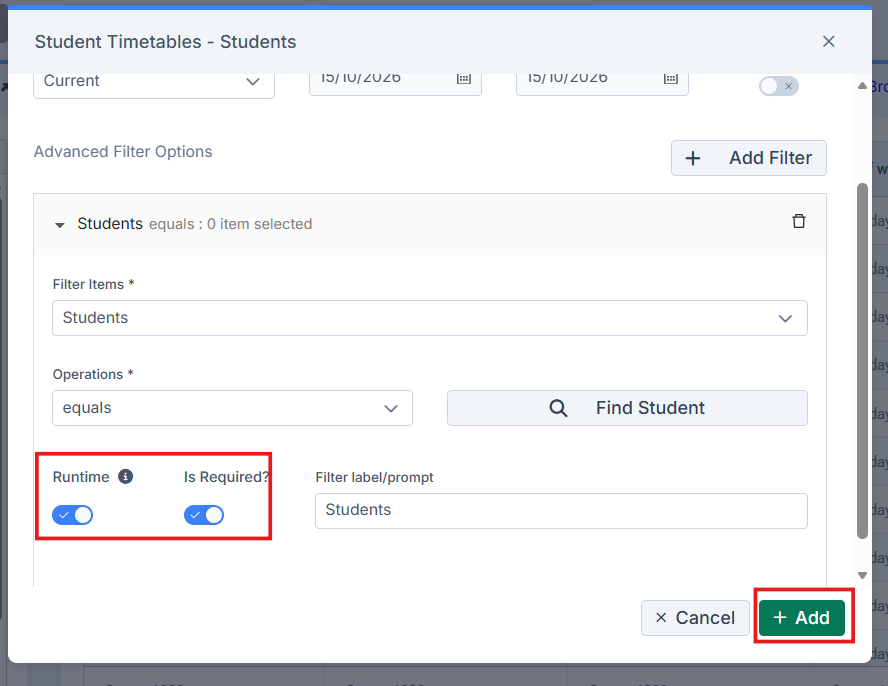
Use the Runtime and Is Required? Toggles accordingly, give your Filter Label/Prompt a Name and then Click + Add to complete

Other Domains
In the example below we have chosen the Student Timetables domain and added some Data Items to the report.
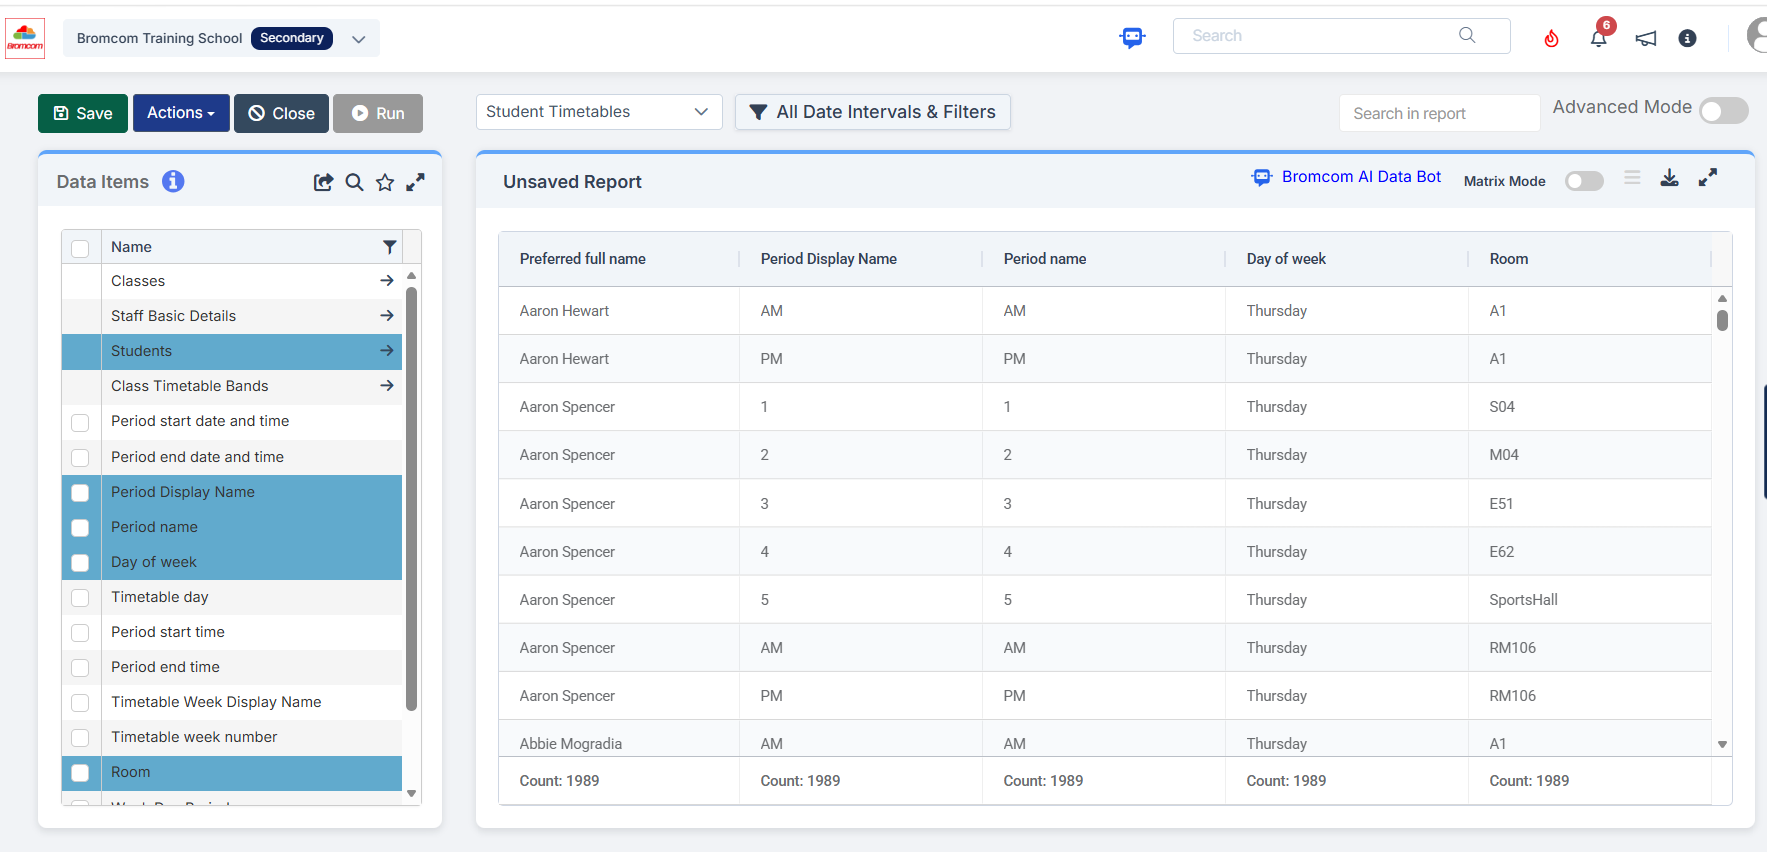
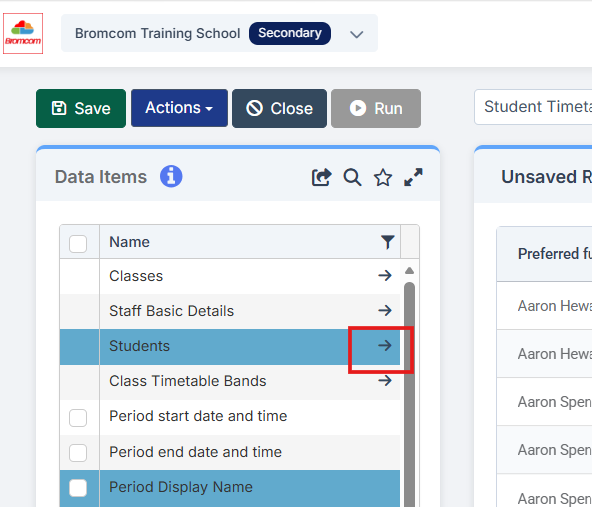
Click on the arrow next to Students in the left-hand Data Items list.
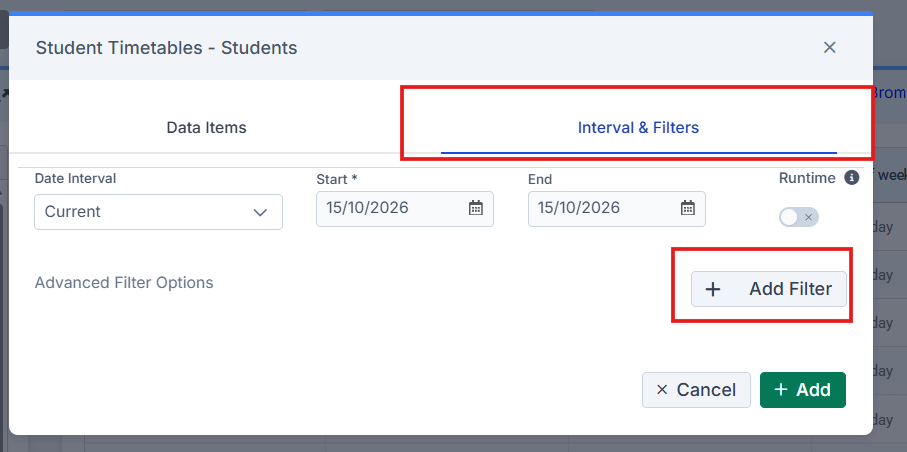
Then click on the Intervals & Filters tab and click Add Filter.
In the Filter Items click on Students
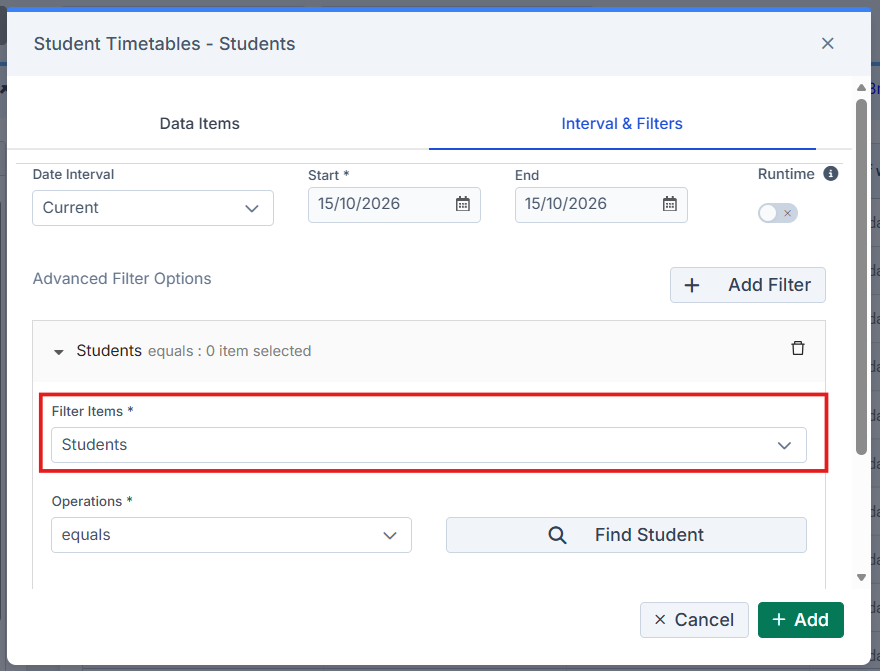
Use the Runtime and Is Required? Toggles accordingly, give your Filter Label/Prompt a Name and then Click + Add to complete