
This guide will show you how to update the following information in the Additional Learning Needs tab in the Student Profile.
- ALN Applications
- ALN Support Plan
- ALN Review
- ALN Type
- Gifted and Talented
- Additional Information
- ALN Document List
See also: How to Add a New Student and for Wales Government guidance see here.
Access: The minimum permissions required to follow the steps in this guide is found in the Framework Module of Config>Setup>Roles & Permissions.

Start from the Student List Page and select the Student who’s ALN information you wish to update.
Once they are highlighted blue, click View.

The Student’s Profile will open.

Select Additional Learning Needs from the left hand menu.

Click the + Icon in the top right hand corner of the ALN Details panel, 5 options will appear, select the area you would like to update.
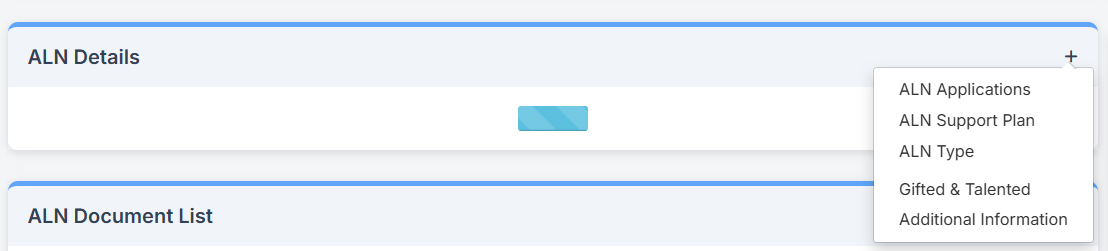
ALN Applications
Students can have multiple ALN application and decision records.
ALN Application data items are also available in Quick Report, Audit Report and as selectable columns within Student List.
In the ALN Applications tab click the right-side + to Add New ALN Application
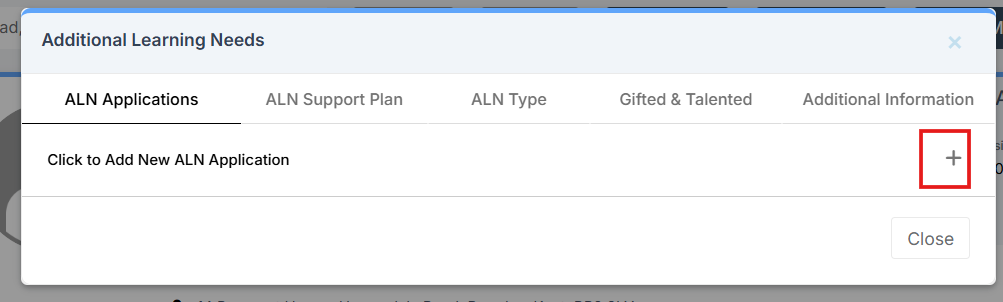
Enter the required information, fields marked with an * asterisk must be completed to save the record.
Click Save.
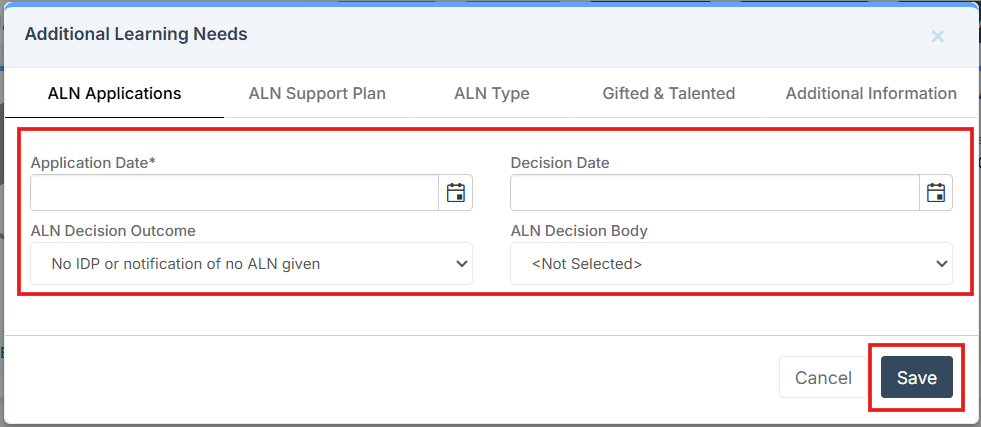
ALN Support Plan
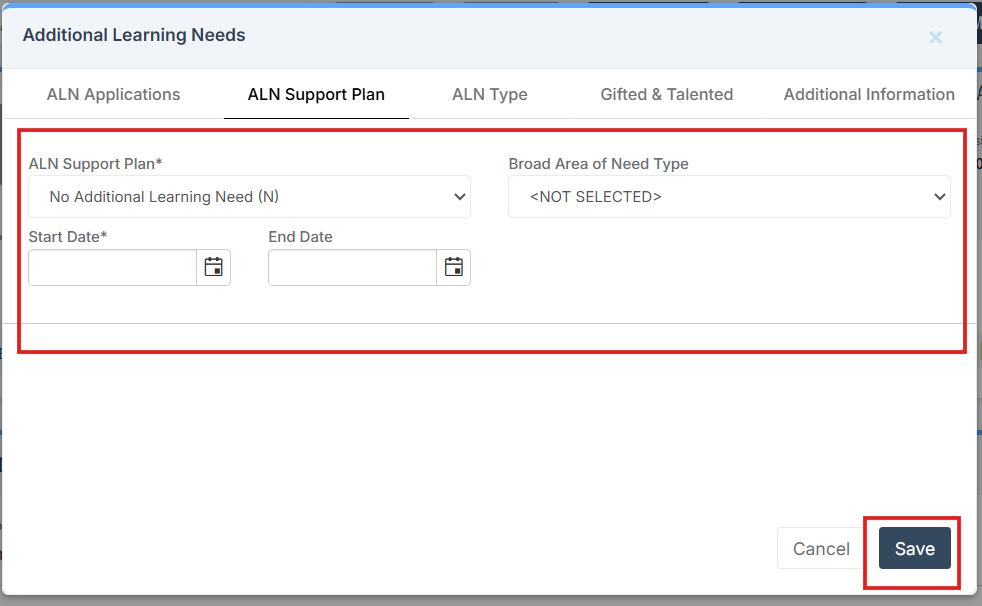
In the ALN Support Plan tab click the right-side + to Add New Support Plan, or click on a record to edit.
Here you can update the ALN Support Plan*, Start Date * and Broad Area of Need Type.
For ALN Support Plan * and Broad Area of Need Type choose from the drop down choices.
Note: all fields marked with an asterisk* must be completed to save the record.
Click Save.
ALN Review
Once you have added the ALN Support Plan you can add a Review with Notes and the ability to add Attachment(s)
Click on the spy glass next to the relevant ALN Support Plan

Then Click the + to Add New Review.

From here you can add a Review Date, Notes and click the Attach Icon to add Attachment(s).

Click Save.
ALN Type
On this tab you are able to add their Type of Need and the Priority. The Type of Need is a dropdown that cannot be edited.

You must also add a Priority*, ALN Type* and Start Date*, if an ALN Type ends then you can come back in here and add an End Date.
Choose the ALN Type* from the drop down choices and add Notes if required.

Click Save.
Gifted and Talented
if a Student is identified as being Gifted & Talented you can record it here by adding the Start Date* when they became Gifted & Talented.

Click Save.
Additional Information
For more information on this area please click here.

ALN Document List
The ALN Document List will display any Documents with the Document Type ALN. You can add a new one by clicking the + button in the top right hand corner of the panel.

Select the Document Status Type from the drop down:
- Public – Anyone with access to this area of Bromcom will be able to see Public documents.
- Private – The document will only be visible to the User that uploaded it.
- Confidential – Only people with the permission ‘Staff Access To Confidential Documents’ will be able to access Confidential documents. This permission can be found in Config > Setup > Roles and Permissions within the Framework module.
Then click Select Files, select the file to be uploaded. Once you’re happy click Save.

The document will then display in the ALN Document List.
