
Attendance Officers or Office Managers can use this guide to;
- View/Export or Print a List of Attendance Marks
- Create a New Mark
- Enable/Disable Marks for Teacher Registers
- Display a Colour for a Mark
- Protect a Mark
- Define a Mark as Physically Present
- Export Mark
Access: The permissions required to follow this guide are found in the Attendance Module of Config>Setup>Roles & Permissions.

See also: How to Add a New Attendance Sub Code, How to Distribute Attendance Codes and Subcodes from within Vision and Attendance.
DfE guidance on School Attendance can be found here.
View/Export or Print a list of Attendance Marks
From the Home Page, choose Config>Attendance>Attendance Codes.


Use the Academic Year drop down to choose the relevant Academic Year.
Note: This defaults to the Current Academic Year.
Use the Grid Actions to Copy, Export in Excel or CSV Format or Print the list of Attendance Codes.
Click on the Column Headings in the Table to Sort the Table.
Create a New Mark
From the Attendance Codes page select New.
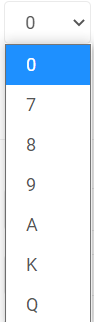
Note: Only the following 7 marks 0,7,8,9,A,K and Q are available when creating a New Mark.

Select a mark from the drop down.
In this example the mark K has been created to define when a student is present but has forgotten a PE Kit for a Physical Education Lesson.
In this example the K mark as been ticked as Physically Present, is Protected and Include in Teacher Register.
Export Mark: enter the relevant corresponding mark to be used for Census to reflect the appropriate DfE School Attendance Code. In this example for the K code the Export Mark is / – Present.

Click Create to Save the New Mark.
Enable/Disable Marks for Teacher Registers
Use this process to define which marks are available to teachers when Taking a Register. See How to Take a Register.
In the example a teacher has marked a student absent in error and then changes this a present mark, the system will let them do this as it’s assuming that the student is ‘at front of the teacher’ so the student needs to be marked present.
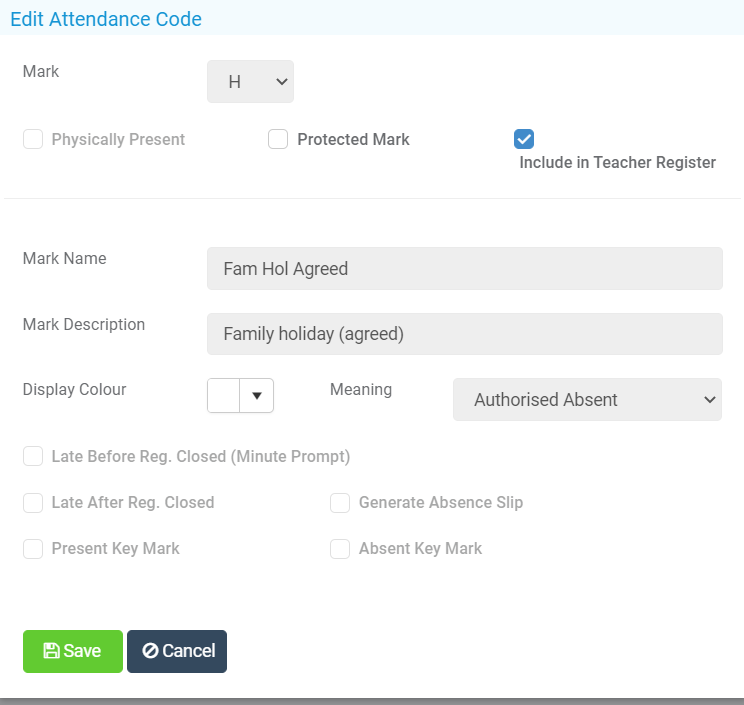
In this example the Attendance Code H, Family Holiday Agreed has been selected, note in the column Enable for Teacher Registers this code is defined as No.

Click on a single code and select Edit. In this example Mark H has been selected.
In the Edit Attendance Code box note the Include in Teacher Register is not ticked.

This means when Taking a Register if a member of staff chooses this mark a warning pop up ‘Action Needed’ will let them know this is not a valid mark.

Note the Mark, Mark Name, Mark Description and Meaning are all greyed out as this is a DFE defined code and hence these fields cannot be edited. See DFE School Attendance Guidance.
Display a Colour for a Mark
Use this process to define a colour for a mark, this will be visible in the Manage Attendance Page and on the Student List Page under Actions>Attendance.
From the Attendance Codes page select a single Mark and click Edit.
Click on the Display Colour drop down to choose the colour for this code, click Apply and Save.

This colour will be visible in the Manage Attendance from Config>Attendance>Manage Attendance and visible from the Student List Page when choosing Actions>Attendance.


Protect a Mark
Protected Mark: If this is selected then the mark can only be amended to a mark that is a present mark in the Teacher Register.
Note: It is not possible to completely lock a mark, preventing a Teacher from making any changes. Even if the code is protected, a Teacher can still change the mark to a code with a Present Meaning.
In this example the Present Mark / is ticked as a Protected Mark.
From the Attendance Codes page select a single mark and click Edit.
If a teacher attempts to amend this to a mark in the Teacher Register that doesn’t have the Present Meaning then a warning pop up will appear.


Note: The mark can however be amended in the Manage Attendance page by staff with the appropriate permissions.
Define a Mark as Physically Present
Use this process when creating a new Attendance Mark to define as Physically Present.
Note for the 3 DFE defined Marks /, \ and L, which all mean present all have Physically Present ticked by default.

Export Mark
Use this function to define Export Marks for the Census. In this example a new Mark K has been created with the Export Mark / = present.
