
In this guide, you will be shown how to Delete a Student from the MIS. Deleting a Student is very rarely needed and is irreversible. As such, the process consists of multiple interactive stages specifically so it cannot be carried out in error/unwillingly.
Deleting a Student could be used when a new Student has been added to your MIS (as an intake or pre-admission) but decides not to join your School, meaning their record is not needed. Or if a duplicate Student record is created in error.
When Students have attended your School and choose to leave/transfer, you must use the Process Leavers function detailed in the following guide: How to process a Leaver.
Pre-requisites: If you are not part of the SLT, please check with them to confirm whether Deleting the Student is the correct action to take.
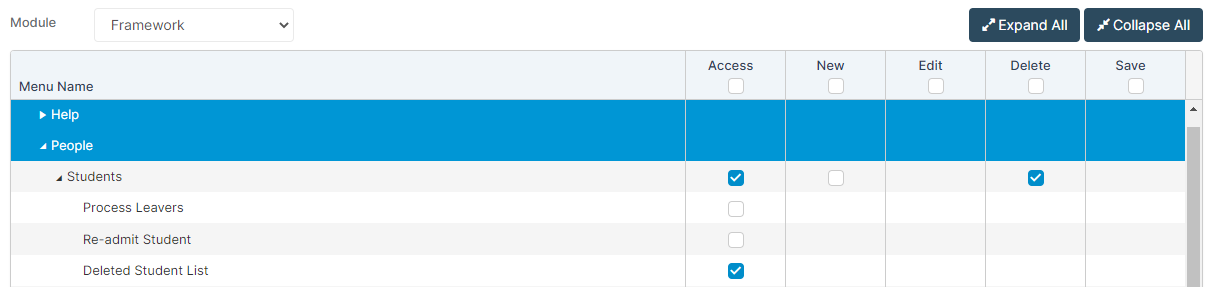
Access: The minimum permissions required to Delete a Student are found in the Framework Module of Config>Setup>Roles & Permissions.
Deleting a Student
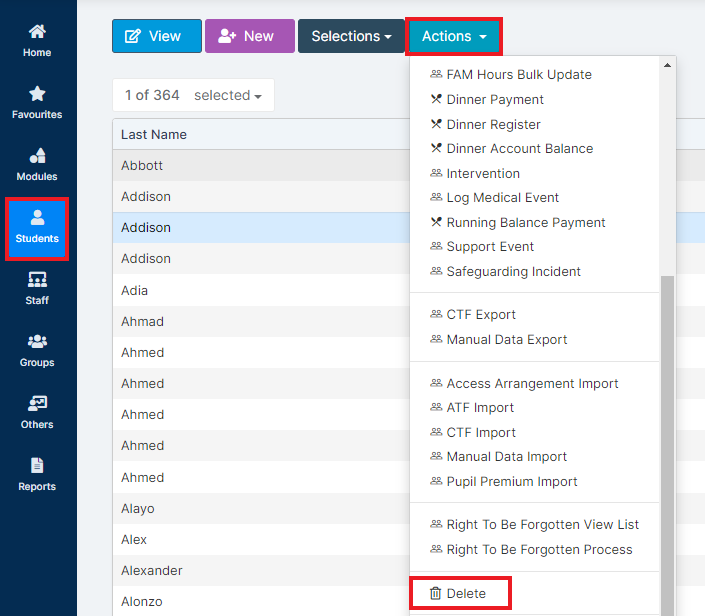
To start the process, go to the Students List page.
If you were already on this page, please press Selections>Remove All to ensure you do not have any unwanted Students selected in error.
Next, highlight the Student(s) you do want to Delete and press Actions>Delete.
After pressing Delete, you will receive a warning asking you to confirm that you wish to Delete the Student.
If this is the case, you must tick I am not making the Student(s) Leaver(s) to make the Permanently Delete button available to press.

This will take you to the next stage which is the Attendance count summary.
If the Attendance count is greater than 0, this means the Student physically attended at least one session at your school and should not be deleted, they should be processed as a Leaver. See: How to process a Leaver.
If the Attendance count is 0, this means the Student did not physically attend any sessions at your school. If you wish to continue, tick the Student and click the Permanent Delete button.

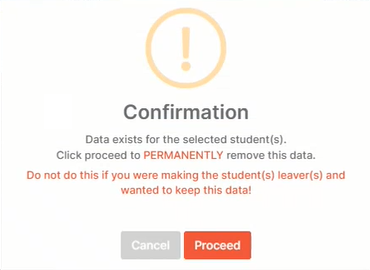
You will then receive a third warning which offers you a chance to Cancel the process if you are unsure or have made a mistake.
If you wish to continue, click the Proceed button.
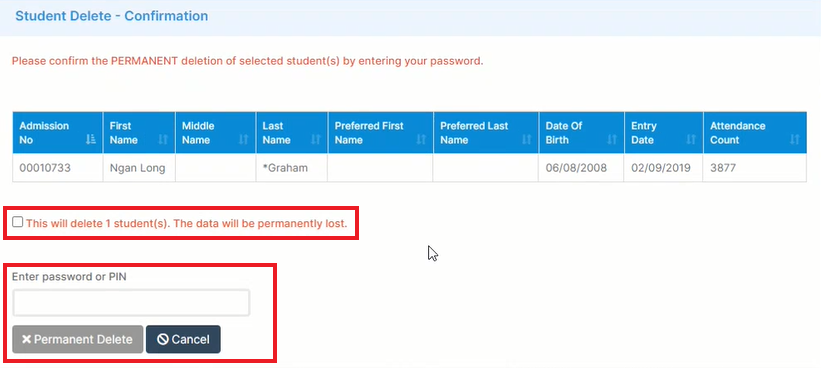
Finally, tick This will delete (1) Student(s) and enter your Password or six digit SSO Pin in the box below. This is your personal Password or SSO Pin that you enter each time you log into the MIS.
See also: How to manage Staff Passwords and How to reset SSO Pins.
Once you press Permanently Delete, the Student and their data will Permanently Deleted from you MIS.
Accessing a list of Deleted Students
If needed, you can view/access a list of all Deleted Students on the Students List page by clicking on Actions> Deleted Students.

This data is shown a table, including which user Deleted the Student, the date of the Deletion and how many Students in total have been Deleted.
This data can also be exported using the options next to Grid actions if required (Excel, CSV or PDF).
