
Attendance Officers can use this page to carry out the following tasks on the Manage Attendance page:
- Overwrite Marks for Students
- Add Attendance Comments for Students
- Enter Marks for Students who have not yet been Marked or were initially Late
- Enter Marks for Individual Students
- Take Attendance for Students sitting Exams
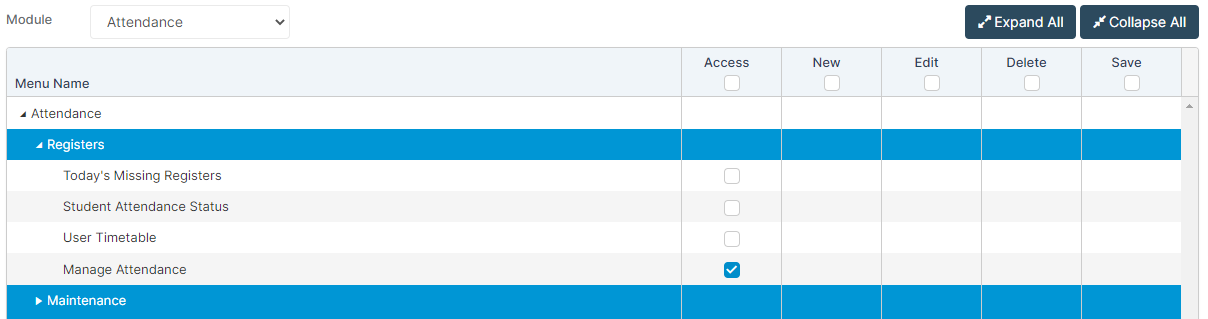
Access: The minimum permissions required to access the Manage Attendance page is found in the Attendance Module of Config>Setup>Roles & Permissions.
See also: How to Use Today’s Missing Registers, How to Create and Manage Attendance Marks and How to Use Bulk Attendance Update
Overwrite Marks for Students
This can be completed either on an individual student basis or in bulk.
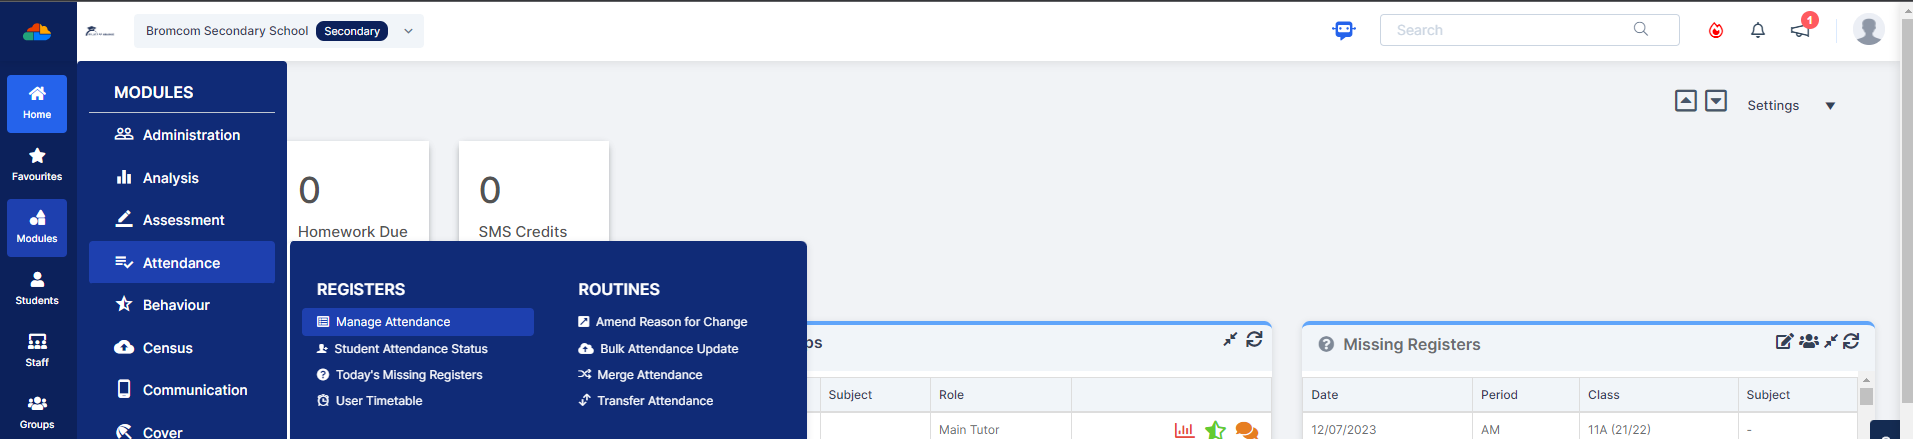
From the left Menu, go to Modules>Attendance>Manage Attendance.
This will open the Select Student Attendance page. Click on the red Settings dropdown option top right to specify which Students you want to Record or Overwrite Attendance Data for such as Whole School, a Tutor Group or Report Group.
Use the Date Range to Manage Attendance for a Specific Date, Week or Exam Register. If you choose Week you also have the option to select specific Students.

These settings are used to Filter to specific Students, Attendance Codes or Periods of the Day.

Note: Whole School Attendance can only be selected for a specific Date.
Once selected, click Apply, you will now see the specific list of Students you have chosen with all the available sessions/periods you can enter Marks into for them. In this example I am using Whole School.
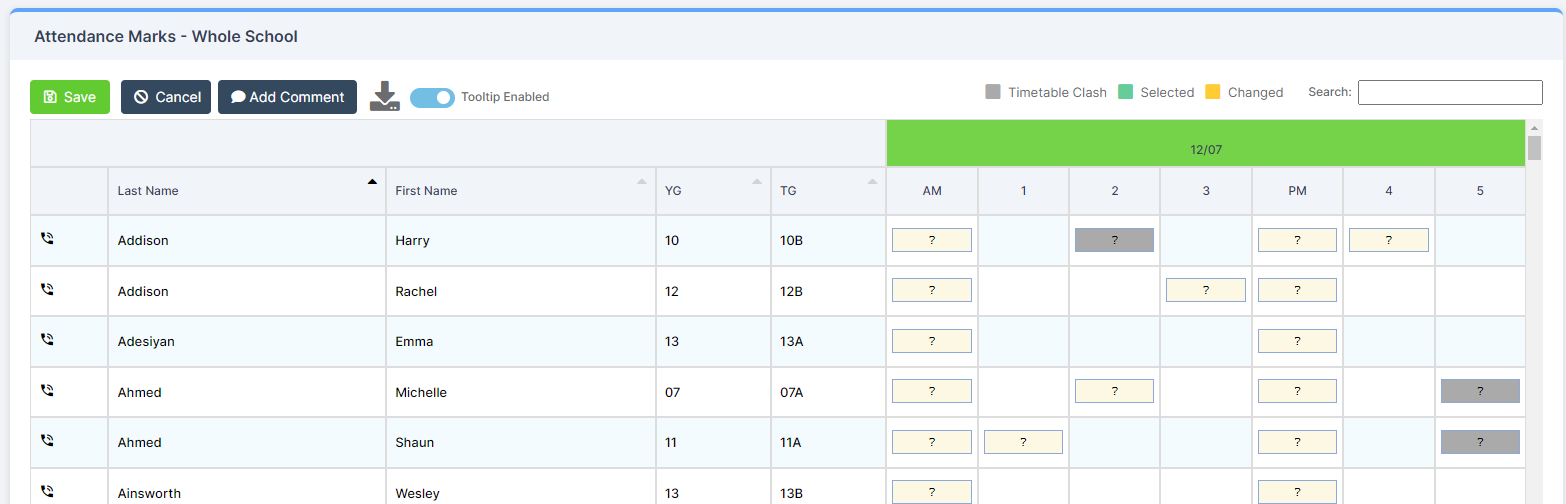
Once the Students are populated, there are some options you have with regards to selecting which Marks to overwrite;
- Selecting an individual Period box will turn that Period green to indicate it is selected, you can now enter an Attendance Code for that Period which will turn it yellow to indicate the Mark has been changed
- Selecting a Period Column Heading (AM, Period 1, Period 2 etc) will highlight that Period for every Student in your list, you can now enter an Attendance Code which will enter that Code for every Student available in that Period
- Selecting a Date Column Heading will highlight all of the Periods on that Day for every Student in your list
- Lastly, selecting the Students name will highlight every Period in that row for as many Days/Periods you initially selected in the Settings

Once your Attendance has been overwritten or entered, click Save. You will see that all your changes are securely in place. It is highly advisable to Save changes as you go if you are using this page for a period of time and take care when selecting Periods/Students to ensure pre-existing Attendance is not overwritten in error.
Note: It is possible to remove marks by using the space bar. Once you have entered a space in the selected session/period and clicked save, the mark will display as the default ‘?’ precreation mark.

A useful tip for this page, if you want to amend Student Attendance for Days/Periods at a time, select Week and Student when choosing your Settings then tick Show Amend Daily Attendance Buttons. You will notice some arrows appear next to each Day for the Students.


Single Clicking the arrow will highlight the whole day for just the selected Students.

Double Clicking the arrow will open an Individual Attendance section allowing you to amend the Marks. The Teacher shown on the right is the Timetabled Teacher for that Period/Class.

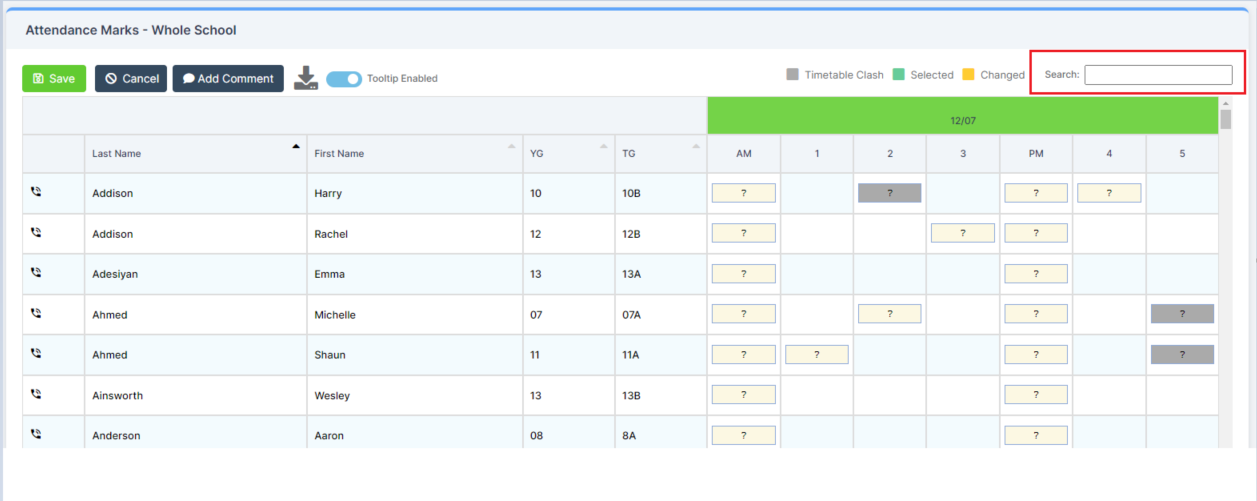
Going back to Whole School, another advantage of selecting this option is the ability to search for Students using the Search Bar located on the right.
Add Attendance Comments for Students
Add attendance comments for students either individually or in bulk.
On the Manage Attendance page, once you have selected your Students you will see some buttons appear just above the list of Students.
- Save/Cancel refers to the Attendance Data you are entering against the Students
- Add Comment allows you to add a custom Comment against an Attendance Mark for a Student or Students
- The downward facing Arrow allows you to Export the Table of Students directly into Excel
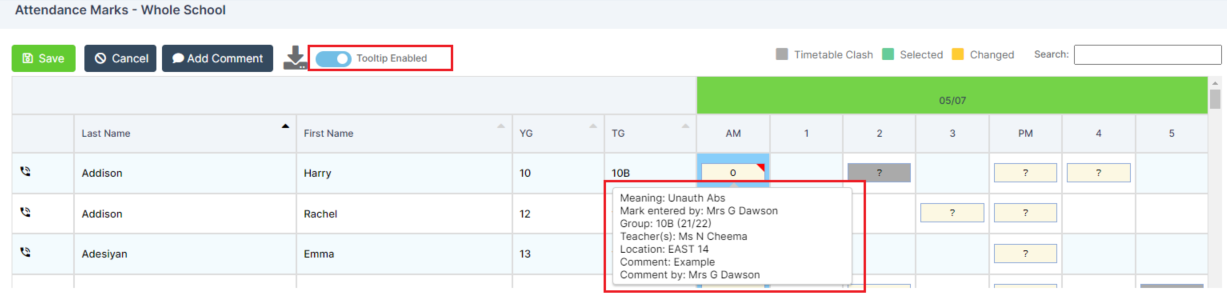
- The Tooltip Enabled toggle button allows you to manage whether or not you wish to see the information relating to a mark when moving over it
To enter an Attendance Comment, select the relevant Attendance Mark – it will turn green. Once the box is selected, providing the Mark has already been saved, you can click Add Comment and a small pop-up box will appear.


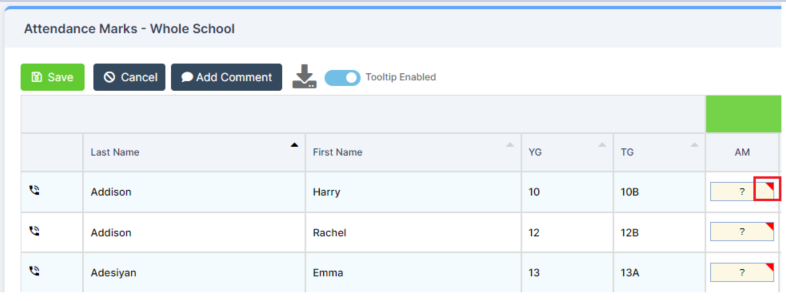
Enter your Comment and click OK to Save it against the Mark for that Period. You should see that the Attendance Mark now has a Red Triangle in the top right corner, which indicates a Comment has been Saved.
Once a Comment has been added, hovering your mouse pointer over that Mark will display the Comment.

Note: If you overwrite a Mark which already has a Comment, you will also lose the previously entered Comment.
A Comment can also be added directly to a ? Mark without having to add an Attendance Mark.
To manage whether or not you wish to see the information relating to a mark when moving over it, use the Tooltip Enabled toggle button to switch this option on (blue) or off (grey):

Note: Once the preference is changed, this will remain the default for the User.
Enter Marks for Students who have not yet been Marked or were initially Late
Whilst it is recommended that Attendance is taken via the Register by Teachers, Attendance Officers have the ability to enter Attendance via Manage Attendance if needed.
If Registers have not been taken by Teachers, your Students should show on Manage Attendance with Missing Marks (?)

An Attendance Officer can select entire Rows, Columns or Days within the Table to bulk highlight Periods to overwrite (Primary Schools will only have AM/PM sessions).
Once all Periods with Missing Marks are selected and turn green, you can now enter the Attendance Code which will flood fill for all highlighted Attendance boxes.

Click the Save button at the top left of the Students table to lock in the entered Attendance Codes.
Note: Entering Attendance via Manage Attendance will not automatically update Registers showing as Missing/Red on Today’s Missing Registers. On Modules > Attendance > Today’s Missing Registers, you will need to use Update Headers to update the Marks and pull them across to the Registers.

Enter Marks for Individual Students
To enter Marks for Individual Students either:
Go to Modules > Attendance > Manage Attendance (you can select individual students per the guidance above).
Or go to Modules > Attendance > Student Attendance Status. Use the group selector to display the relevant group, in this example we have selected the report group (S) Current Students. Right click on the required Student and select Amend Student Attendance to load the Manage Attendance Page with the selected Students details.

Change the Date Range to Week and View By to Student. Click the blue Find icon to open the Student Selector.

Then enter the Attendance Marks as required.

Tip: Amend the Week Start and End Dates to see more than one week.

Take Attendance for Students sitting Exams
Attendance Officers can also enter Attendance for Students taking Exams via the Manage Attendance page.
The Exam Registers will populate providing the following: Exam Basedata is in the system, Students have Entries against the Component and Students are Seated. If this criteria is met, you should see these Exams available under Exam Register on Manage Attendance.


From here, you can select the Exam Register of your choice and this will allow you to take the Attendance for all of the Students who are siting the Exam. In the same way as with regular Attendance, simply enter the Marks and click Save.