
May 2025 Update : As part of Phase 2 of the Teacher App, we have introduced the Seating Plan module,
This feature is designed specifically for use on Tablets.
Important: Teachers will need to update to the latest version of the app unless they have auto-updates enabled for all apps on their device settings.
In this guide we will look at the following functions in the Seating Plan;
See also How to Create & Copy a Seating Plan & How to Create Room Layouts for Seating
Access and Navigation
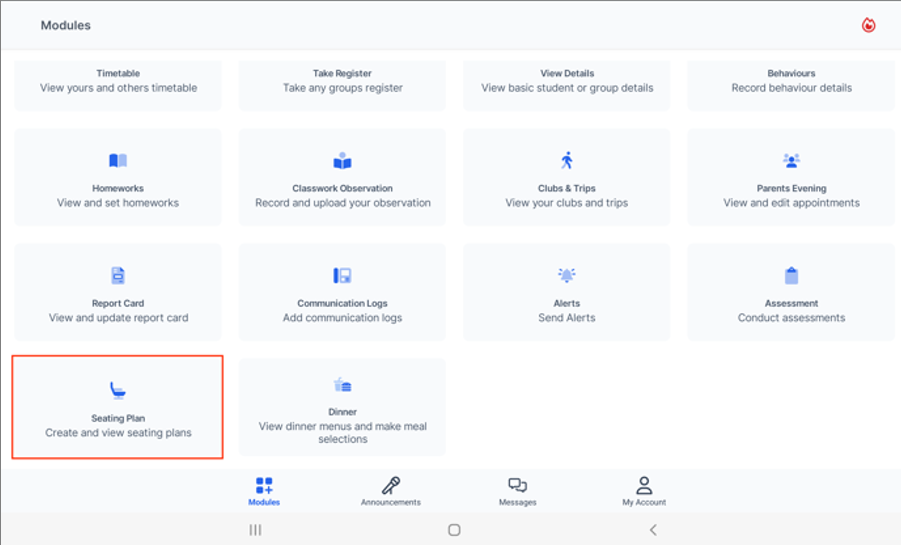
When using the updated Teacher App on a tablet, you will land on the Modules home screen, where all available Modules are displayed in a tile format.
Tap the Seating Plan tile to open the Seating Plan Module.
The Seating Plan Module landing page is divided into two sections: Calendar and Classes.
- The Calendar displays the current week and defaults to today’s date. To view the full month, click the arrow beneath the calendar.
- The Classes section shows all scheduled classes for the date selected in the calendar. Click on a class to open its Seating Plan.
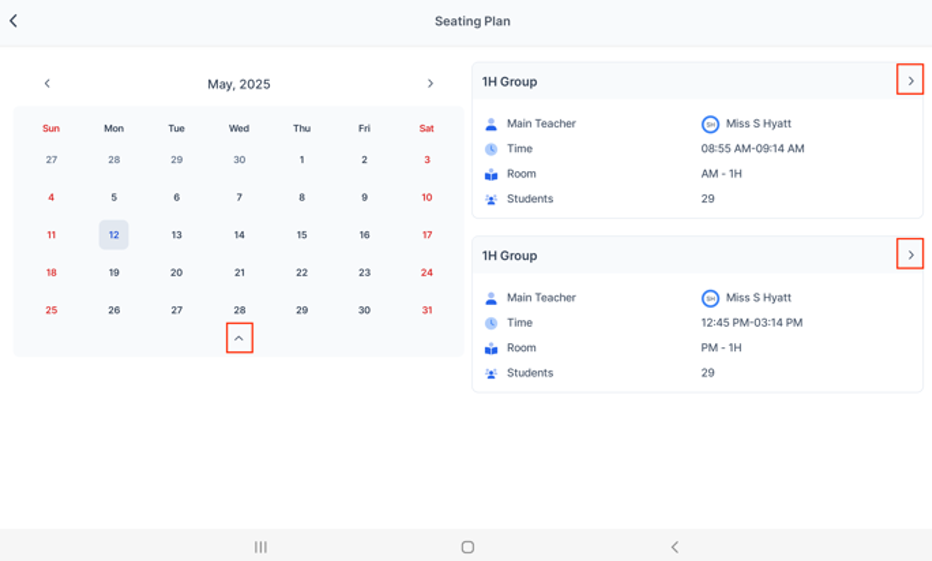
If you access the Seating Plan Module during an active class, you will be taken directly to that class’s Seating Plan, bypassing the landing page. Use the top left Back arrow to return to the landing page if needed.
The Plan is displayed in the top-left corner of the screen. The Plan name is a combination of the Tutor Group and Seating Plan name.
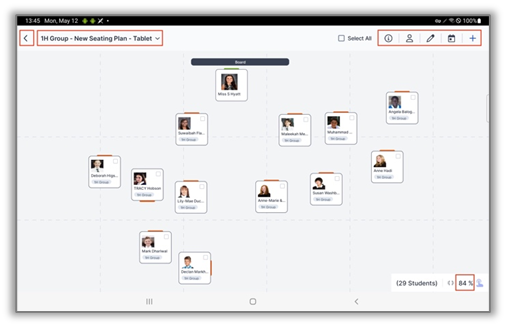
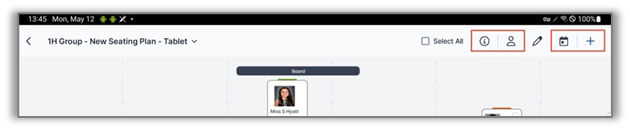
The top right Header (see the section on Seating Plan Header in this guide) icons allow you to:
- Display Student assessment information
- Randomly select a Student
- Change to Edit mode where you can:
- Allocate/remove a Student
- Add/remove a seat
- Amend Seating Plan settings
- Switch to another class
- Add a new Seating Plan
The screen will automatically adjust the zoom level indicated in the bottom right corner to best fit the number of seats displayed.
Click the top left Back arrow to return to the Seating Plan Module landing page.
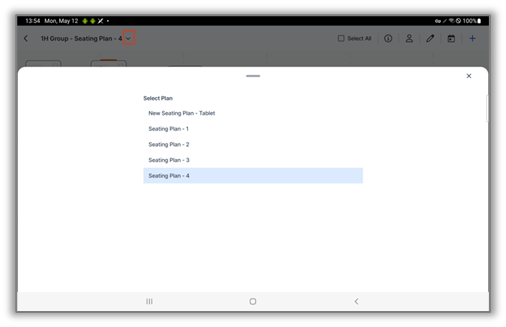
Click the arrow next to Plan to view and select a different seating plan from the list.
Seating Plan Header
In this section we will look at how to:
- Display Student assessment information
- Randomly select a Student
- Switch to another class
- Create a new Seating Plan
Display Student assessment information
Click the top right i icon in the Seating Plan Header to display Student Assessment information.
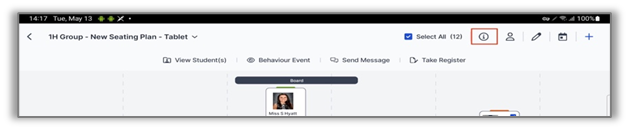
Assessment information will appear within each Student’s seat and will differ depending on the Seating Plan Assessment Settings. Hover over to view the Assessment criteria description.
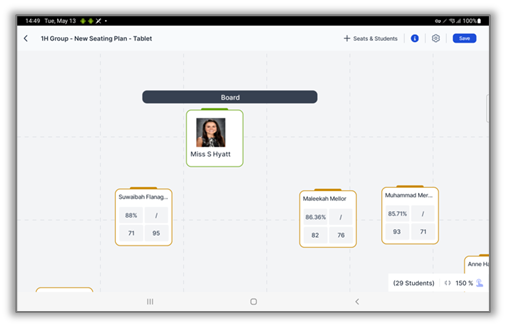
Note: Click the top right i icon again to hide the Assessment information.
Randomly select a Student
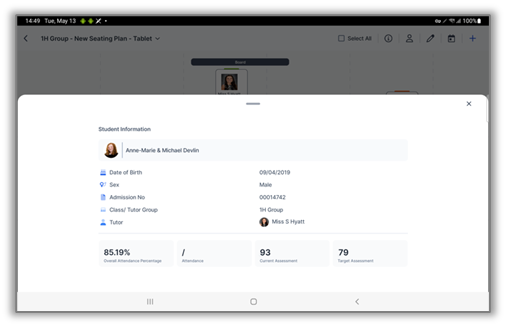
Click the top right Student icon in the Seating Plan Header to open the Student Information popup.
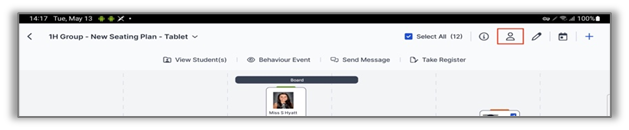
A Student will be randomly selected, and their information will be displayed on screen.
Switch to another class
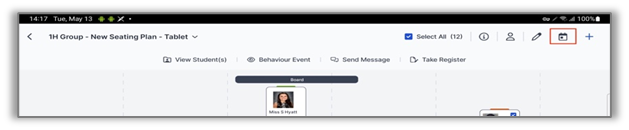
Click the top right calendar icon in the Seating Plan Header to open the Calendar popup.
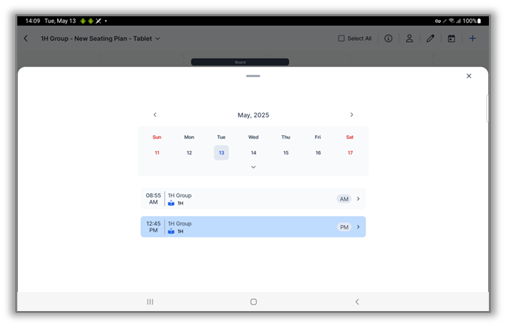
Select the required date and class from the calendar. The corresponding Seating Plan will open automatically.
Create a New Seating Plan
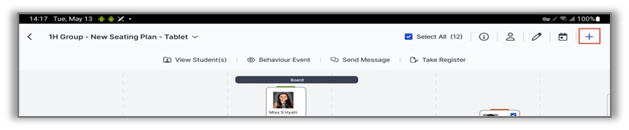
On the Seating Plan landing page, click the top right + icon to create a new Seating Plan.
You can build the elements of the Seating Plan using one of the following methods:
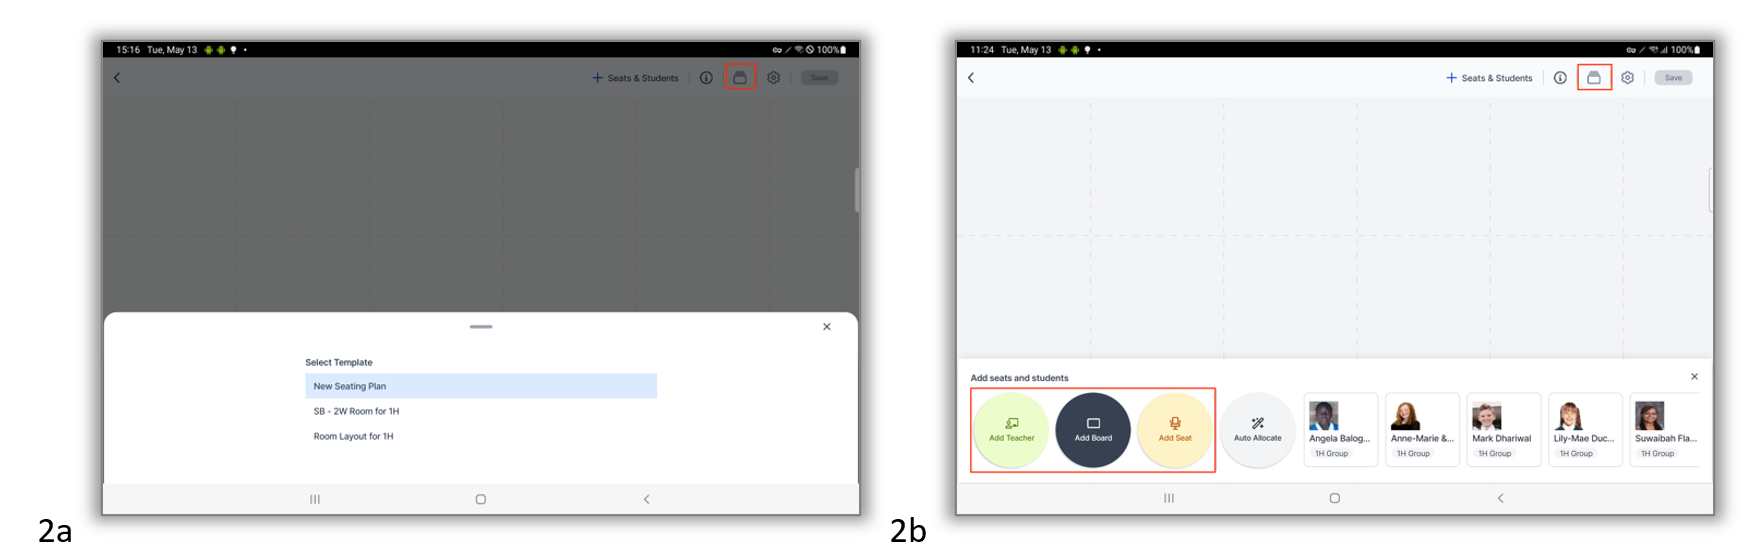
- Template: (2a example below) Click the Template icon and select a Room Layout template from the list.
- Manual: (2b example below) Drag and drop the following elements from the Add seats and students popup onto the Seating Plan.
- Add Board – only one Board is allowed
- Add Teacher – only one Teacher is allowed
- Add Seat
Seats are numbered automatically in the order they are added.
Seats can only be placed in available spaces. The screen will turn red if space is not available.
Assign Students to seats using one of the following methods:
Note: Tablet app users need to press and hold for half a second before you are able to drag items from the palette onto the actual plan.
- Manual: Drag a Student from the list at the bottom and drop them onto a seat.
- Auto Allocate: Click Auto Allocate to assign Students in alphabetical order.
- Auto Allocate will fill available seats.
- Extra Students will remain unassigned if there are not enough seats, or some seats will remain empty if there are fewer Students.
Note: Use the top corner icons to delete or rotate the Board, Teacher, or Seats.
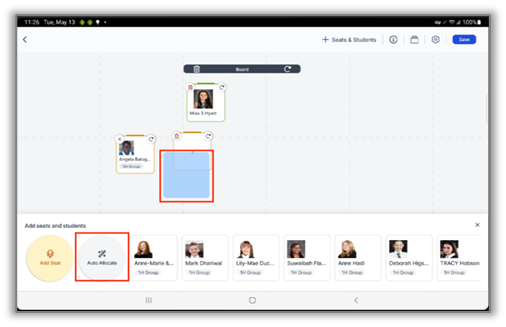
When finished, click Save. This will open the Seating Plan settings.
In Seating Plan settings:
Under the General tab (5a in example below):
- Enter a Seating Plan Name.
- Select the sessions you would like to copy this Seating Plan to.
Under the Assessment tab (5b in example below):
- Select the relevant Assessment Type (e.g. Current and Target Assessment, or Key Stage Assessment).
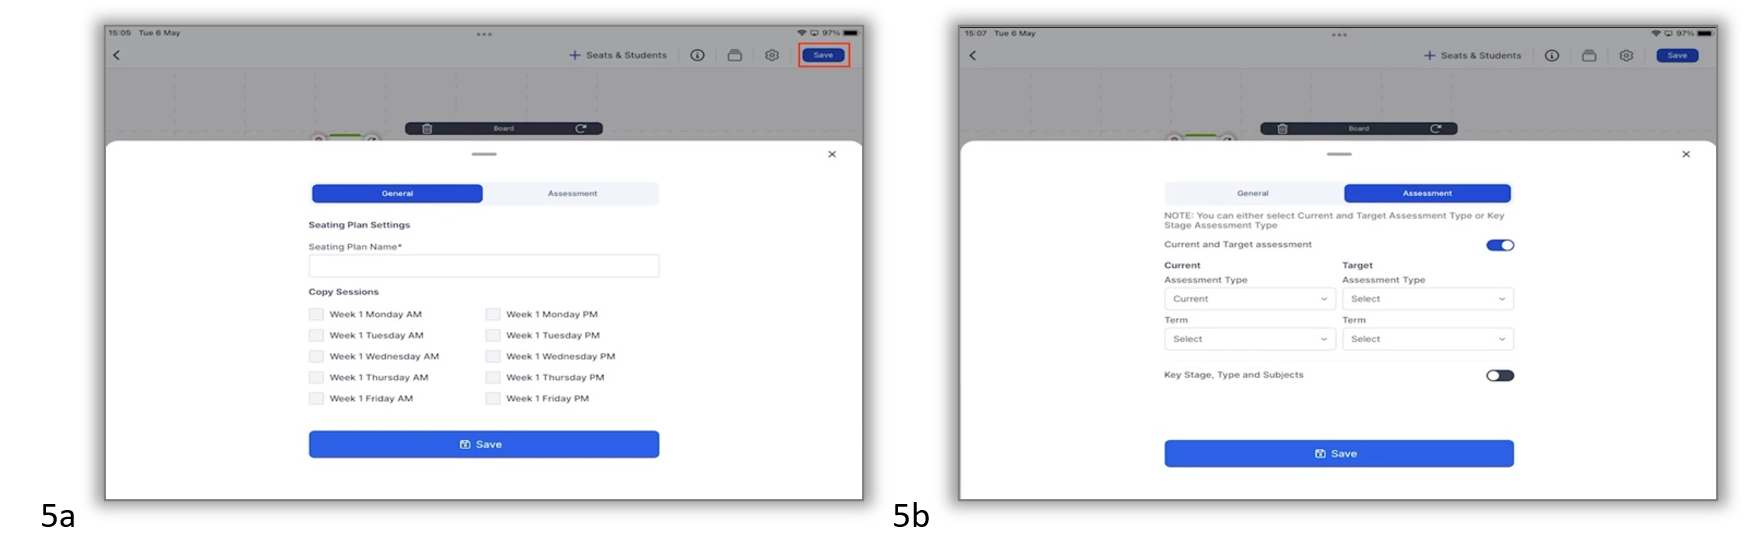
Click Save to confirm and apply your settings. A notification will let you know that the Seating Plan has been saved successfully.
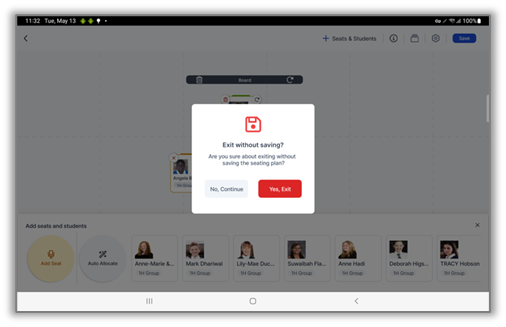
Note: If you try to leave the Seating Plan page without saving, you will see the following message:
‘Exit without saving? Are you sure you about exiting without saving the seating plan?’
Click ‘No, Continue’ to remain on the page, and remember to click Save to save your data before you exit.
Edit mode
The Seating Plan Edit mode can be accessed by clicking the Edit icon in the top right Seating Plan Header. In this section we will look at how to:
- Copy/edit a Seating Plan
- Add/allocate seats in the Seating Plan
- Remove a student/seat from the Seating Plan
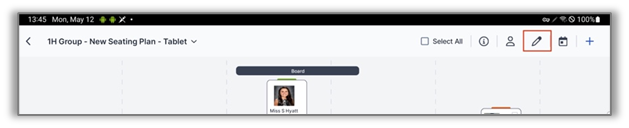
Copy/edit a Seating Plan
Click the top right settings icon to open the Seating Plan Settings popup.
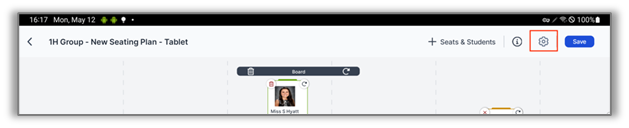
In Seating Plan Settings:
Under the General tab(example 2a below), you can;
- Rename the Seating Plan Name.
- Select the sessions you would like to copy this Seating Plan to.
- Delete the Seating Plan.
Under the Assessment tab (example 2b below), you can change the Assessment Type (e.g. Current and Target Assessment, or Key Stage Assessment).
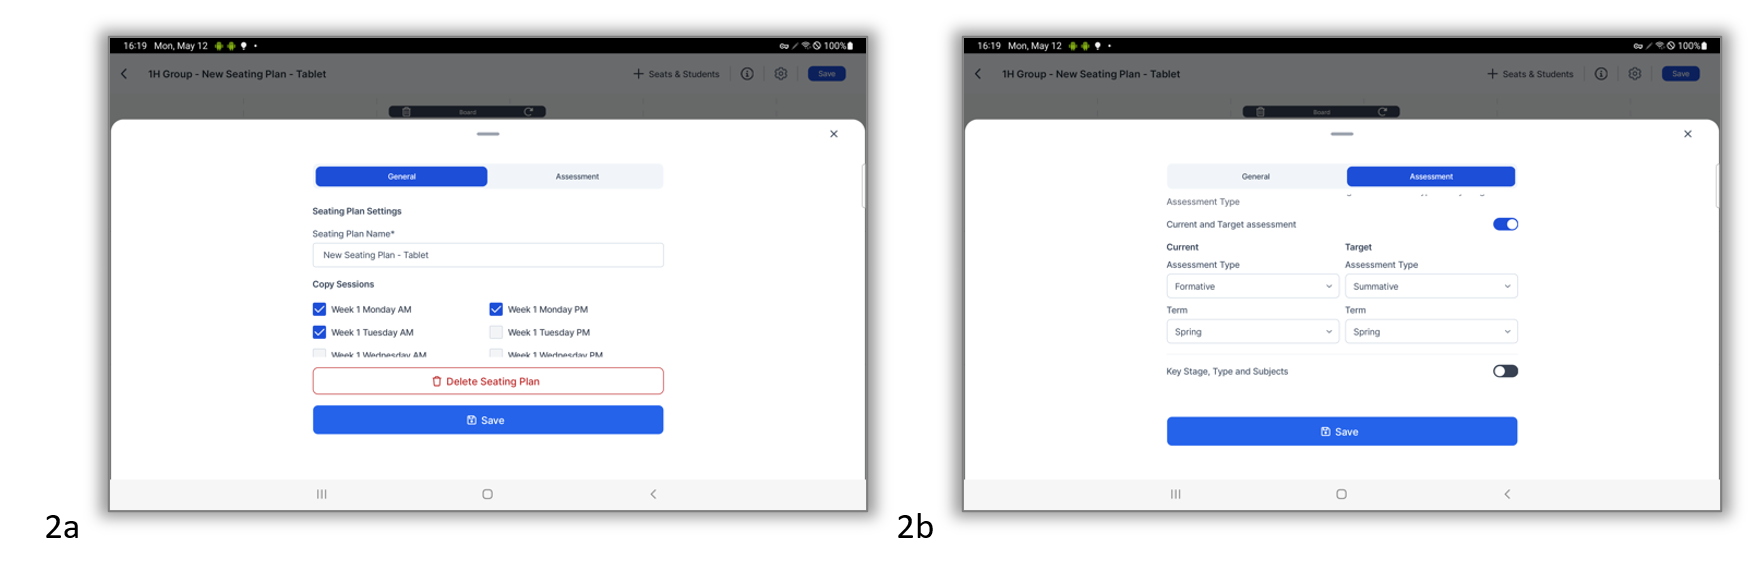
Click Save to confirm and apply your settings. A notification will let you know that the Seating Plan has been saved successfully.
Add/allocate seats in a Seating Plan
Click the top right + Seats & Students to open the Add seats and Students popup.
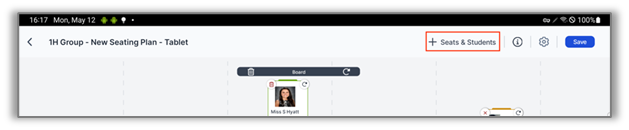
Click Add Seat (2 in the example below) to add a seat to the Seating Plan
- Seats are numbered automatically in the order they are added.
- Seats can only be placed in available spaces – if the space is too small, the screen will turn red.
Assign Students (3 in the example below) to seats using one of the following methods:
- Manual: Drag a Student from the list at the bottom of the screen and drop them onto a seat.
- AutoAllocate: Click Auto Allocate to assign Students in alphabetical order.
- Auto Allocate will fill available seats.
- Extra students will remain unassigned if there are not enough seats, or some seats will remain empty if there are fewer Students.
Note: Use the top corner icons to delete or rotate the Board, Teacher, or Seats.
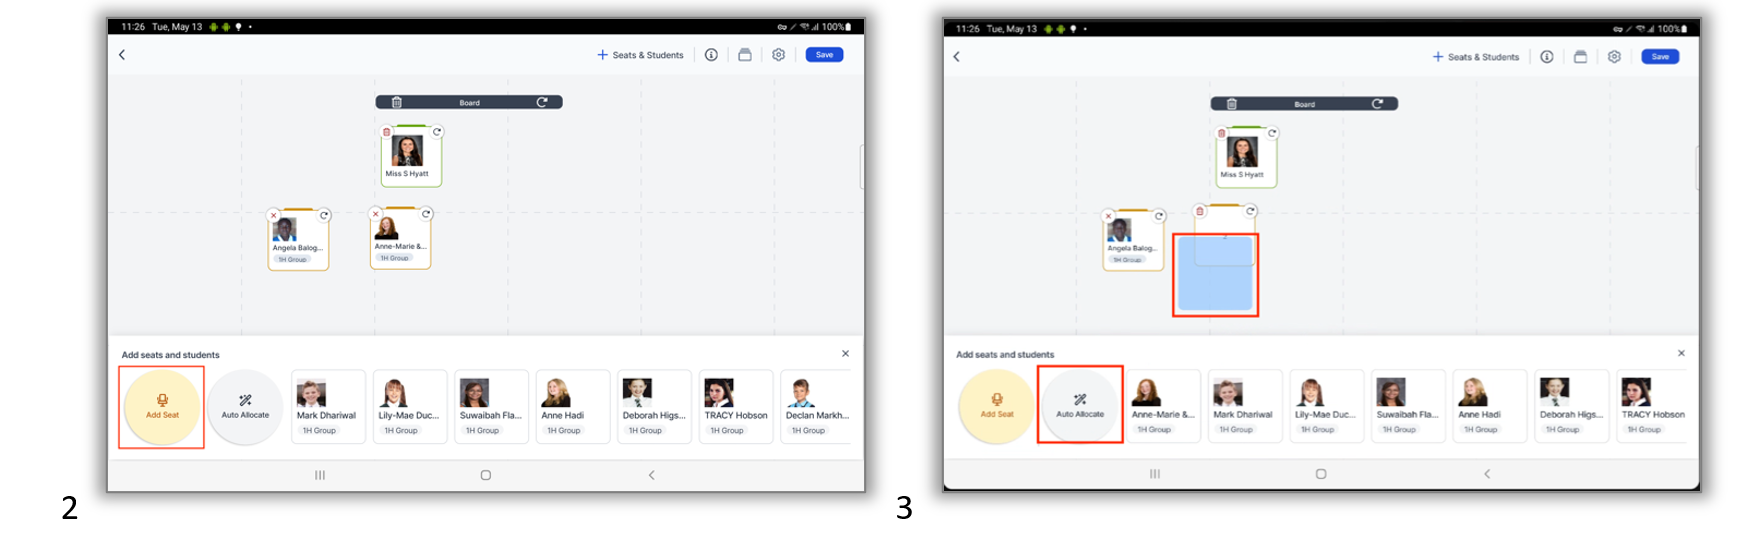
Click Save. A notification will let you know that the Seating Plan has been saved successfully.
Remove a Student/seat from a Seating Plan
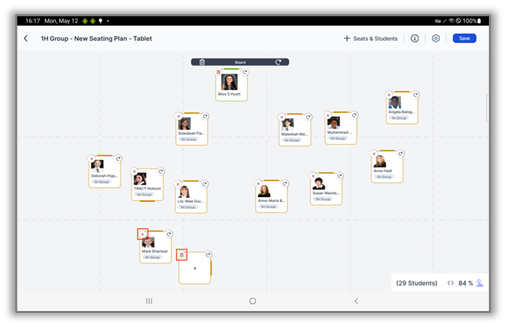
- To remove a Student from a seat, click the X on their allocated seat.
- To remove the seat entirely from the Seating Plan, click the bin icon.
- Click Save. A notification will let you know that the Seating Plan has been saved successfully.
Students
On the Seating Plan page, you can perform the following actions for selected Students:
- View Student details
- Create a behaviour event
- Send a message
- Take a register
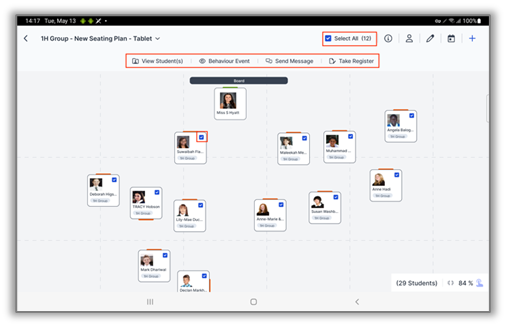
To use these features, select Students by ticking the box in the top-right corner of each Student’s seat.
To select all Students at once, click Select All in the header.
The number of selected Students will be shown in brackets.
View Student details
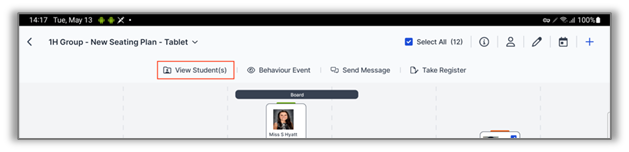
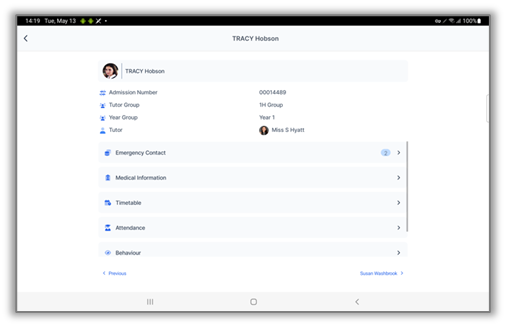
Click View Student(s) to open the details for the first selected Student.
To navigate between Students:
- Click the next Student’s name in the bottom-right corner to move forward.
- Click Previous to go back.
- Click the back arrow to return to the Seating Plan.
Create a Behaviour event
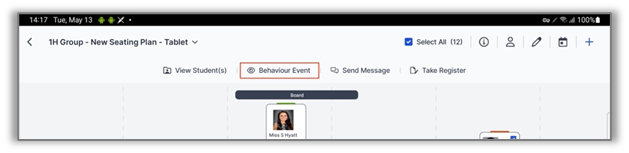
Click Behaviour Event to open the Behaviour Event screen for the selected Students.
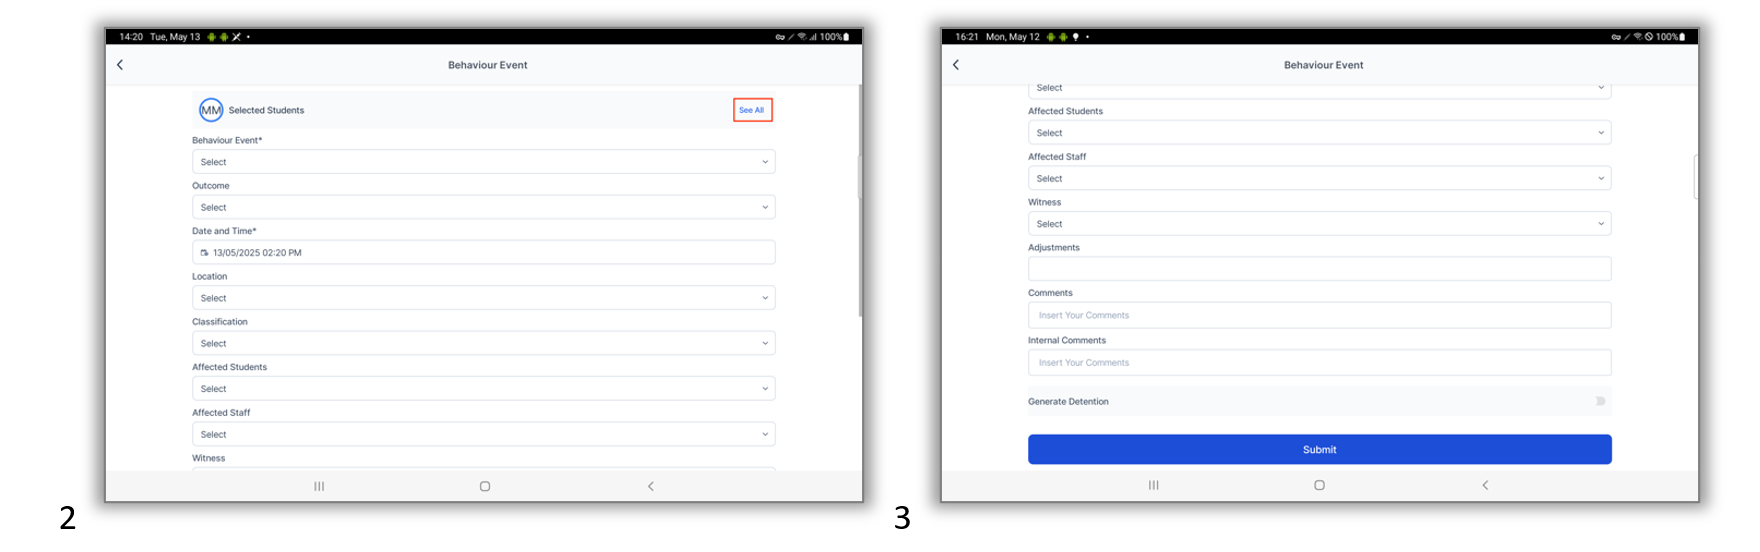
- You can click See All (2 in the example below) to view the full list of selected Students.
- Click the X to close the list.
- Complete the Behaviour Event (3 in the example below) form, where you also have the option to generate a detention.
- When finished, click Submit to save the event.
Send a message to a Student(s)
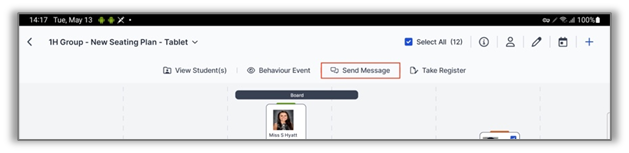
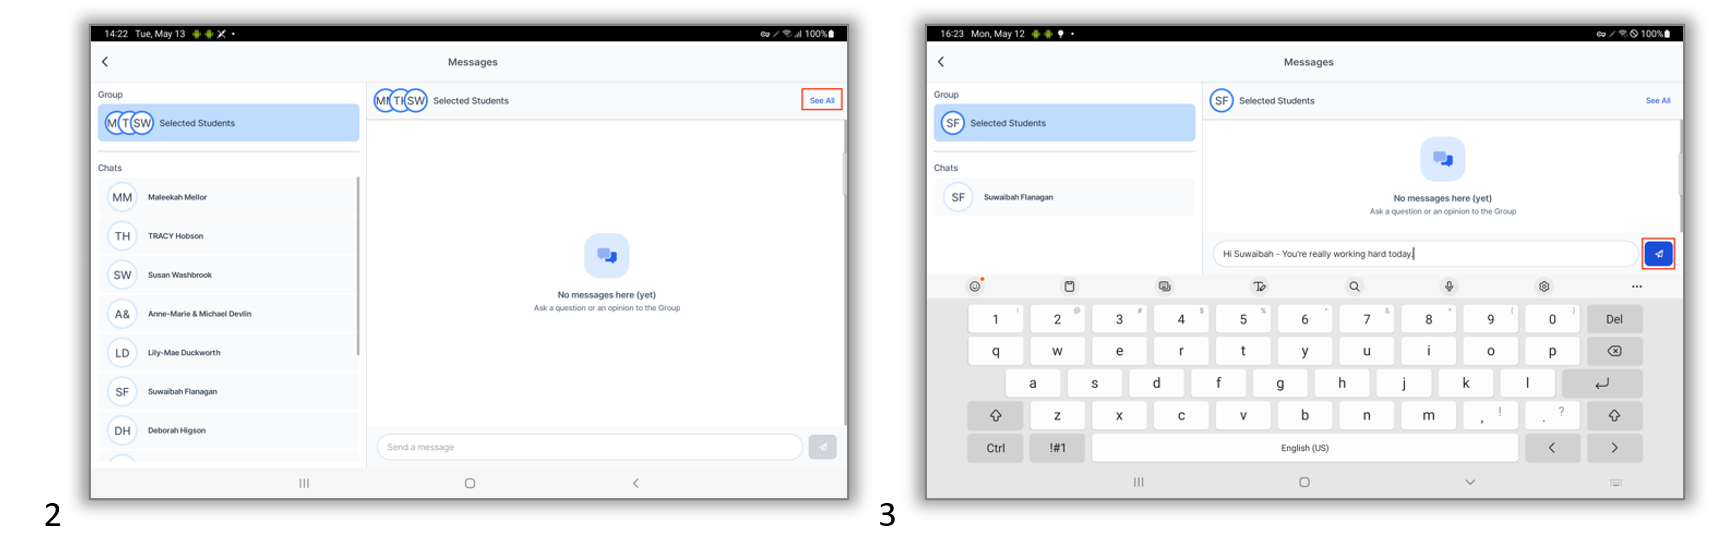
Click Send Message to open the Messages screen for the selected Students.
- You can click See All (2 in the example below) to view the full list of selected Students. Click the X to close the list.
- Complete the Messages (3 in the example below) form.
- When finished, click the Send icon to send the message.
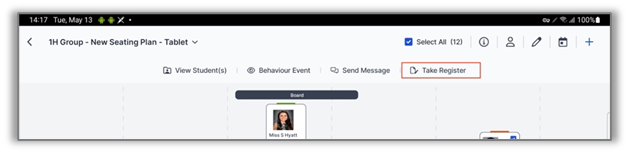
Take a Register
Click Take Register to open the Take Register screen for the selected students.
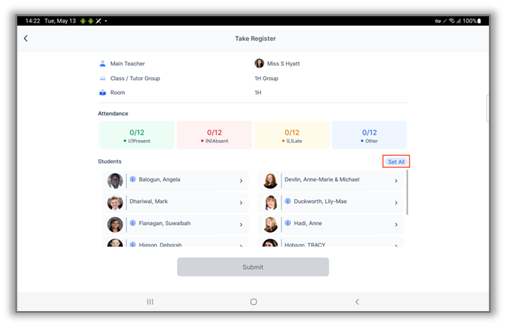
Select a Student to begin recording attendance individually, or click Set All to mark attendance for all Students at once.
Choose the appropriate attendance mark for the Student(s). If marking individually, click Next to proceed to the next Student.
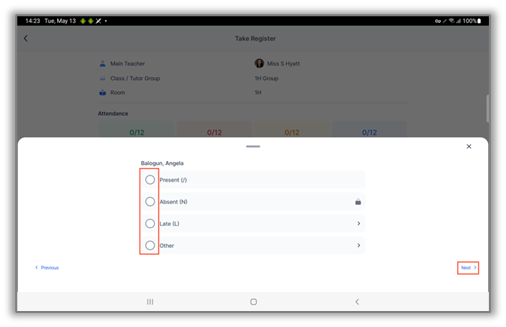
Note: If a Student is marked as Late, you must enter the required Late Minutes before clicking Confirm.
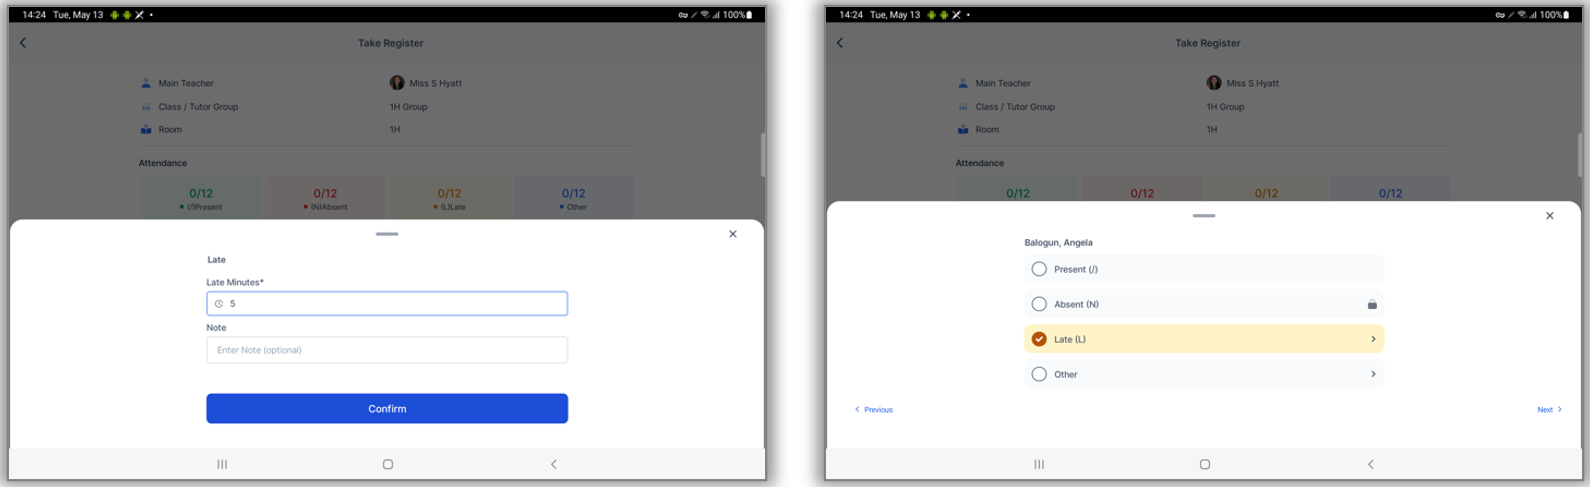
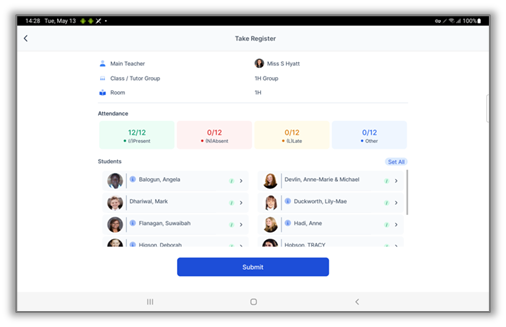
Once attendance has been recorded for all Students, the Submit button will become active.
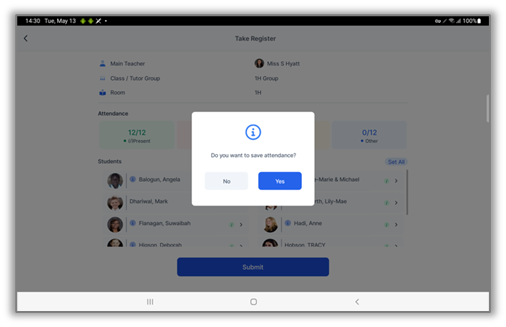
Click Submit to save the attendance and return to the Seating Plan screen.
IMPORTANT: If you exit the Take Register screen without submitting, all recorded attendance will be lost. There is no option to save progress
November 2025 Enhancements
The new Seating Plan interface has been further enhanced to provide a faster, more intuitive and consistent experience when creating and editing classroom layouts on the tablet app.
The Furniture Library now includes resizable tables in various shapes. Dragging the bottom or right edge of any new square or round table will expand or shrink the table, increasing or decreasing the number of seats.
- Square tables remain as single seats (as in the previous interface) unless expanded.
- Square tables can be expanded to a maximum of five seats in a row or side. with a maximum square size of five seats by five seats.
- Round tables can have between three and six seats.
- Hexagon tables cannot be resized.
- You can remove a student from a table by tapping the X icon in the top left of the tile.
- Tap the rotate icon to change the direction a seat faces.
- You can delete a table by tapping the bin icon in the top left of the tile.
- Users can now add a Door to the layout.