You can use Support Allocation to timetable specific Staff Members to support specific Students one to one. In this guide we’ll look at how to do this.
Access: The minimum permissions required to access Support Allocation can be found in the Framework module from within Config > Setup > Roles & Permissions.

See Also: How to Block Out Staff Timetable Periods and How to Run the Timetable Report for Staff
Support Allocation
To allocate Support time, select Staff from the left hand menu.

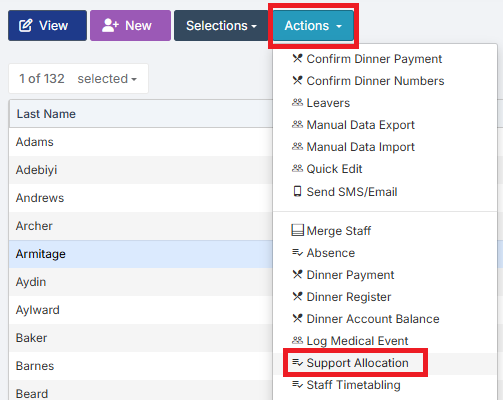
Select the Staff Member that you would like to allocate Support Time to by clicking on them once so they are highlighted blue, then select Actions > Support Allocation.
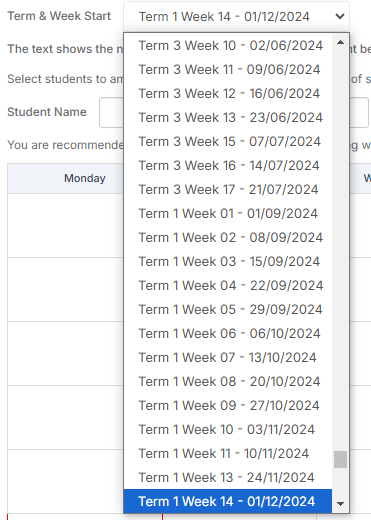
First, use the Term & Week Start drop down to select the week you would like to view the timetable for.
Note: Any changes made will apply from the Date that you select here.
Next, start typing the Name of the Student you would like to allocate Support Time to in the Student Name box and select them from the dropdown. Alternatively, you can click on the blue magnifying glass to open the Student Selector.

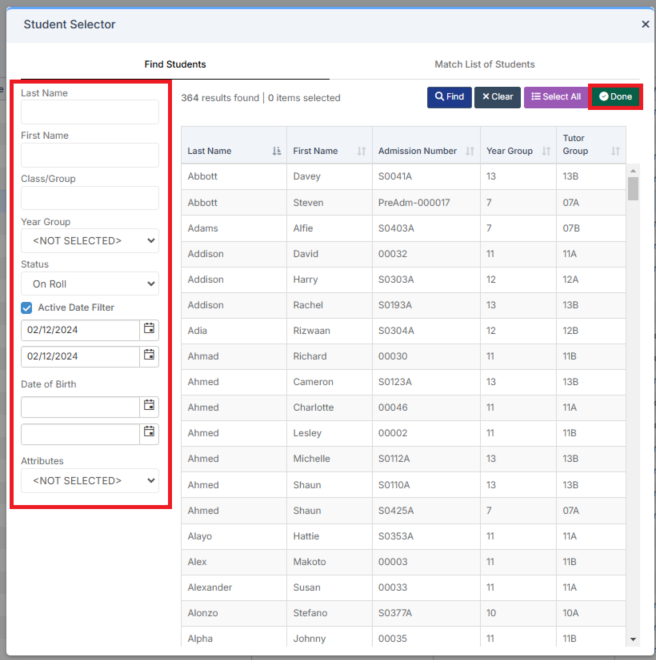
In the Student Selector, use the filters on the left to refine your search, if you update any of the filters click Find to update the list. Then select the Student(s) by clicking on them once to highlight them blue, then click Done in the top right hand corner.
This will display the selected Students Timetable,
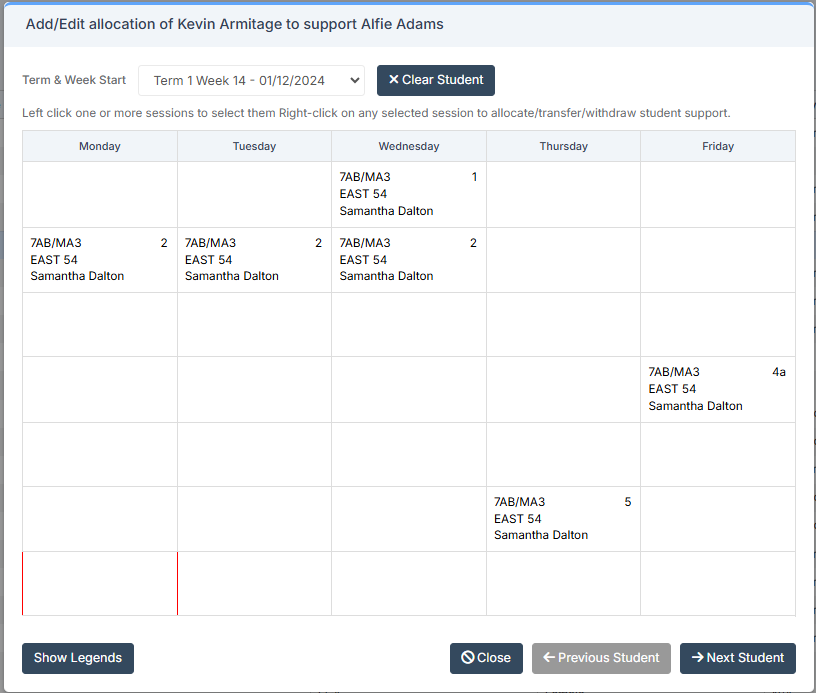
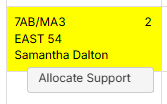
To Allocate Support to the Student right click on the Session you would like to Allocate it to and select Allocate Support.
Note: This will not work on Free Periods, the Student must be assigned to a Teaching Class in order to allocate Support.
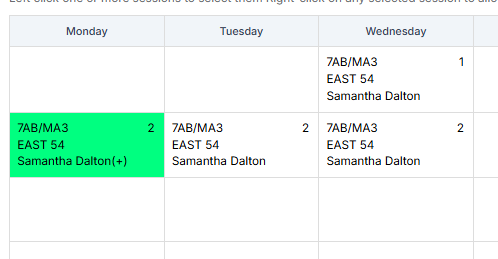
The session you have allocated Support to will turn green.
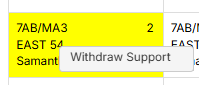
If you would like to Withdraw Support that has previously been allocated, right click on the session that you have Allocated Support to and select Withdraw Support.
If you have selected more than one Student you can move between them using the Next Student and Previous Student buttons at the bottom of the pop up.

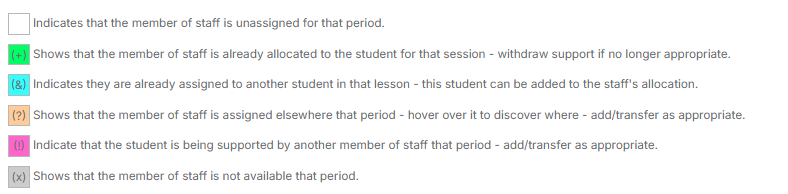
Periods may display in different colours depending on the Support Allocation and Timetable of the Staff Member or Student. To see what each of the different colours means click on Show Legends at the bottom of the pop up.
See below the meanings of the different colours.
Once you’ve finished Allocating Support for the selected Staff Member, click Close.
Reports
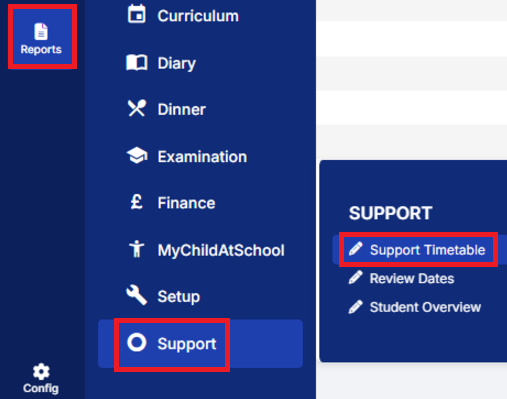
You can print Support Timetables by going to Reports > Support > Support Timetable.
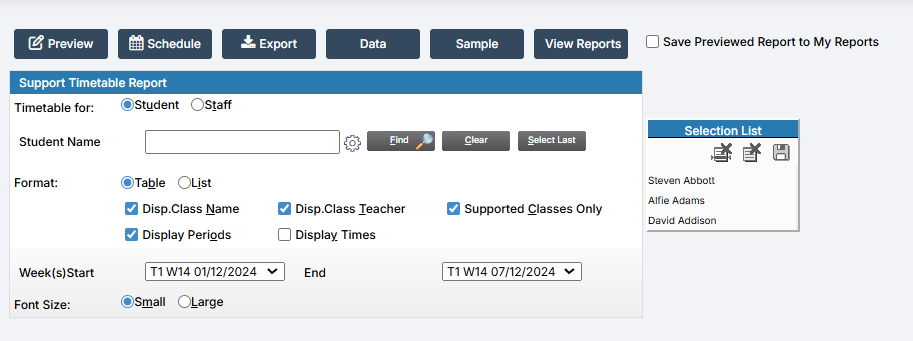
First select whether you would like to see Support Timetables for Students or Staff using the radio buttons.
Then you can either use the Name box to search for the Students or Staff Members you would like to print timetables for, or click Find to use the Student or Staff Selector. Use the Format tick boxes to configure what you would like displayed in the Report, then use the Week Start and End drop downs to select the time period you would like to see the Support Timetable for. Finally, use the radio buttons to select the Font Size. Once you’re happy click Preview.
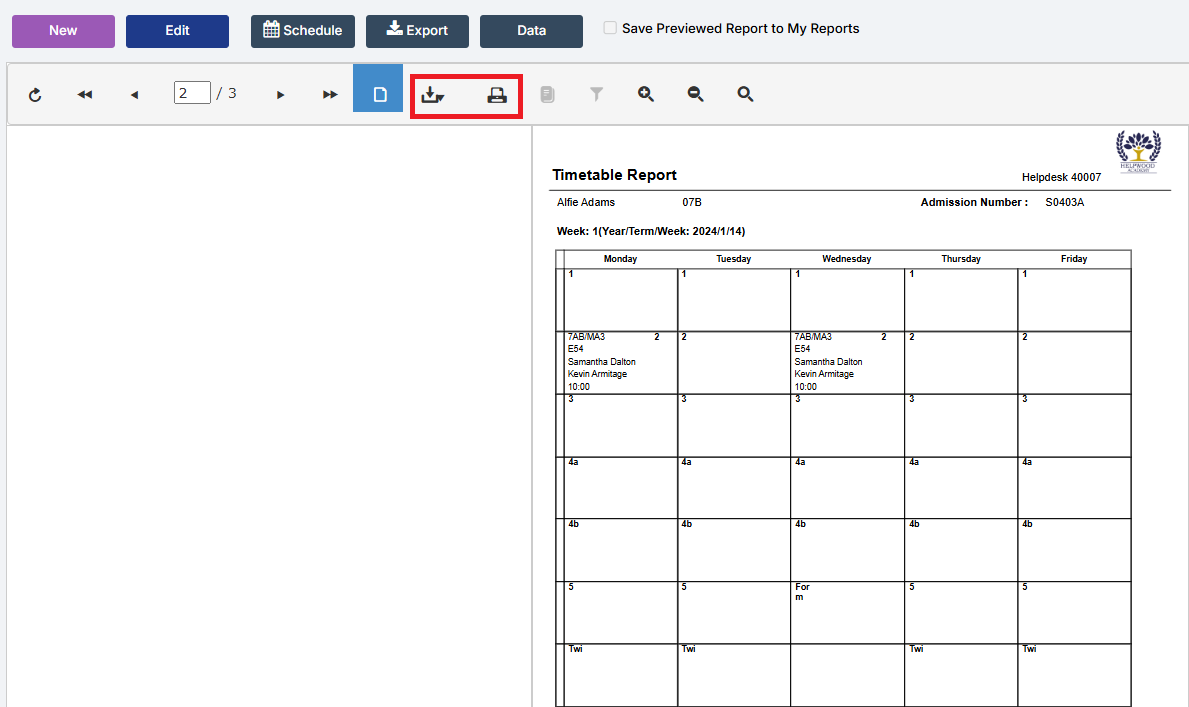
This will display the Support Timetable for the selected Student or Staff Member. You can use the Export and Print buttons across the top to Save a copy.