This guide covers the following dashboard functions:
- Export to PDF
- Settings
- Charts
- Year Group Bar Chart
- Absence Chart
- Group Bar Chart
- Timeline Chart
- Student Lists
- Quick Profile
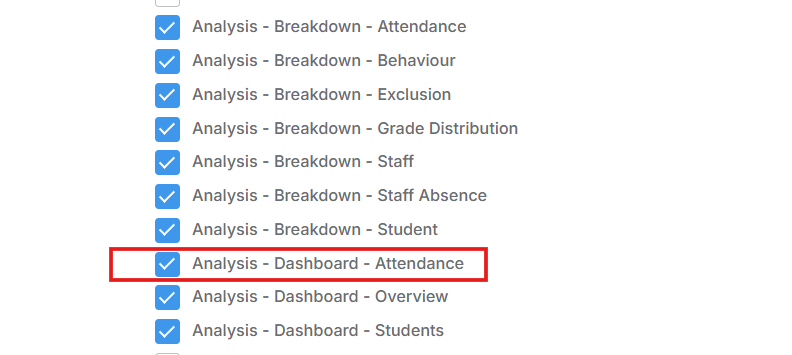
Access: to set the permissions for the Attendance Dashboard in Vision go to Admin>Roles, choose the Role and click Edit then tick Analysis>Dashboard>Attendance. Click Save. For further guidance on roles and permissions within Vision see here.
For further analysis see How to View Attendance figures in Vision/Power BI
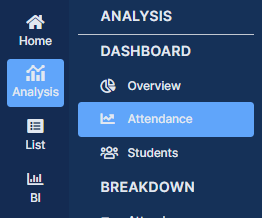
In Vision and from the left Menu navigate to Analysis > Dashboard > Attendance.
Export to PDF
Click the top-right Export to PDF for an Export for the whole dashboard and all charts.

Exported PDFs feature text to help put attendance into context, for example informing the school that attendance for a certain group is stable, improving or declining.
Settings
Click the top-right Settings drop down

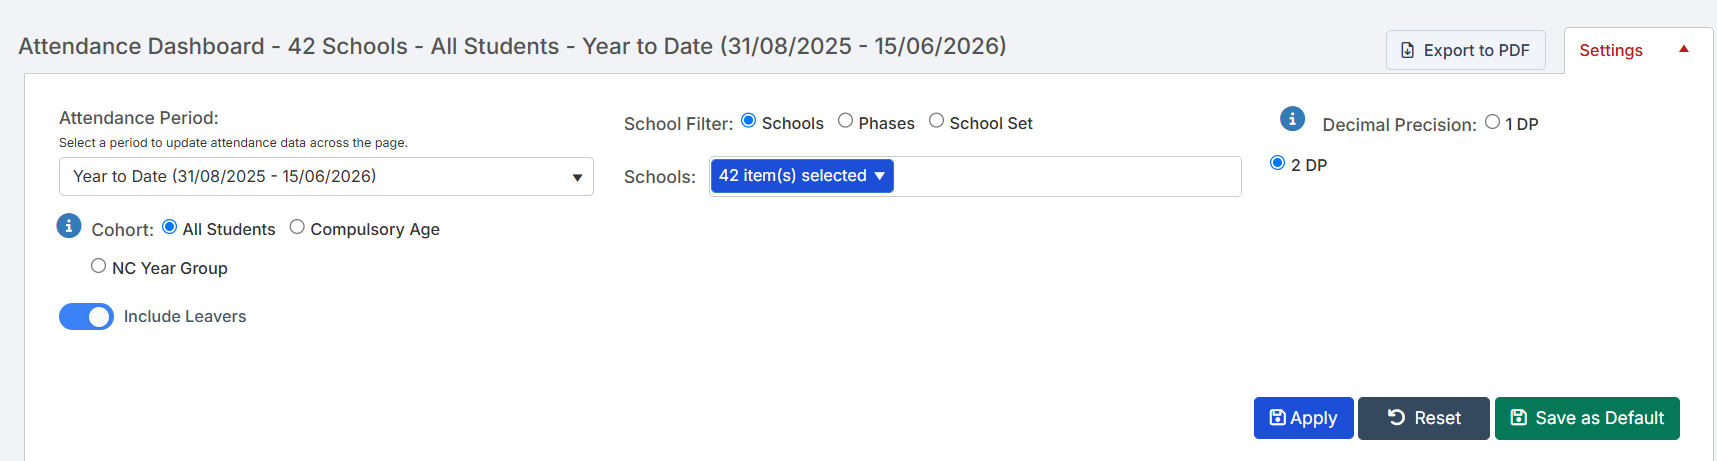
In the Settings panel the Attendance Dashboard can be configured as below
- *Attendance Period : select a period from the dropdown choices
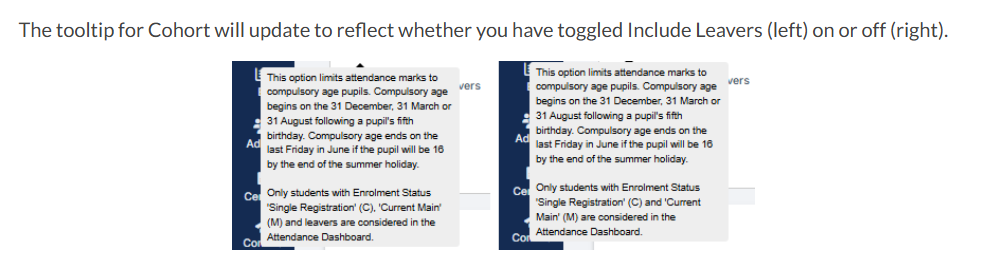
- Cohort : choose from All Students, Compulsory Age or NC Year Group ( with the option to choose the Year Groups) click the blue i for more information on Cohort
- *Include Leavers : choose to Include Leavers (default) or to not include them. If choosing to toggle off the Include Leavers button and want to carry this forward click Save as Default.
- School Filter: choose from Schools, Phases or School Set with the option to click to choose Schools.
- Decimal Precision : choose from 1 or 2 DP ( Decimal Places)
For *Attendance Period select from:
- Year to Date
- Previous Year
- 2 Years Ago
- Autumn Term (current academic year)
- Spring Term (current academic year)
- Summer Term (current academic year)
- If a selected term has an end date in the future, the dashboard will still display data only up to the previous school day.
- Term dates are based on government guidance: DfE (England and Wales): Pupil absence statistics
*Include Leavers
Once the required Settings have been chosen choose Apply, if needed click Save as Default.
Charts
There are four Charts, a Year Group Chart an Absence Chart, a Groups Chart and a Timeline Chart, each with different views and the option to drilldown into the information, the results are dependent on the options selected in Settings.
Year Group Bar Chart
The Year Group Bar Chart top left has six options Attendance, Absence, Persistent Absence, Authorised, Unauthorised and Lates. These are selected from the dropdown list top right.
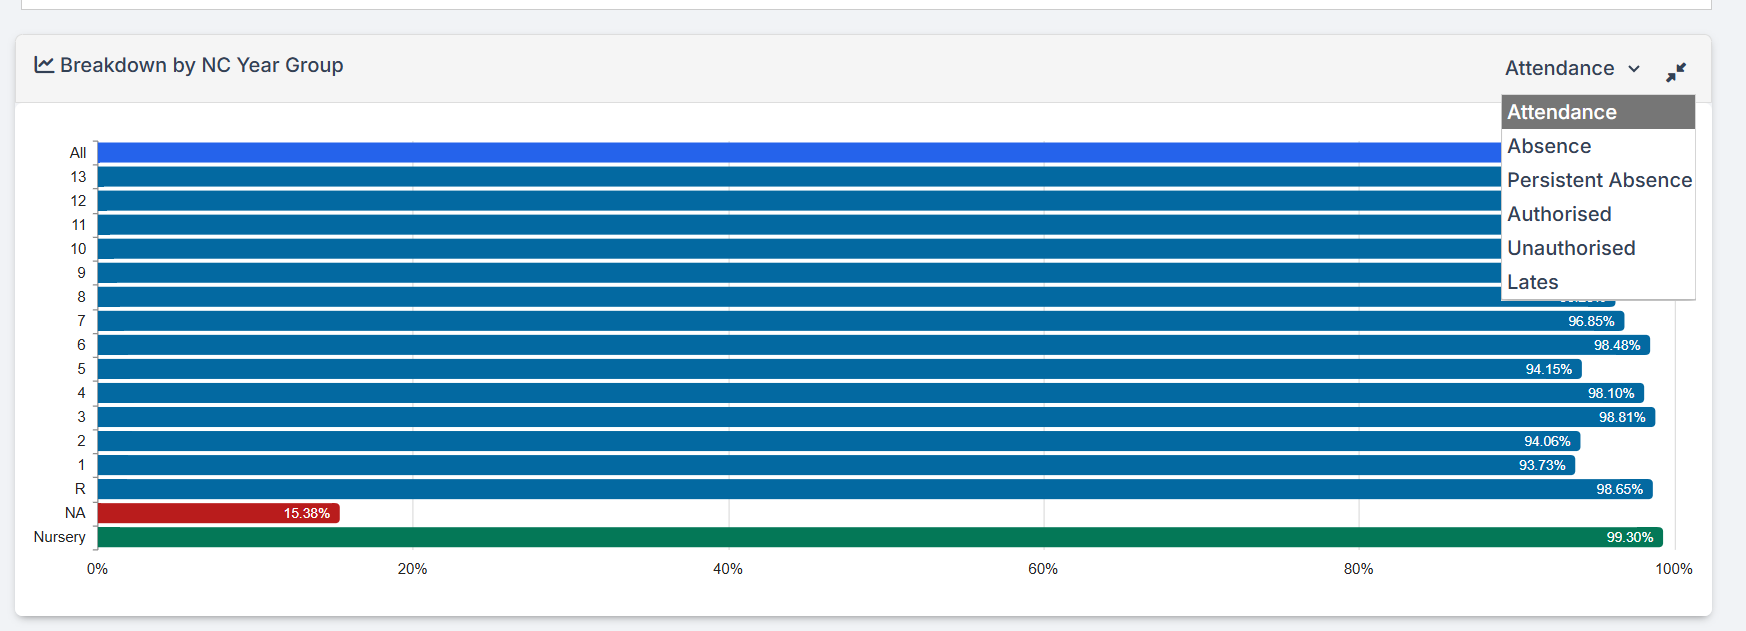
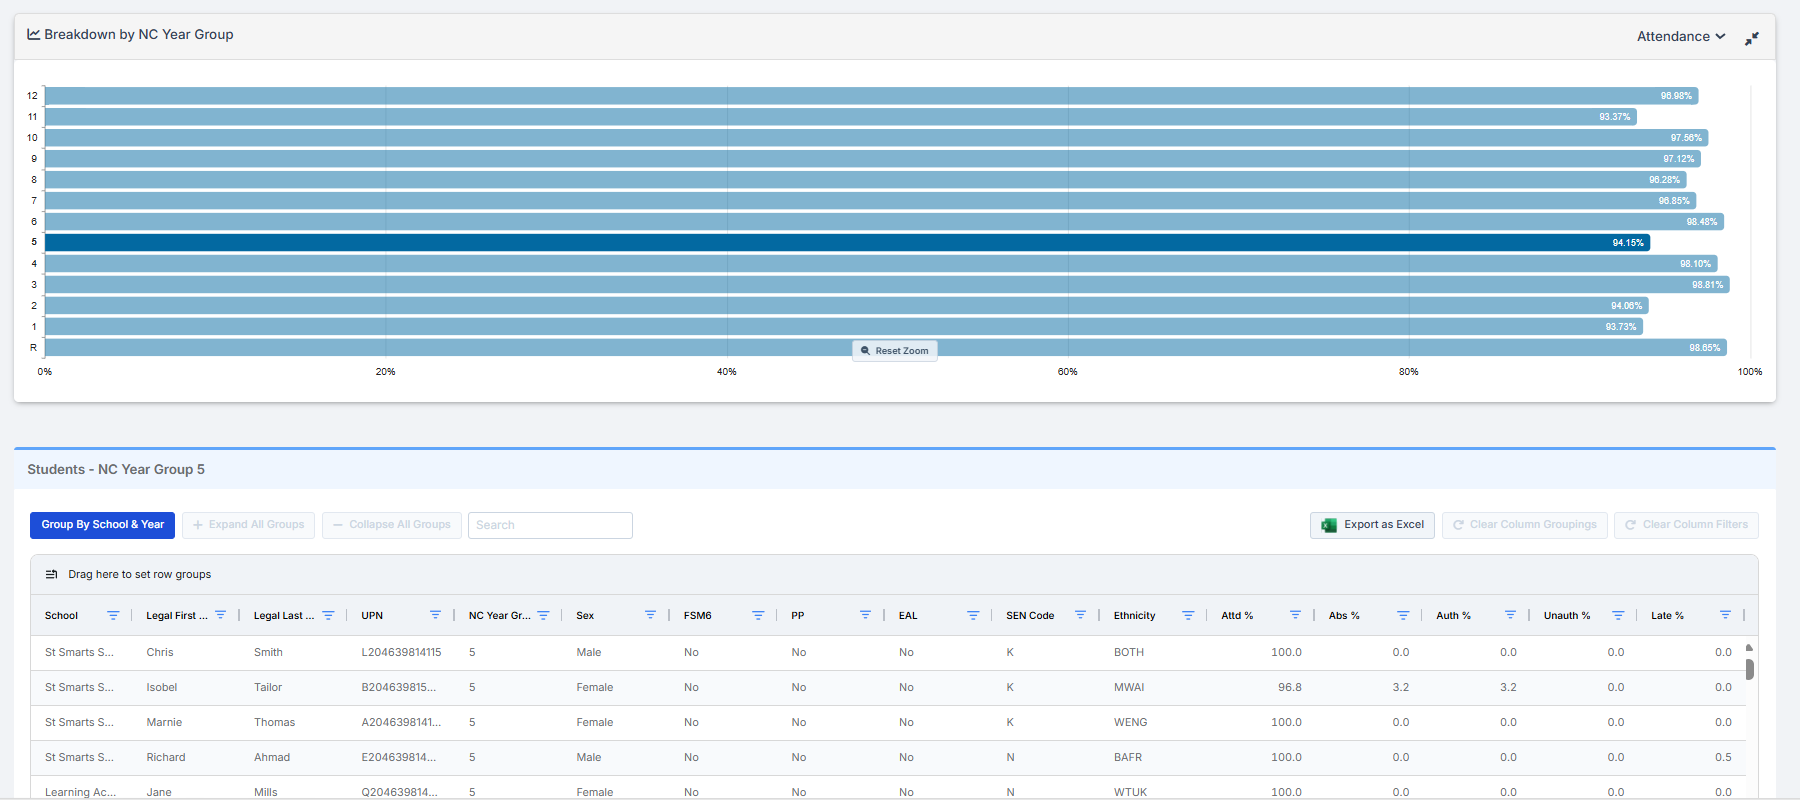
Clicking on a section of the Chart will highlight that section, maximise the Chart and display a grid below with the information from the selected section.
Absence Chart
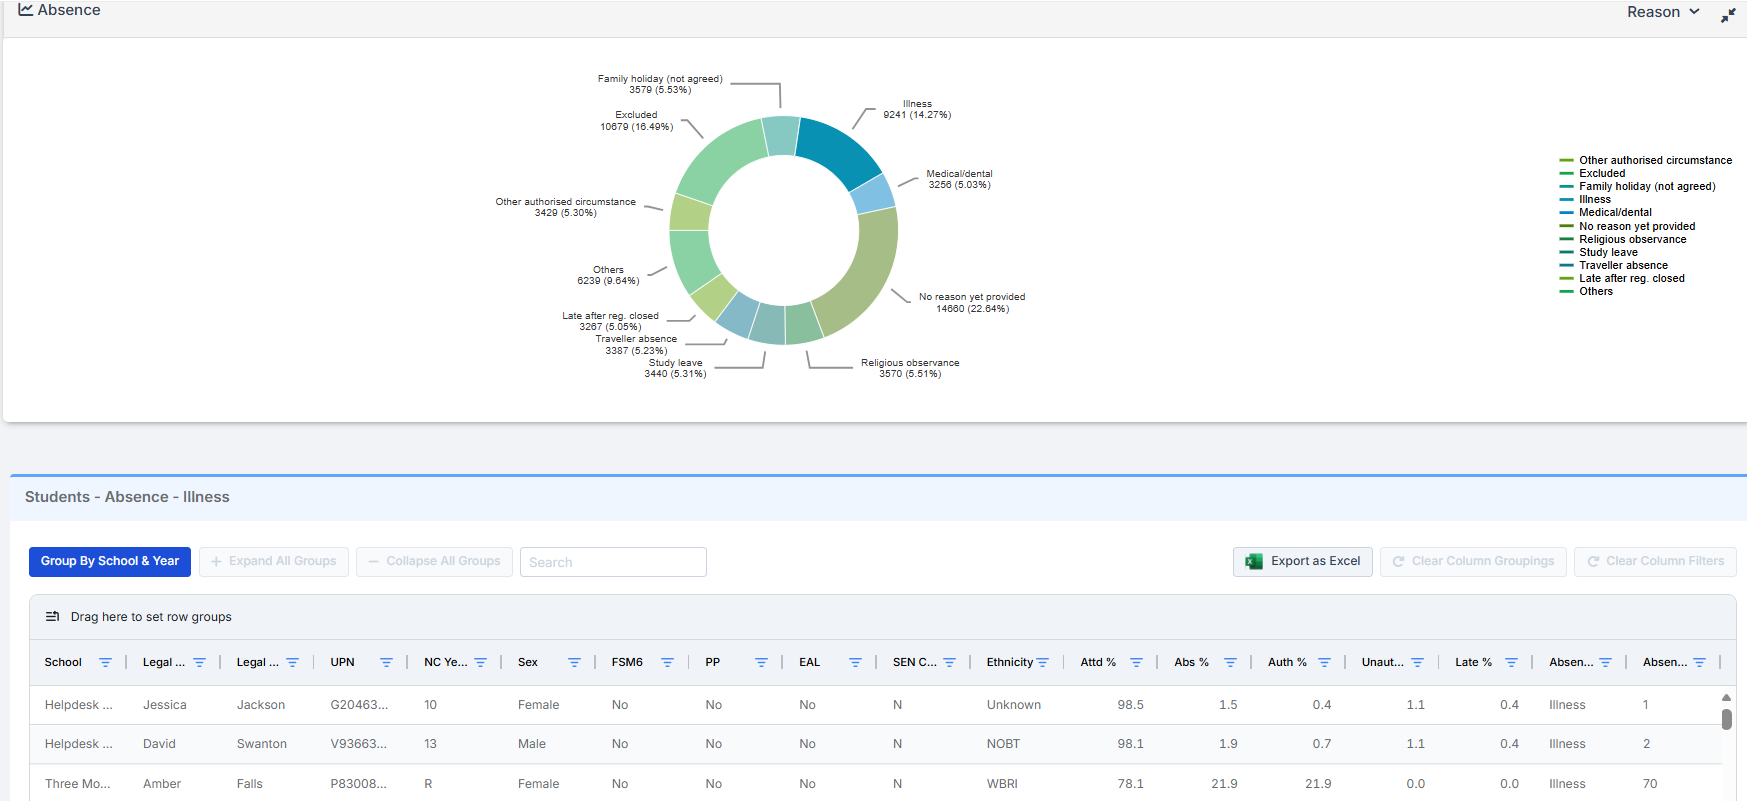
The Absence Chart top right has two options Reason and Day of the Week. These are selected from the dropdown list top right.
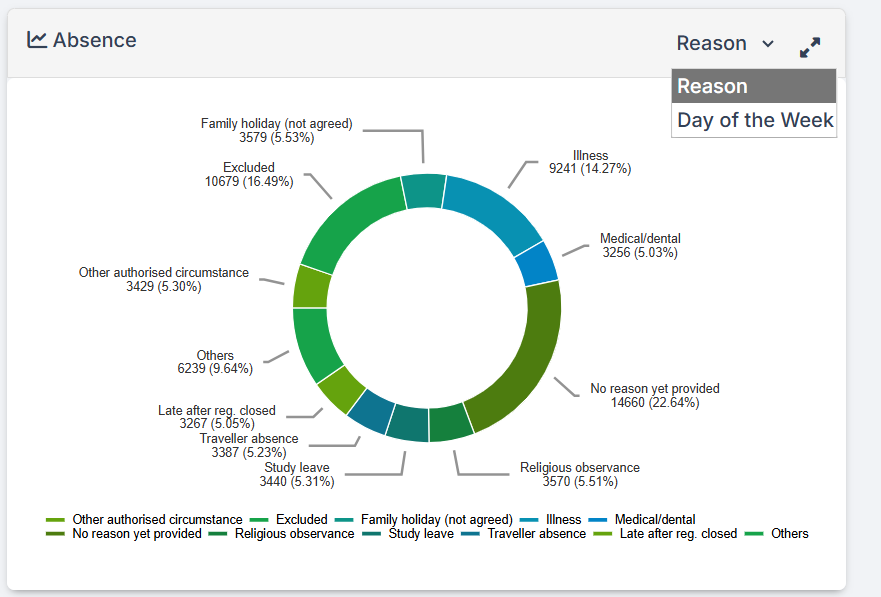
Move the mouse over a section of the Chart to see the details. Clicking on a section of the Chart will highlight that section, maximise the Chart and display a grid below with the information from the selected section.
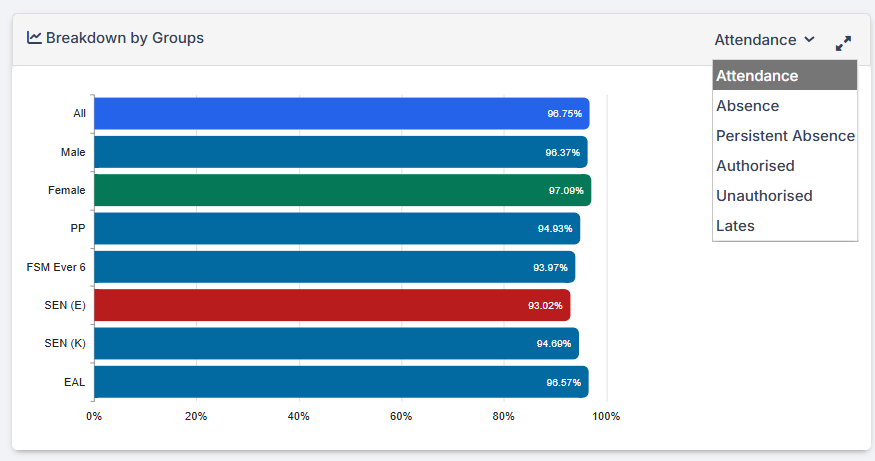
Group Bar Chart
The Group Bar Chart bottom left has six options Attendance, Absence, Persistent Absence, Authorised, Unauthorised and Lates. These are selected from the dropdown list top right.
Timeline Chart
The Timeline Chart bottom right has five options Attendance, Absence, Authorised, Unauthorised and Lates. These are selected from the dropdown list top right.
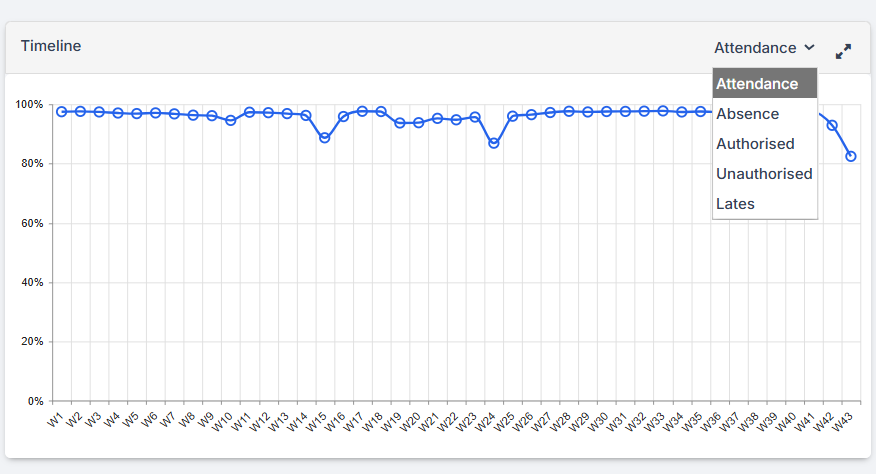
Moving the mouse pointer over the Chart will display details for the selected week.
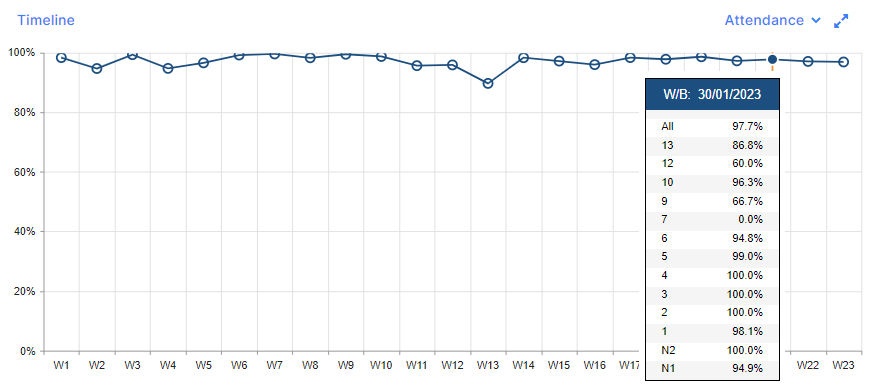
Clicking on a specific point will highlight that point red and display the Student information below.
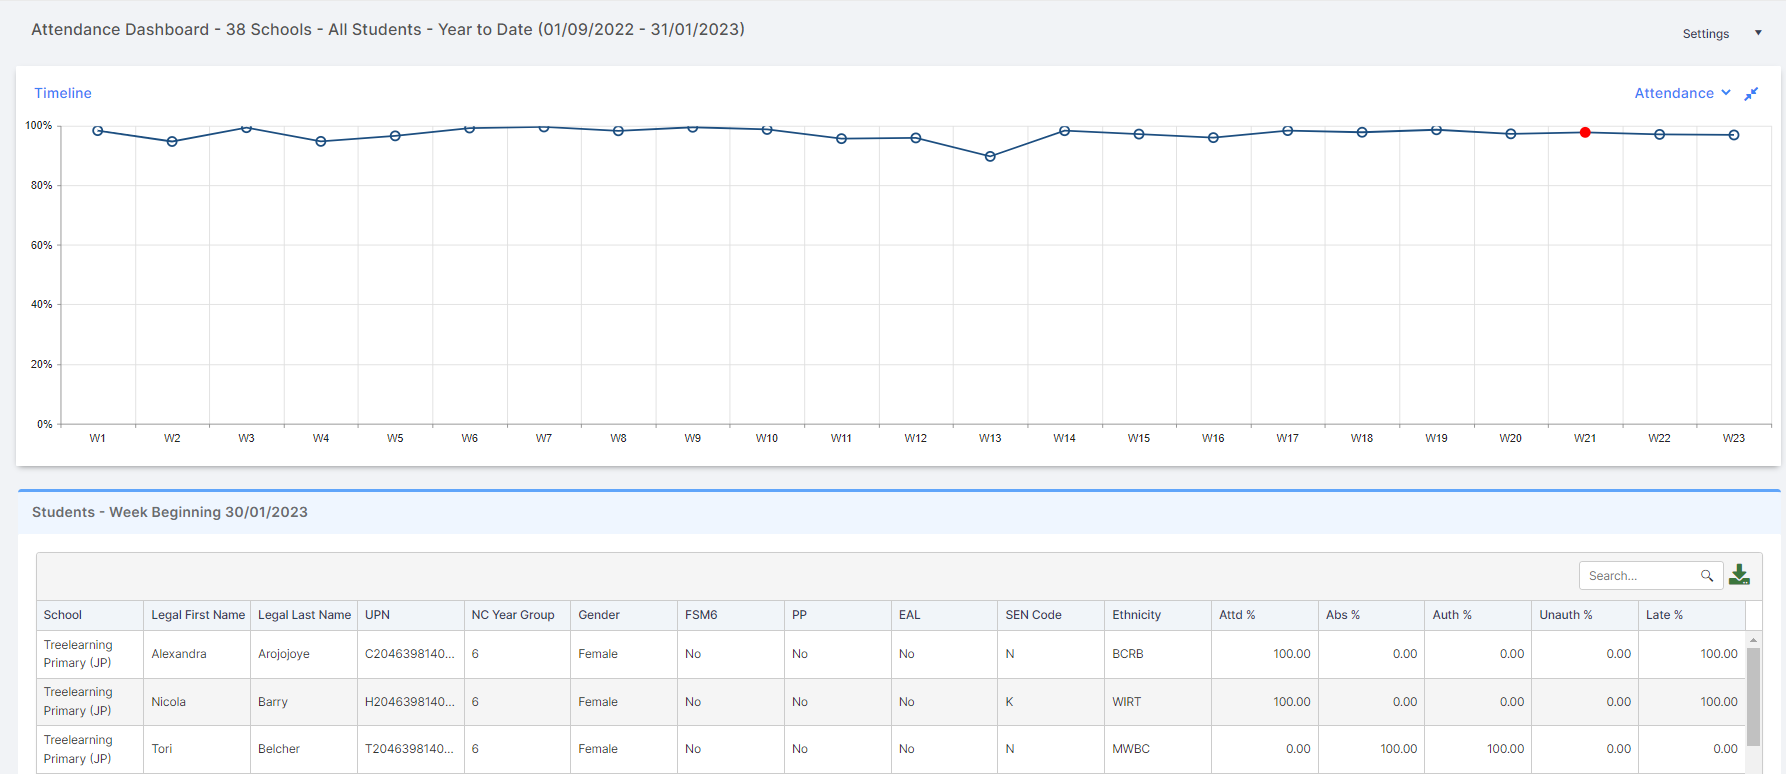
Note: The details displayed in all of the drilldown grids is dependent on the User Role.
Student Lists
Student Lists can be used to view Student data with column functions to Sort, Filter, Widen and Move columns, there is also the function to Group data by the columns in the List.
After clicking on a section in the Charts the corresponding Student List will appear. The columns in the Student List view vary dependant on the chosen chart.
In the example below we have chosen Breakdown by NC Year Group>Absence to show NC Year Group 11 has the highest Absence
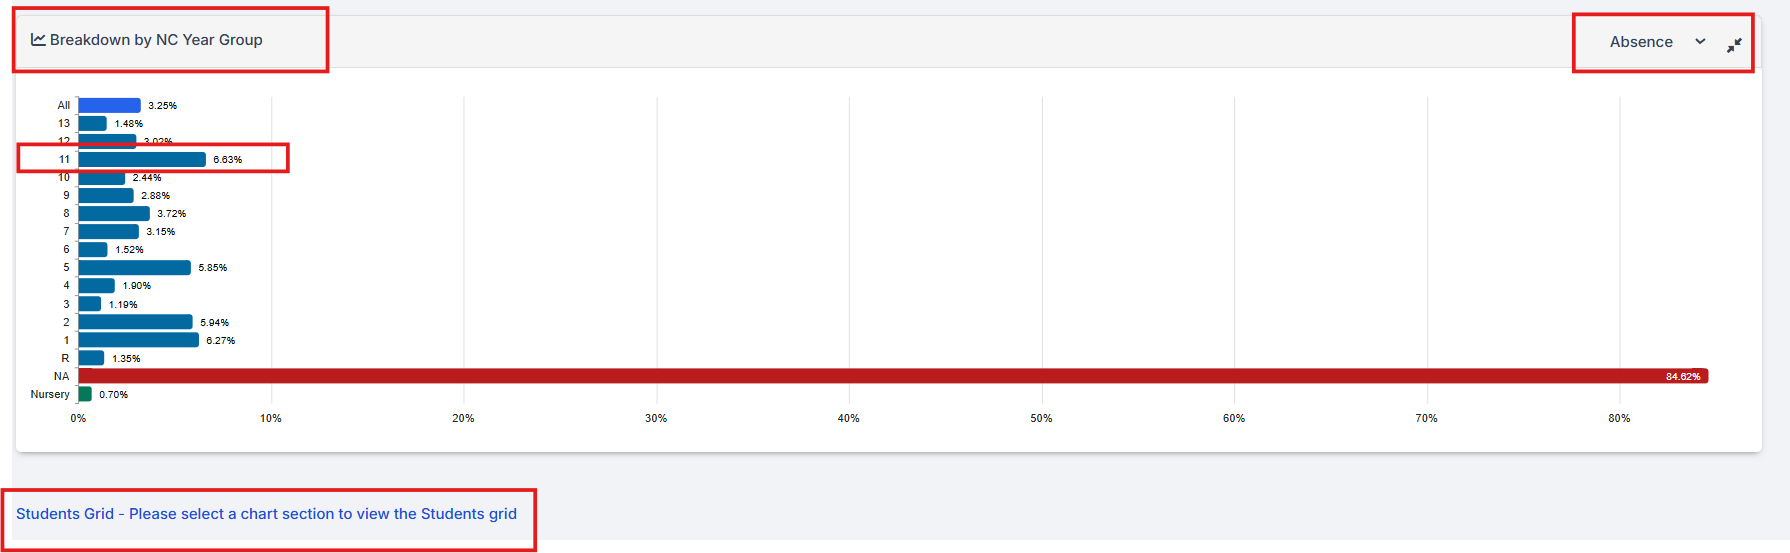
Click on the 11 bar to open the Student List
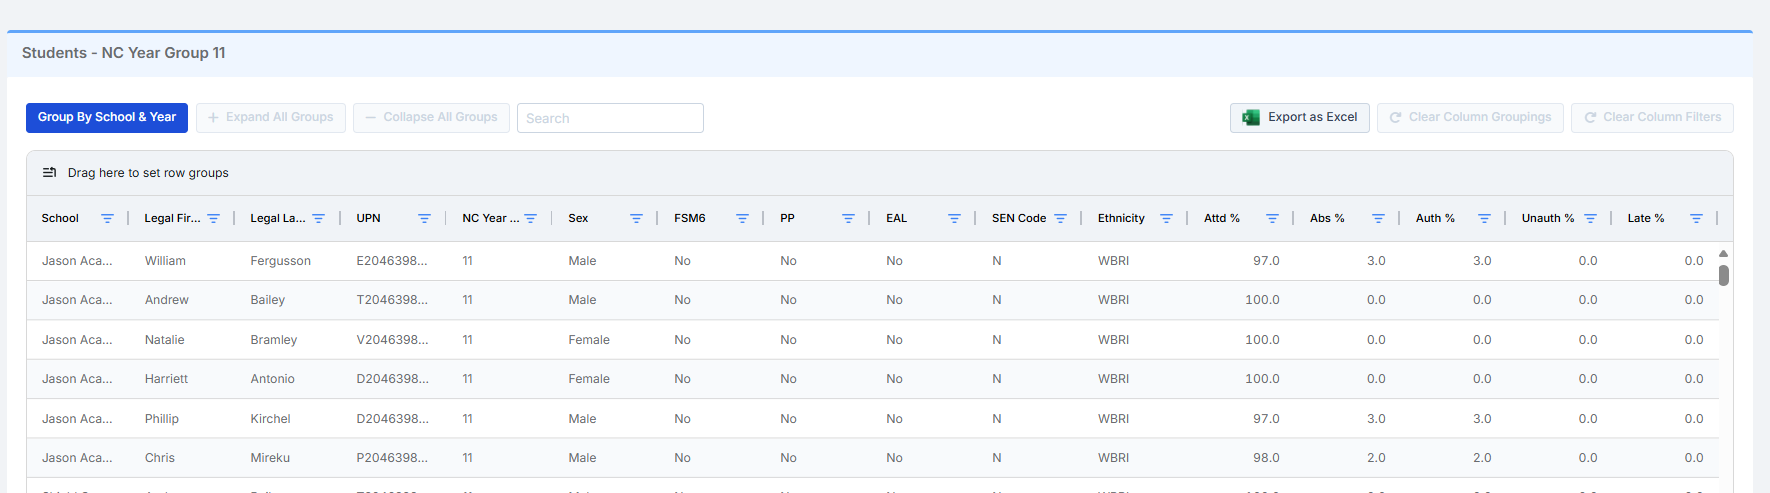
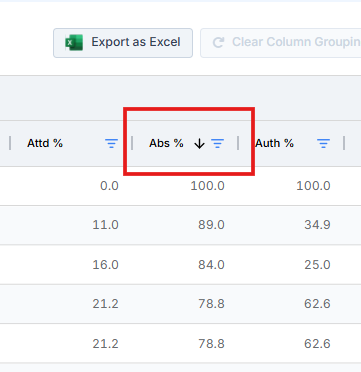
Sort Columns: click on the column header to sort, arrows show direction of sort
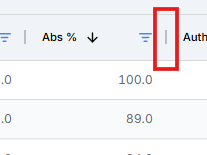
Click the grey line to the right to widen the column
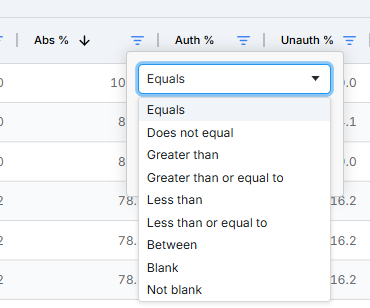
Click the 3 blue bars to filter the column, the options vary dependant on the data in the column
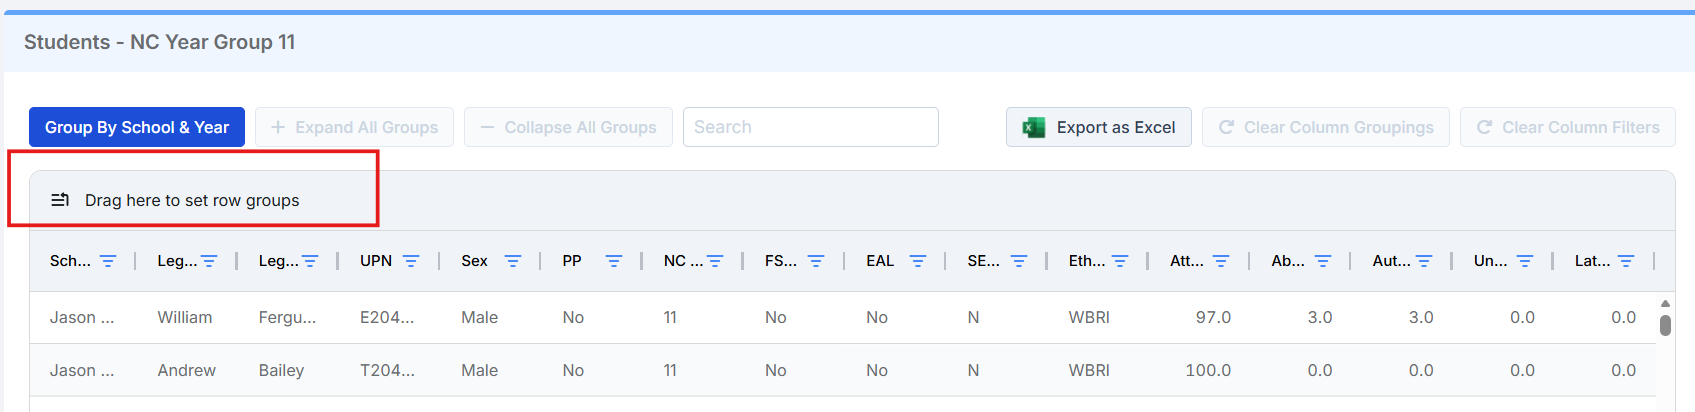
Use Drag here to set row groups to further group and analyse the data
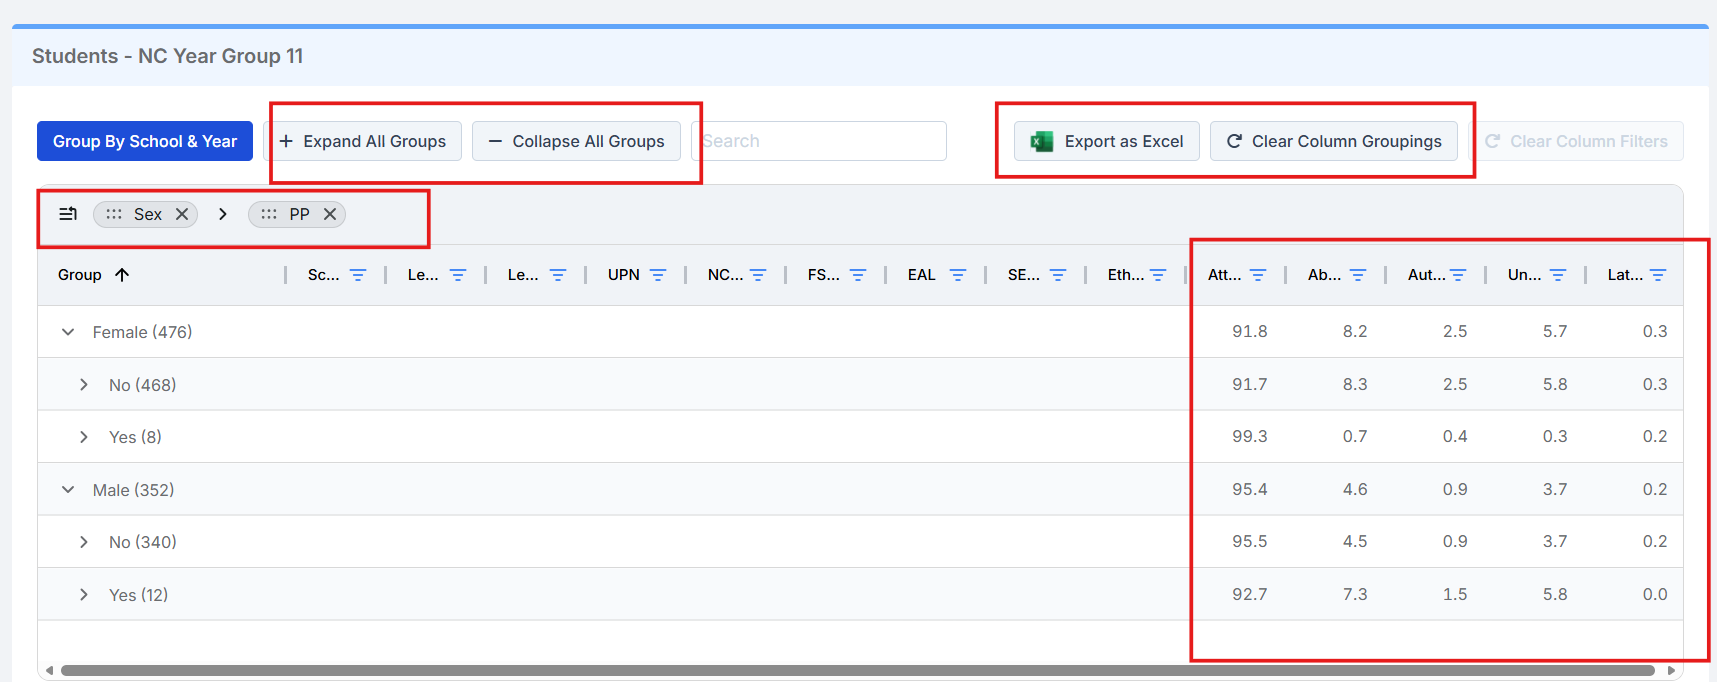
In the example below Sex and PP have been chosen.
Once the rows have been grouped choose to either Expand All Groups, Collapse All Groups, Clear Column Groupings and Export to Excel
Quick Profile
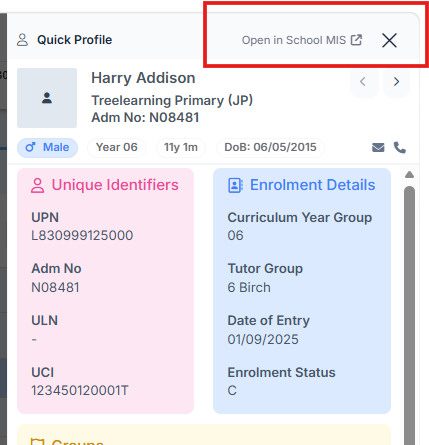
Clicking on a student row in any Attendance Dashboard drilldown table opens Quick profile in the right of the screen. The panel adds quick-access key information such as contact information by clicking the envelope or phone icons, groups, medical details, attendance data and behaviour summary.
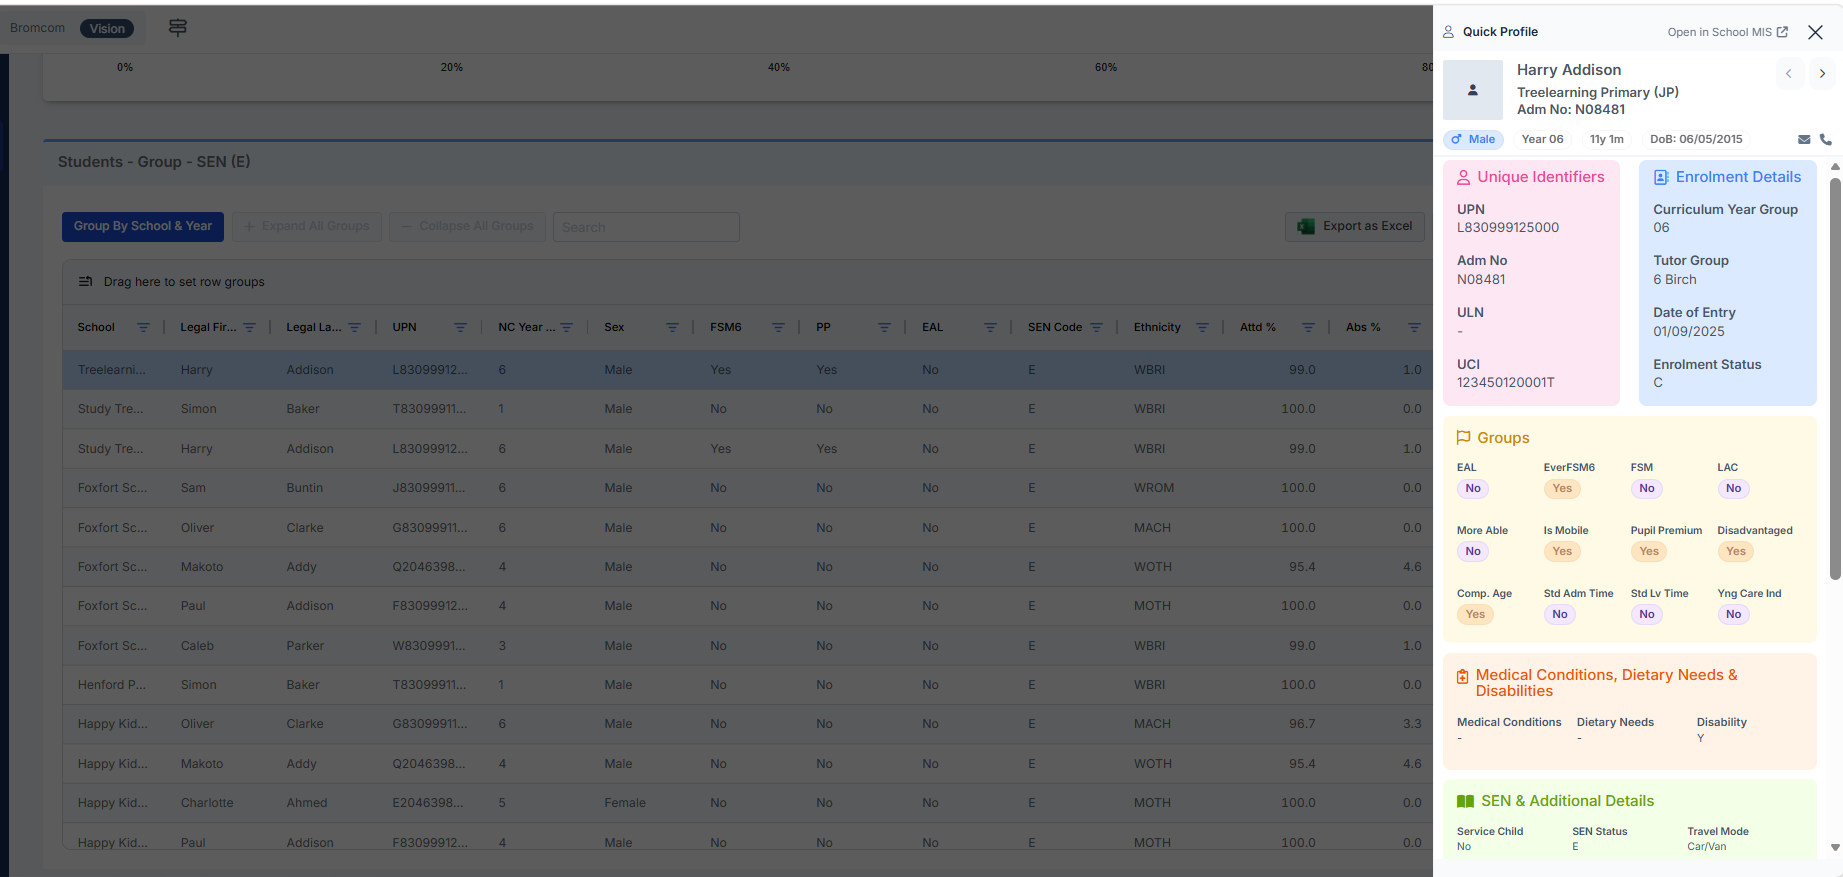
If required click the top right ‘Open in School MIS‘ button