
This guide explains how to Apply a Timetable Model using Bromcom Timetable Software (wTimetable and eTimetable) and covers:
For guidance on non Bromcom Timetable Software please see here
Access: the minimum permissions required to access Apply Timetable Model can be found in the Curriculum Module dropdown via Config>Setup>Roles and Permissions

For more information, see How to Edit a Role.
Pre Requisites
Period Structure
Applying a Timetable Model requires a Period Structure to be in place to map against. For more information on Period Structures, please refer to the guidance below:
- How to Create and Apply a New Period Structure
- How to View/Edit a Period Structure
- Changing your Period Structure Mid Year
Academic Year and Academic Days
When applying a Timetable Model for the next Academic Year, ensure the new Academic Year is set up and all Academic Days have been checked and amended as necessary (for example, Staff Only Days, School Holidays, or Bank Holidays). See the guidance below for further details:
Applying Timetable Model
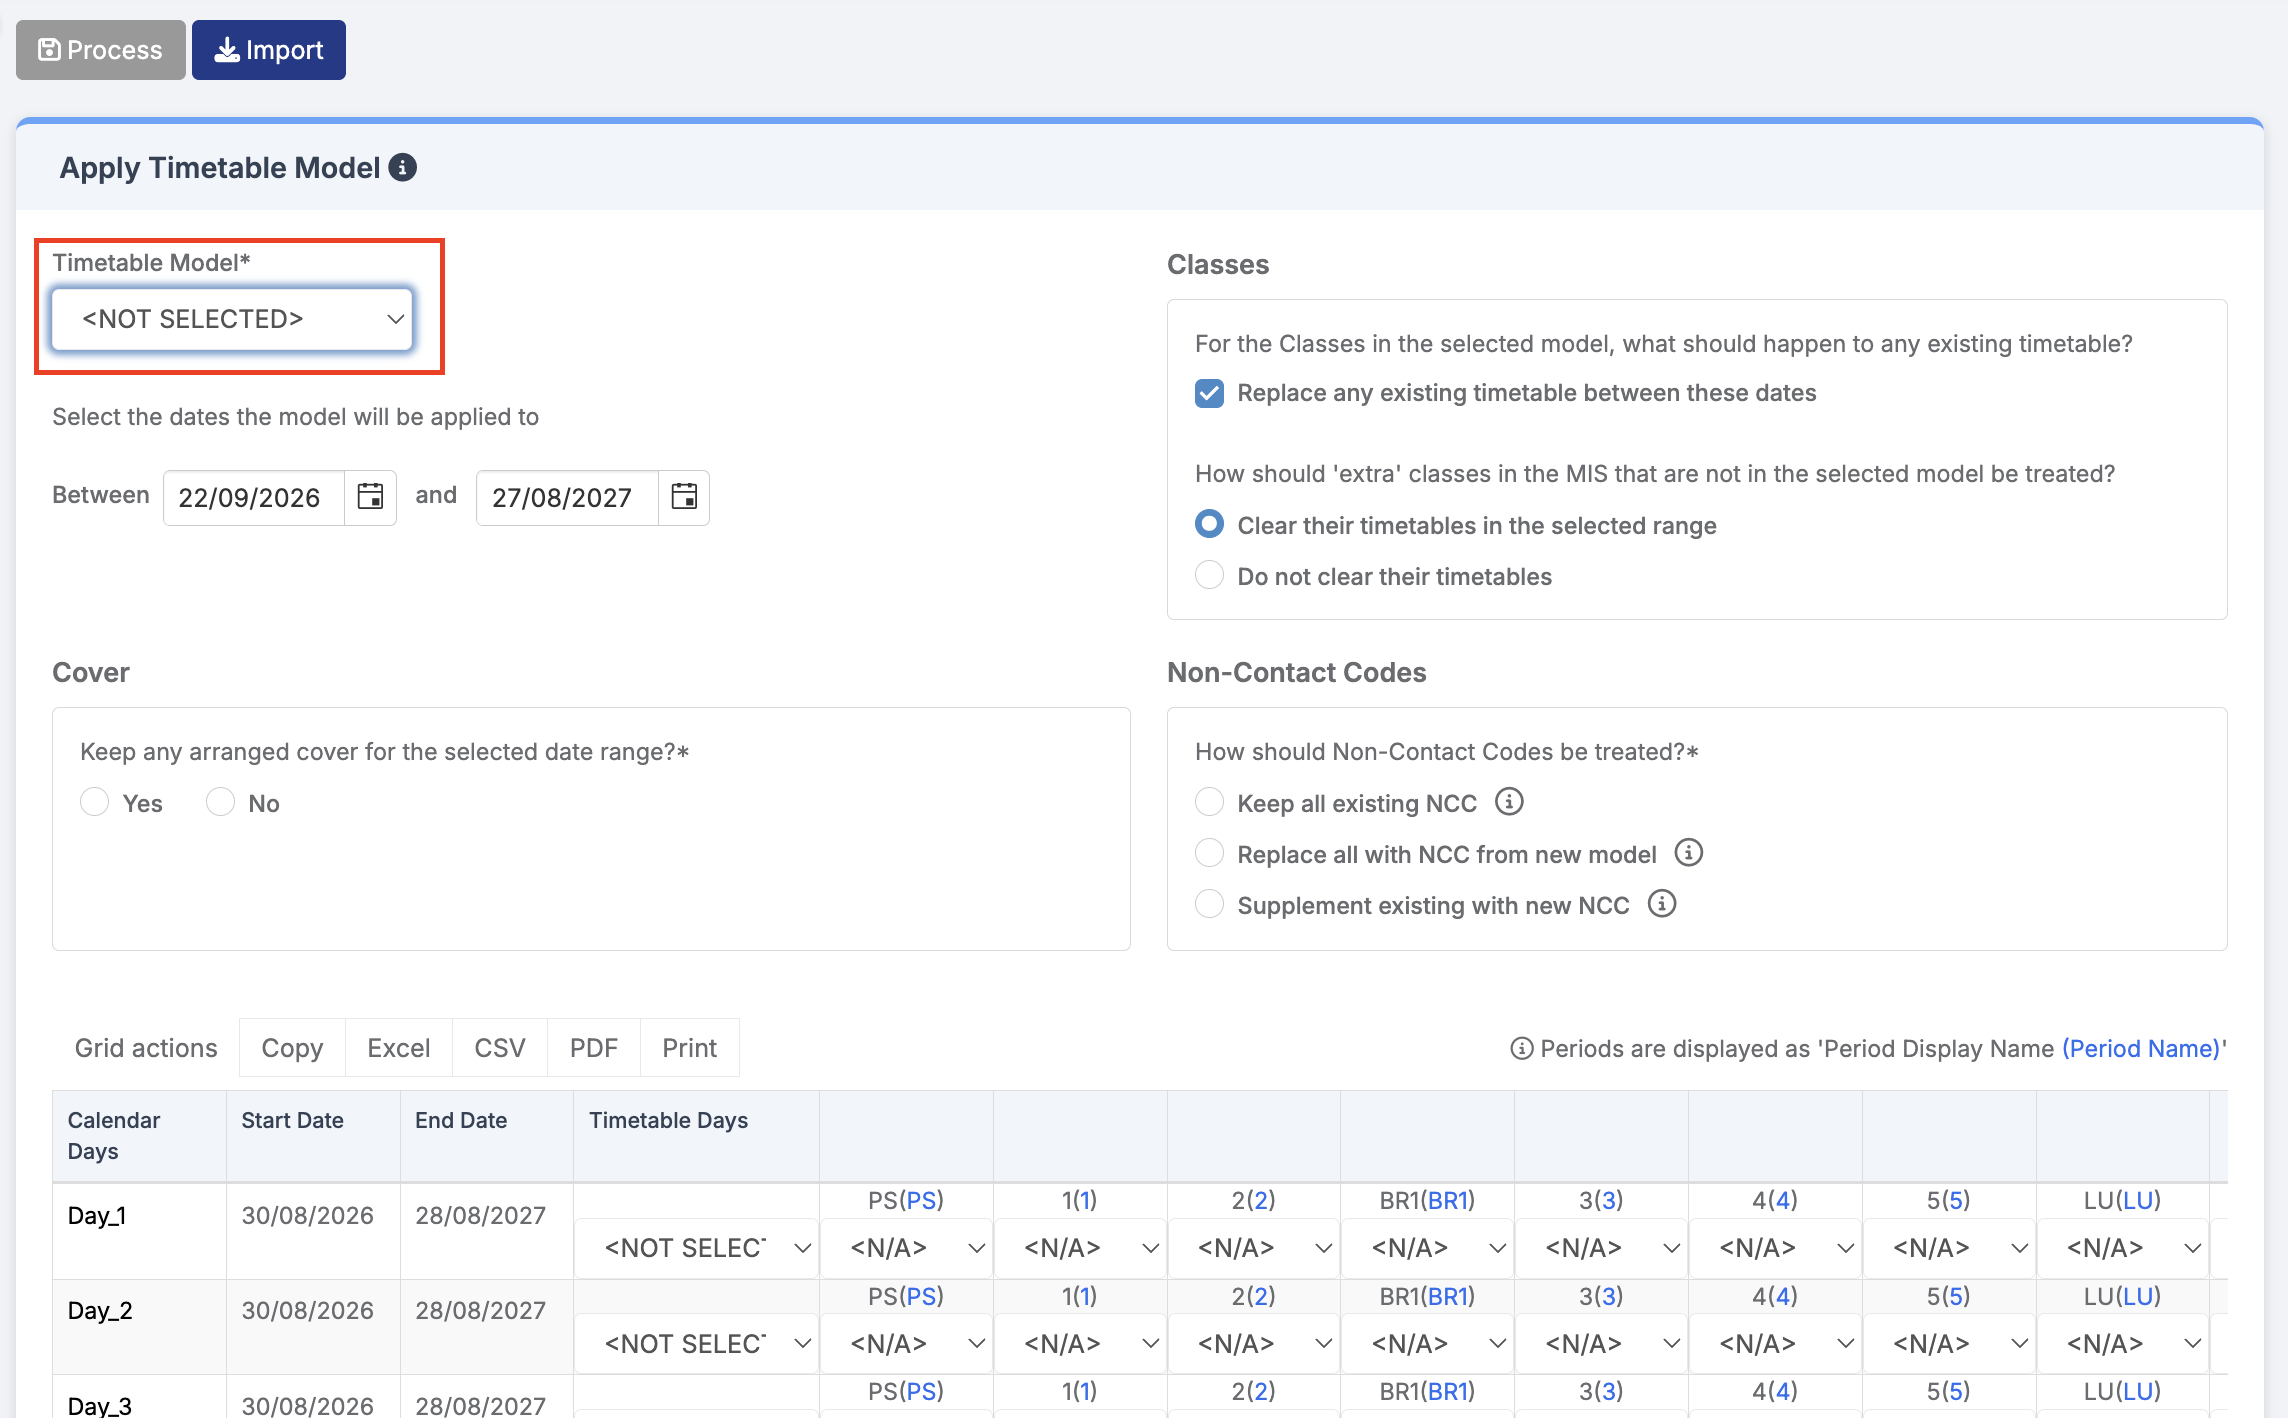
Navigate to Modules > Curriculum > Apply Timetable Model

In the Apply Timetable Model panel choose the required Timetable Model from the dropdown.
Timetable Import Dates
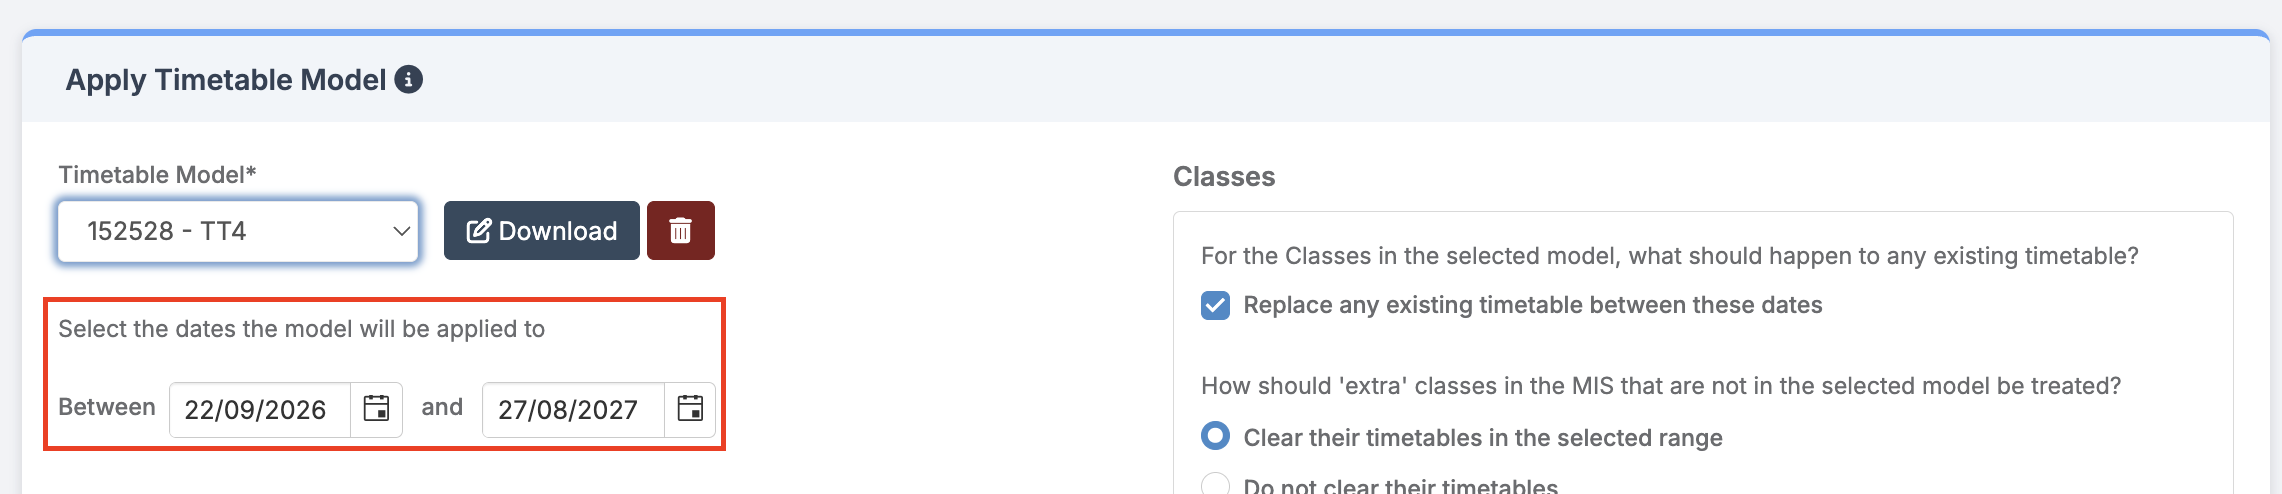
When selecting the dates the model will be applied to, there are two scenarios to consider:
- Applying a Timetable Model for the next Academic Year
- Applying a Timetable Model to make changes Mid Year
Next Academic Year
When first applying a timetable model for the next academic year, the following must apply:
- Start Date – Ensure the start date is on or after the start date defined for the academic year in Config > Curriculum > Academic Years.
Note: If the Teacher Dashboard needs to be available before students return (for example, during staff INSET days), the import start date should be the first day that the timetable is required by staff. This date must also be defined as an Academic Day in Config > Curriculum > Academic Days. - End Date – The end date must fall within the same academic year as the start date. Schools may choose whether this is the last day of the summer term or the final day of the academic year.
- If a new version of the timetable model is applied before the next academic year begins, ensure the same start and end dates are used as originally defined.
Mid Year Changes
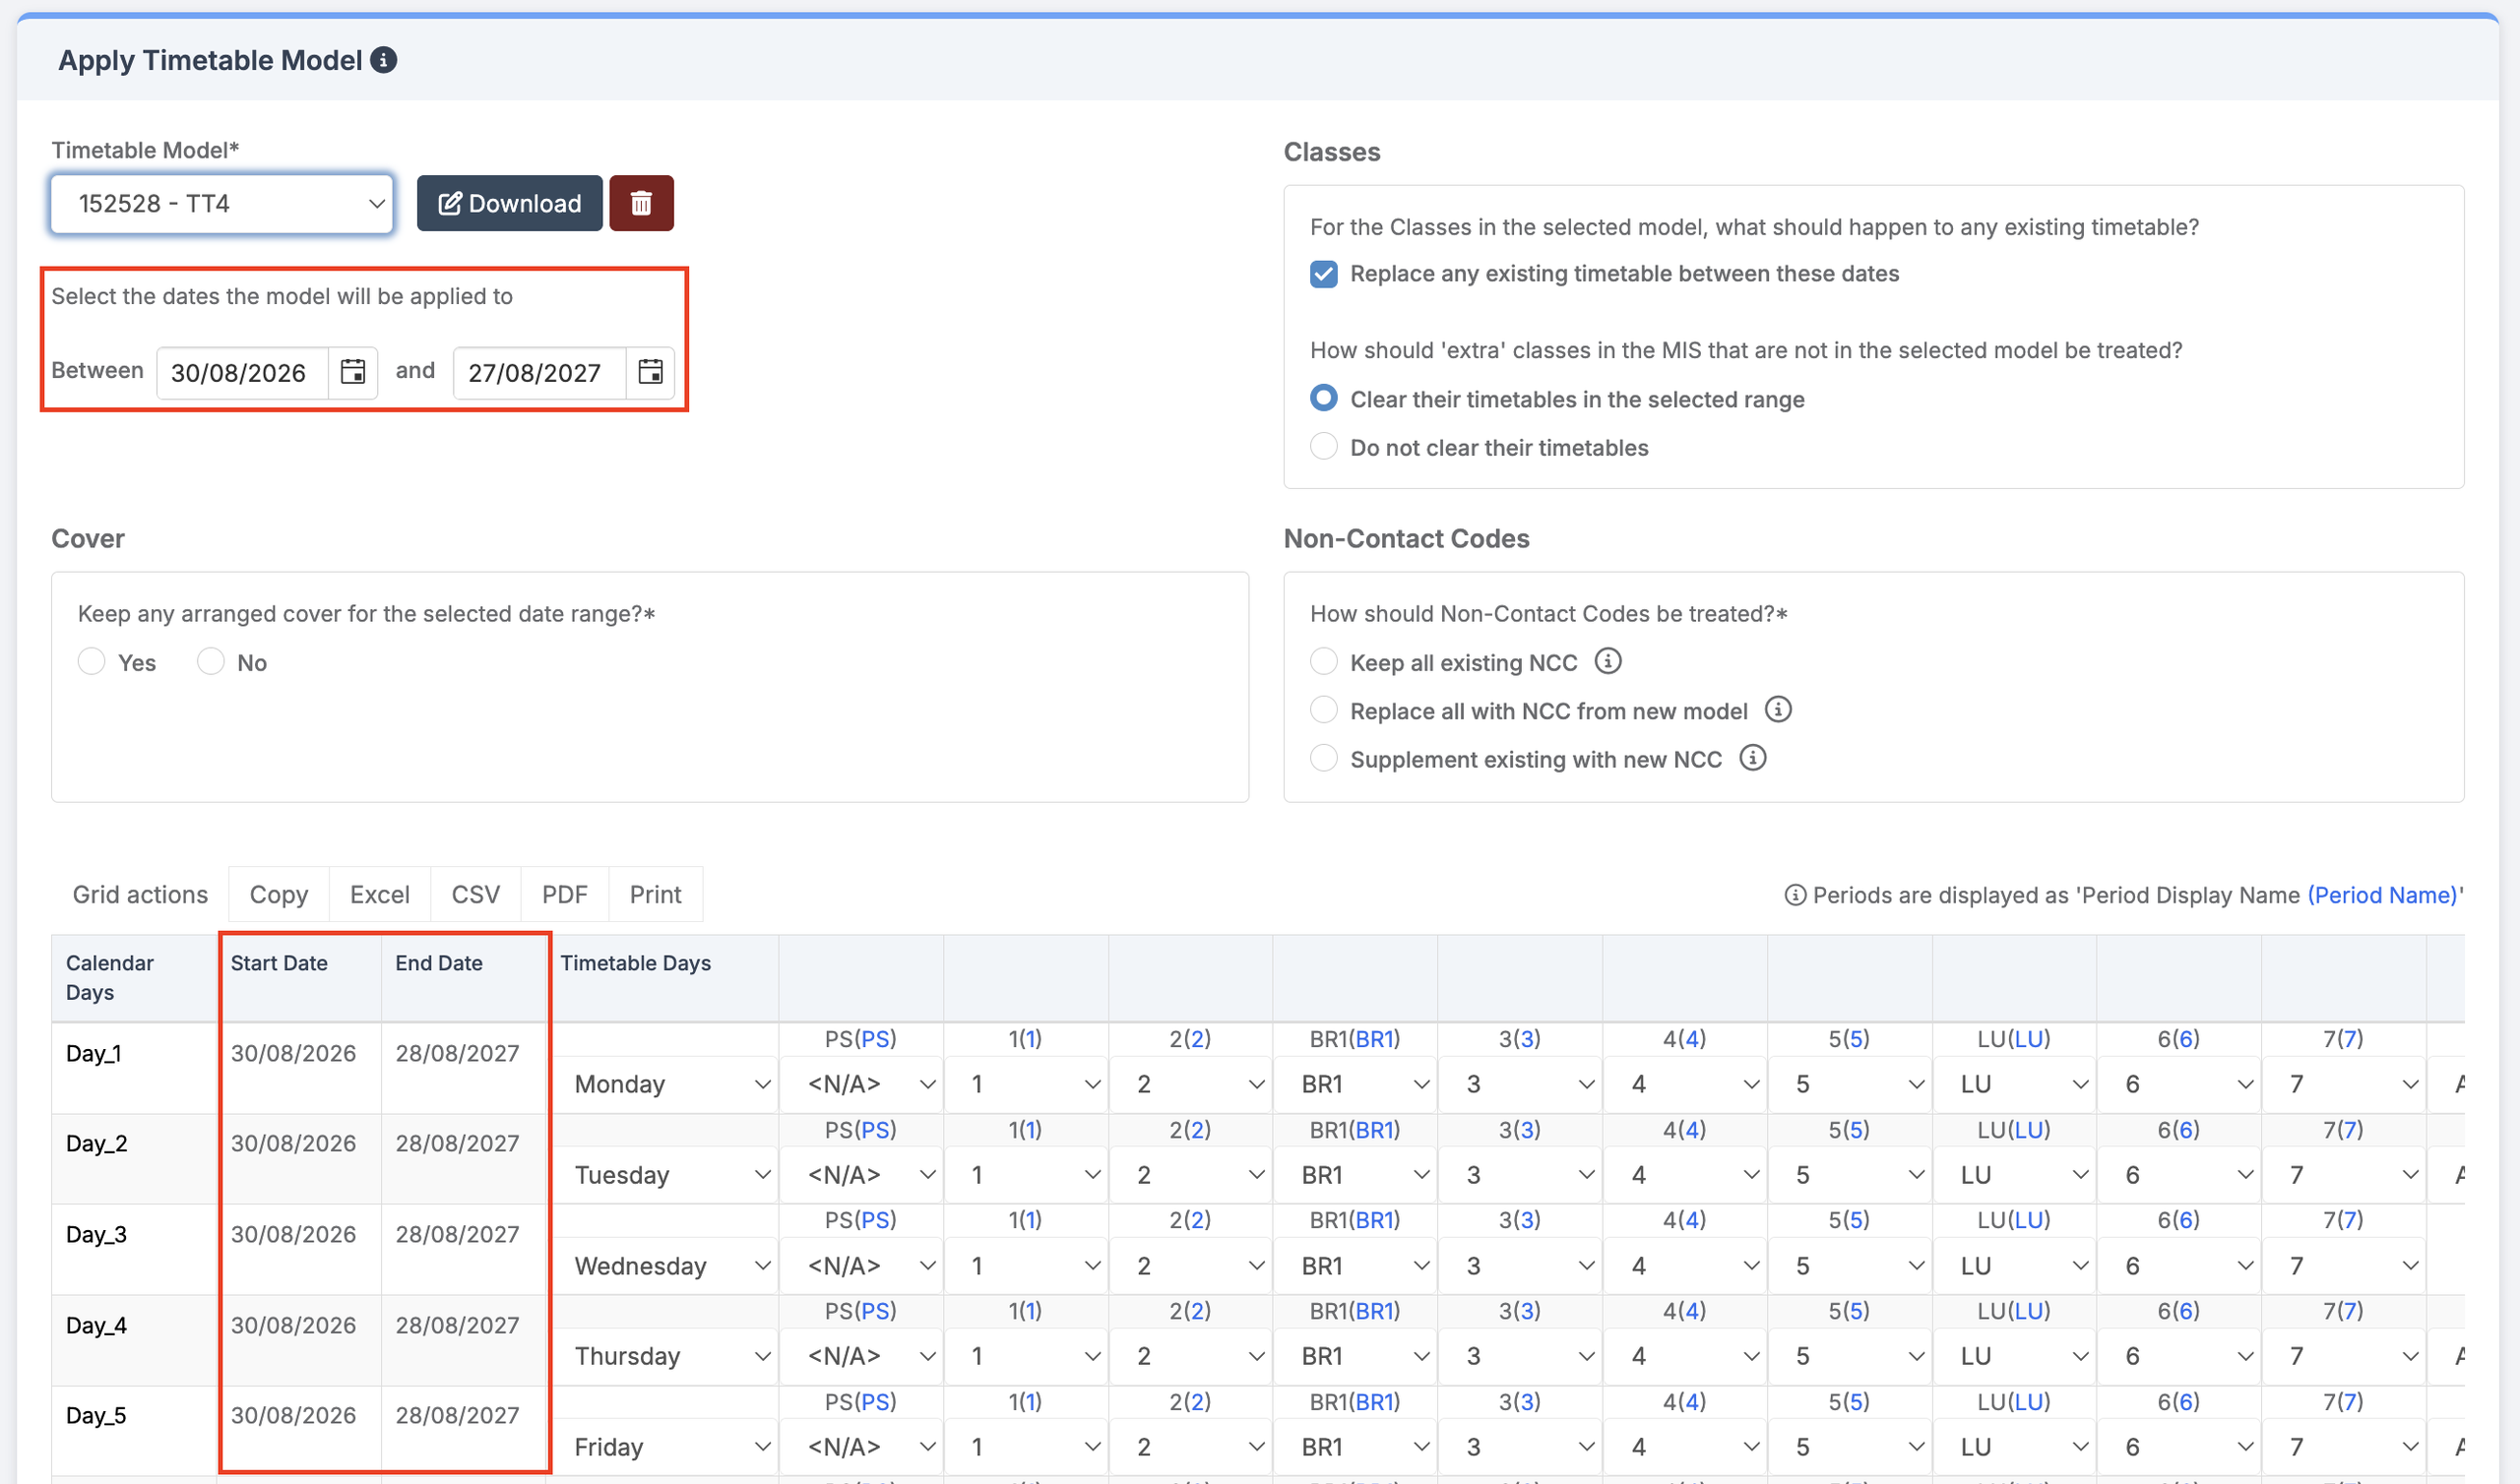
When applying a Timetable Model mid-year:
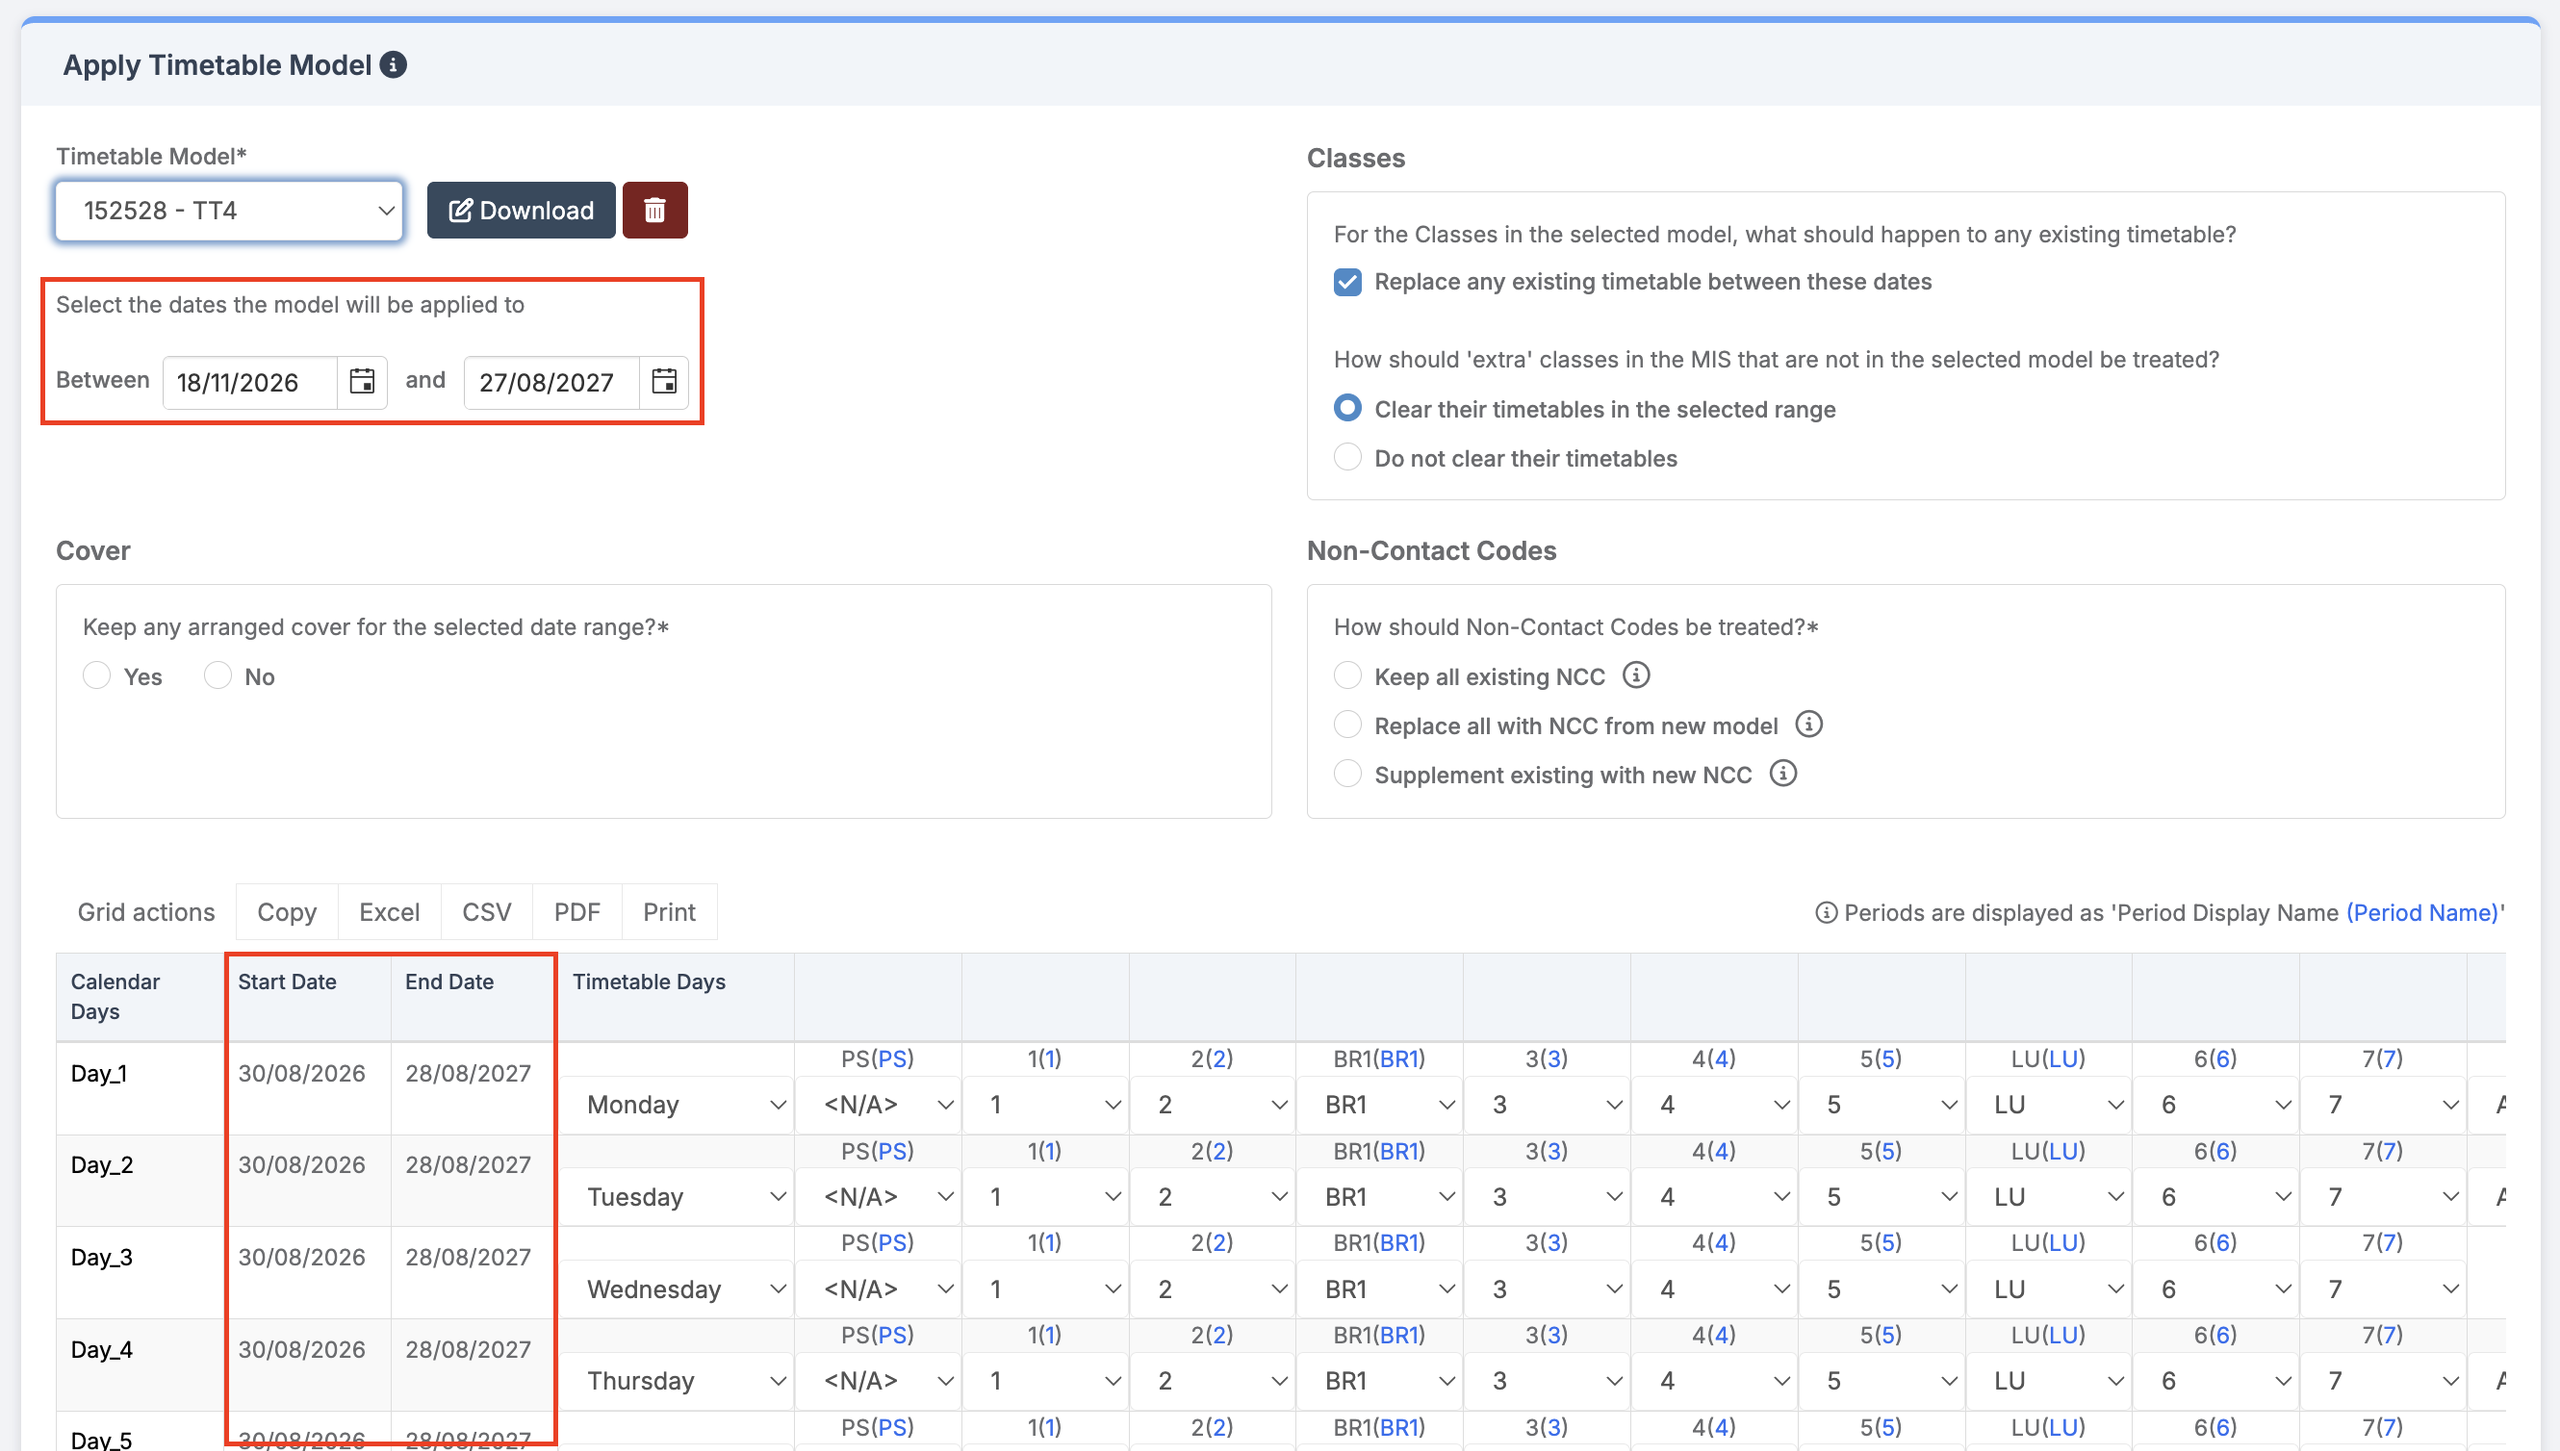
- Start Date – the start date should be set to the date on which changes are intended to go live in the MIS.
It is recommended to choose a date at least one day in the future to allow time to review the import before the changes are applied.
- End Date – The end date must remain the same as when the Timetable Model was first applied at the start of the academic year.
Tip: When re-applying a timetable mid-year, rename the file so it does not match the existing file in Bromcom.
Finally, confirm that the Start Date and End Date in the Period Structure mapping table correspond to the current academic year.
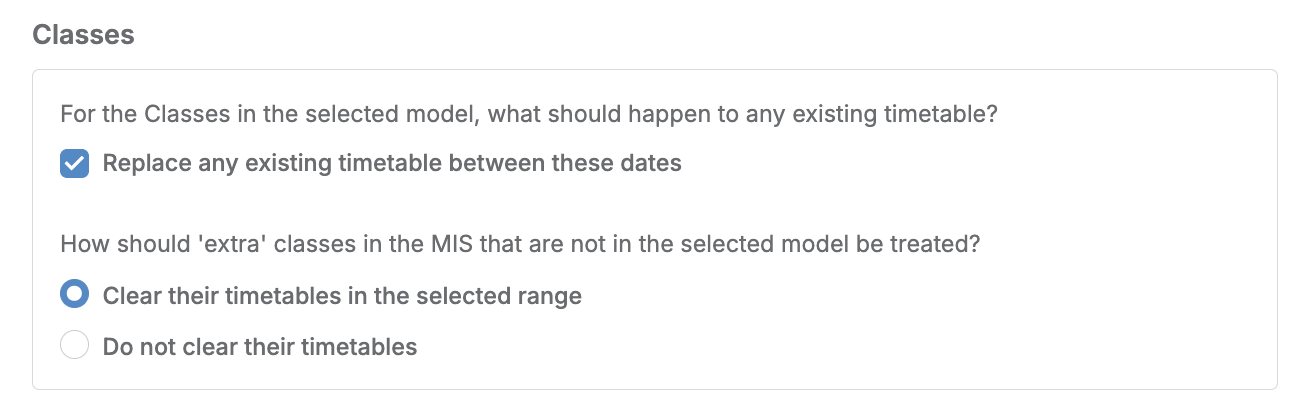
This section explains how to manage timetables for existing classes in the MIS, as well as classes that appear in the MIS but are not included in the timetable file.
Existing Classes
For classes in the timetable model that match existing classes in the MIS, it must be decided whether to replace any existing timetable between the selected dates. In most cases, this tick box should remain selected, as the changes in the timetable model are intended to override what is already in the MIS.
Example: Class Ma11/A1 is currently scheduled on Monday and Wednesday, Periods 1 and 2. In the new timetable model, this has been changed to Monday and Wednesday, Periods 3 and 4.
- If the tick box is selected: The timetable for Ma11/A1 will be updated to remove Periods 1 and 2 and replace them with Periods 3 and 4.
- If the tick box is not selected: Periods 3 and 4 will be scheduled in addition to the original periods.
Extra Classes
If there are extra classes in the MIS that do not appear in the timetable model, it must be decided whether to clear or retain the timetables of those classes. The classes themselves will remain intact; only their timetables will be affected.
Note: NCCs, Withdrawal Groups, and Tutor Groups will not be affected.
The next step is to review how the system has mapped the periods of the timetable model to the Bromcom period structure. This mapping is performed automatically and only requires checking for accuracy, with any necessary amendments applied.
The Calendar Days column and the Period names in each column and row header are taken from the Bromcom period structure built in the MIS.
Note: Period headers are displayed as Period Display Name (Period Name). For example, Break 1 (BR1)

The Timetable Days and Periods in the dropdown boxes are taken from the timetable model being imported.

The Cover panel includes the question: Keep any arranged cover for the selected date range?
This setting determines whether existing arranged cover and swaps are retained when the timetable model is applied.
If you select No
All arranged cover and swaps (Modules > Cover > Arrange Cover) for the selected date range are removed, including:
- Cover for teaching sessions
- Cover for NCCs/duty codes
- Swap for Staff
- Swap for Room
The following records (Modules > Cover) are not affected:
- Room Closures
- Special Events
- Staff Absences
- Suspend Classes
If you select Yes
You can choose which cover-related records should be preserved.
Keep arranged cover for teaching sessions?
- Yes: Retains arranged cover for teaching sessions.
- No: Removes arranged cover for teaching sessions.
Keep arranged cover for NCC/duty codes?
- Yes: Retains arranged cover associated with NCCs/duty codes.
- No: Removes arranged cover associated with NCCs/duty codes.
Keep swap staff / swap room adjustments?
- Yes: Retains all staff and room swaps.
- No: Removes all swap adjustments.
The Non-Contact Codes panel includes the question: How should Non-Contact Codes be treated?
This setting controls how existing NCCs in the MIS, and new NCCs in the applied model are handled.
Keep all existing NCC
- All existing NCCs in the MIS are preserved.
- NCCs from the applied model are not added.
- Note: When an applied model has teaching sessions that clash with existing NCCs in the MIS, the teaching sessions have priority over the NCCs. The session is highlight red in Staff > Staff Details > Action > Staff Timetabling > Manage Non-Contact Codes. You can right-click session to remove the NCC update the page and the clash will disappear.
- Note: If a timetable model includes teaching sessions that clash with existing NCCs in the MIS, the teaching sessions take priority. Clashing sessions are highlighted in red in Staff > Staff Details > Actions > Staff Timetabling > Manage Non-Contact Codes. To resolve the clash, right-click the session to remove the NCC and refresh the page. The clash indicator will then be removed.
Replace all with NCC from the new model
- All existing NCCs in the MIS will be removed and replacedwith NCCs from the new model.
Supplement existing with new NCC
- All existing NCCs in the MIS will be preserved. Missing NCCs from the new model will be added where applicable. Existing NCCs will take priority over NCCs in the new model.
Note: To select Process, you must answer the questions in both Cover and Non-Contact Codes panels.
Important: Cover arrangements and swaps can only be preserved when a session/NCC in wTimetable exactly matches the corresponding session in the timetable model. If there are any differences, the associated cover or swap information cannot be retained.
The final section on the page relates to Non-Compulsory Data, and a decision must be made on whether to include this data in the import.
There are four tick boxes, all selected by default, and in most cases they should remain selected.

Finally, once all information has been reviewed and confirmed as correct, click the Process button at the top-left of the page.
Note: The Import button can be disregarded, as it is only used with third-party software
Finally when all the information is correct in the Apply Timetable Model screen click Process

A pop-up will appear requesting confirmation to proceed.

Click Proceed to continue.
A summary of the data to be imported will then be displayed. Review this carefully before finalising the process by clicking the Apply button.

A message will confirm that the model has been applied successfully. If any other message appears, please contact the Bromcom Helpdesk.