This guide is designed to assist in understanding and resolving the various validation errors that may occur during the generation of the Welsh Pupil Level Annual School Census (PLASC).
It should be used in conjunction with the guidance provided to schools by the Welsh Government and covers:
Note: the screenshots included in this guide are for illustration purposes only and may differ from the view in your school’s system.
IMPORTANT: It is the school’s responsibility to review the Welsh Government Guidance to ensure all required information is submitted as part of the Pupil Level Annual School Census .
Documentation and Guidance
- Welsh Government documentation and guidance on PLASC can be accessed here.
- Additional Bromcom documentation and guidance on PLASC can be accessed here.
- For detailed information on all Errors and Queries see the PDF document below.
Viewing PLASC Errors and Queries
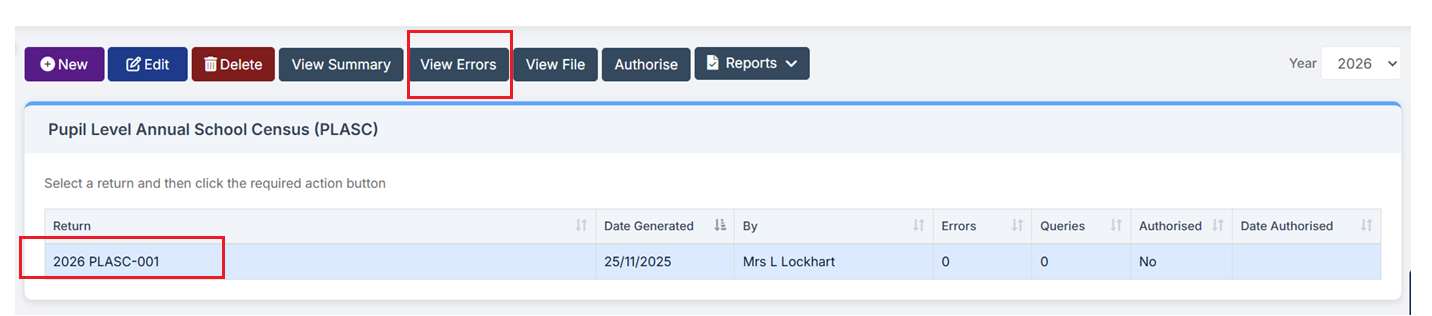
Once a PLASC Return has been generated, errors must be addressed before authorising and submitting the return.
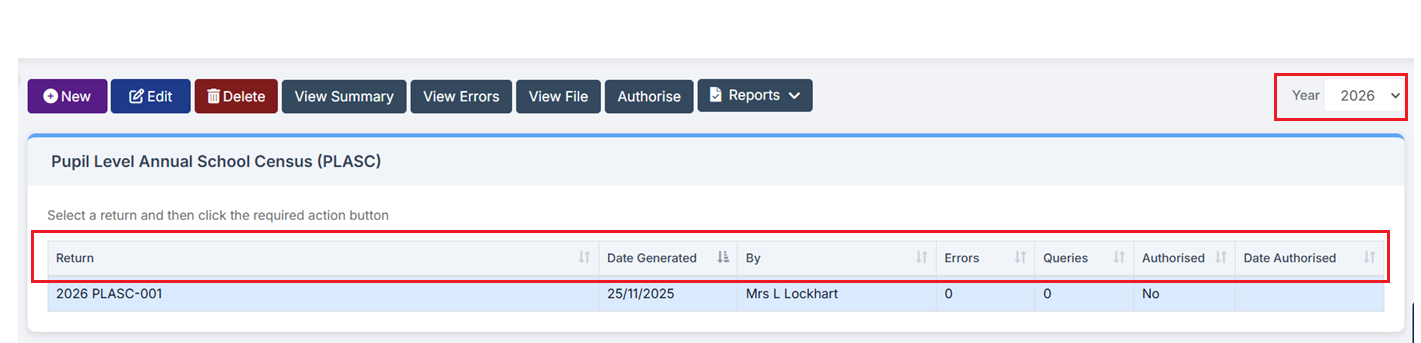
The Year field should default to the relevant Census period.

The screen will display any previously generated returns. Each return will clearly show the following information:
- Return [Name]
- Date Generated
- [Return Created] By
- [No. of] Errors
- [No of] Queries
- Authorised (Yes/No)
- Date Authorised
Working within the Error Details screen
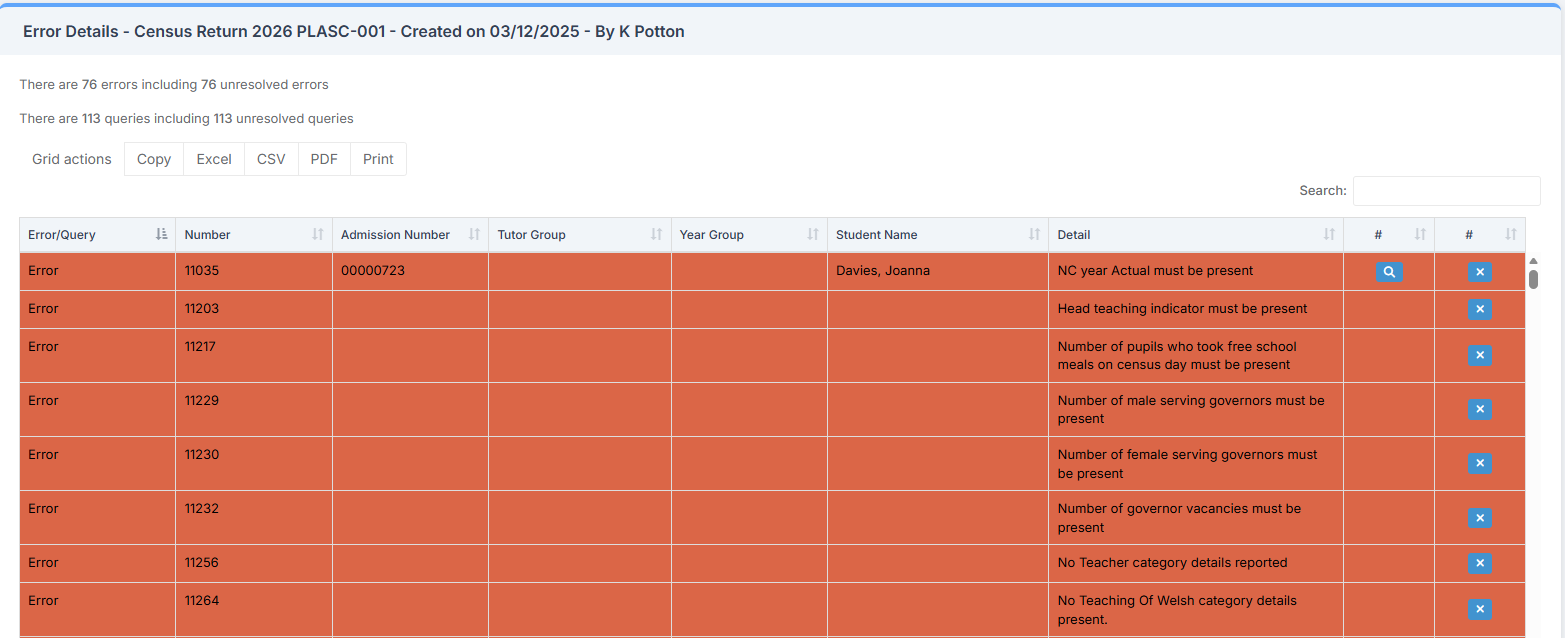
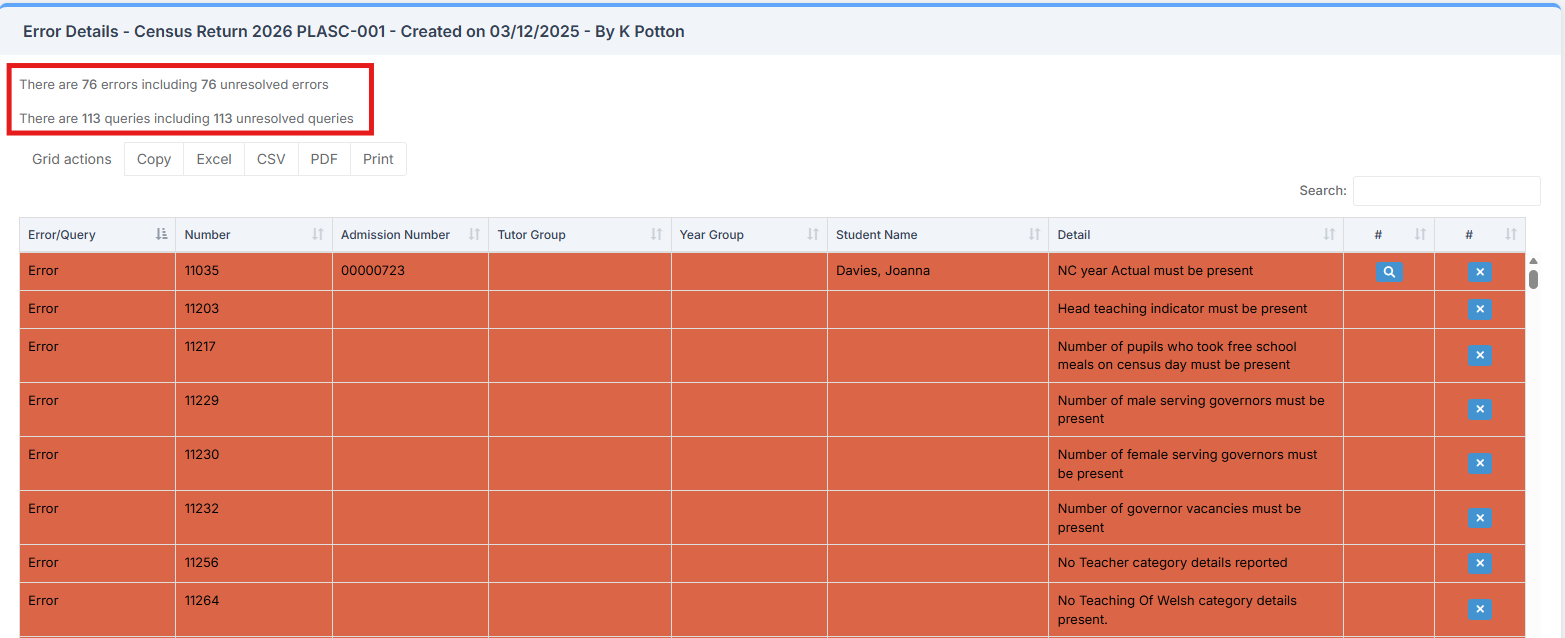
The Error Details screen consists of two main sections: the Census Return Summary and the Errors and Queries Data Grid.
The Census Return Summary area displays summary information for the selected return, most notably providing clear identification and updates of the number of currently unresolved errors and queries.
The Errors and Queries Data Grid lists each error and query individually, row by row.
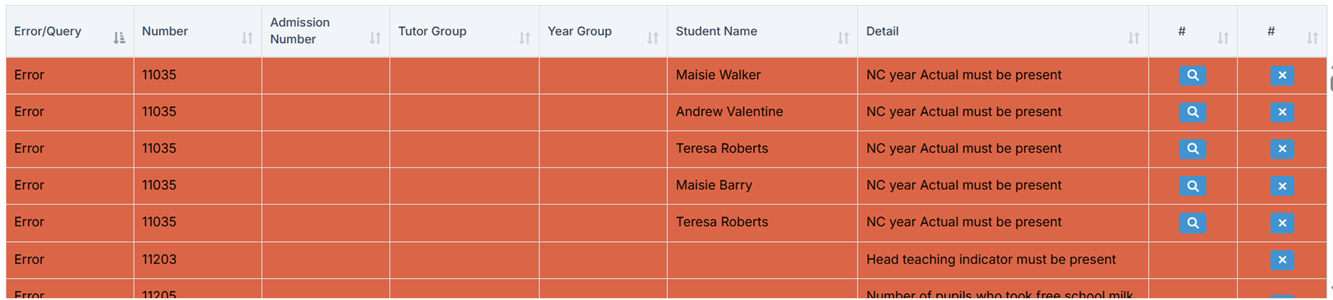
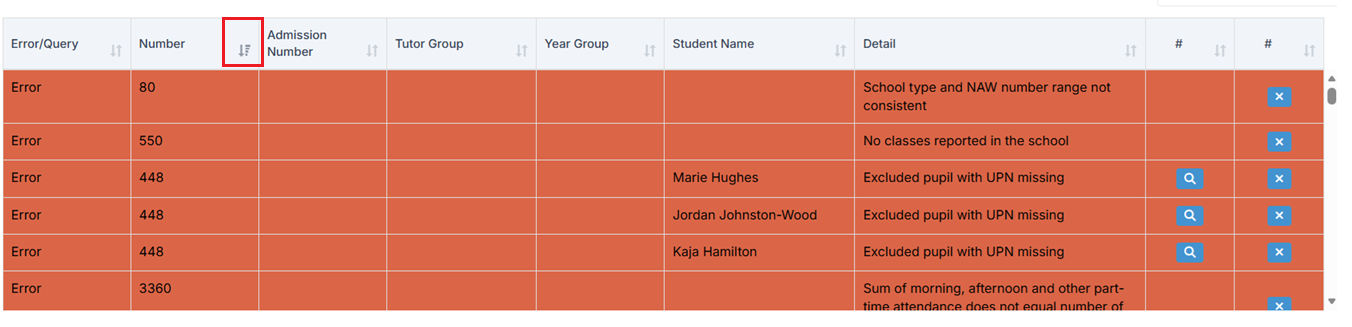
Use the scrollbar on the right to navigate through the errors. Each column can be sorted using the sort arrows located at the bottom right of the column headers.
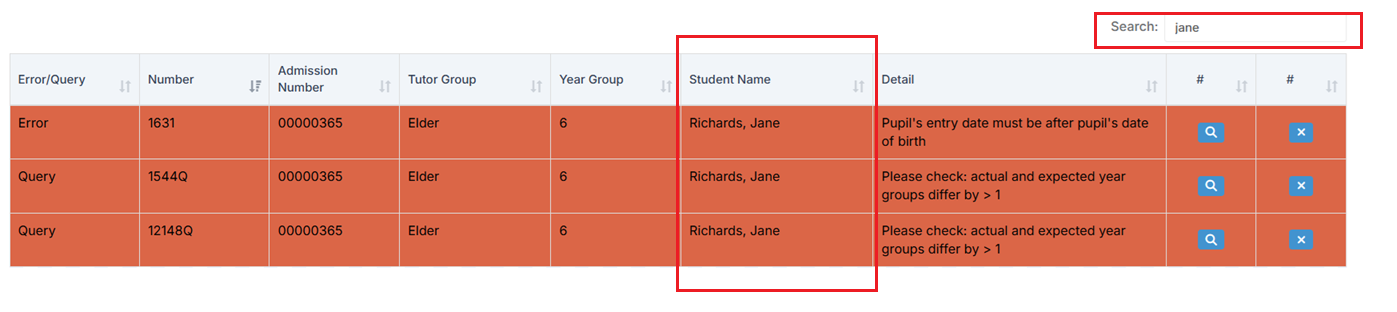
Use the search box at the top right to find items in the Data Grid. The grid updates automatically as you type, showing only matching results.
Note: Searches can be performed by, for example, Student Name, UPN or Error/Query Number.
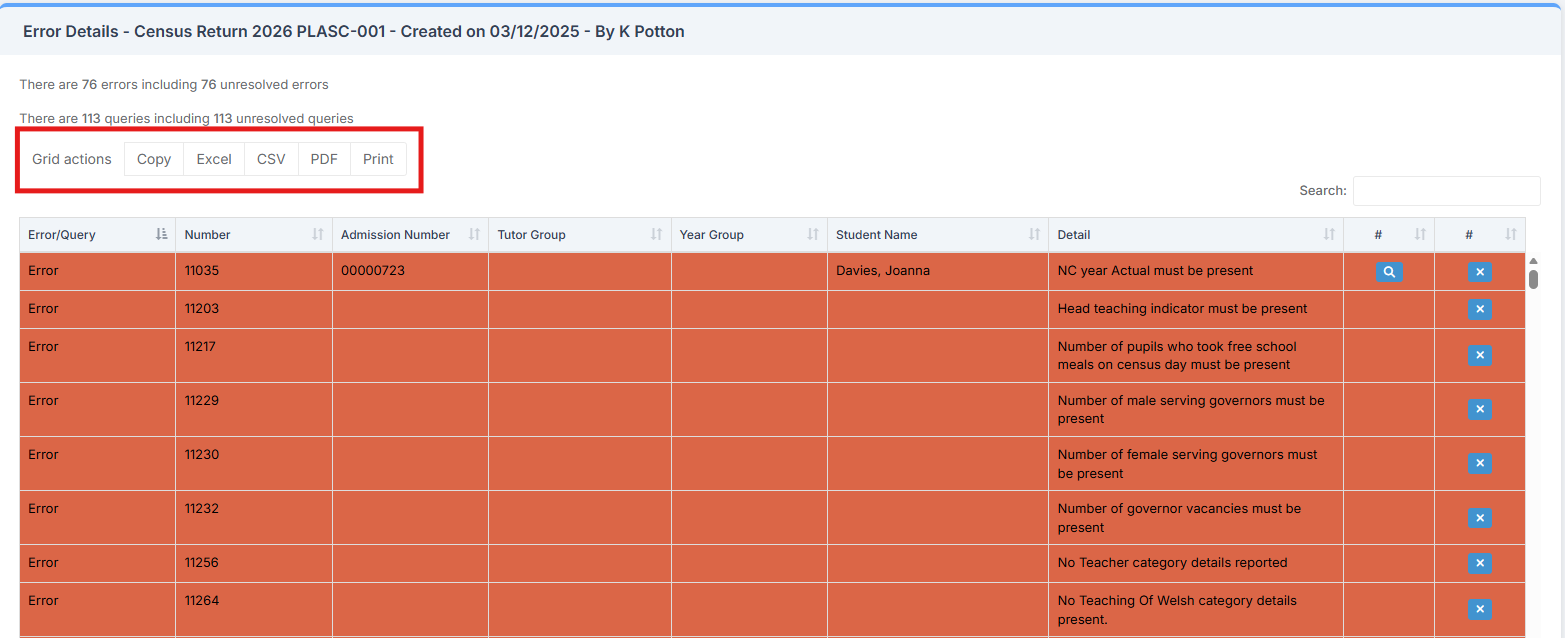
Click Grid Actions at the top left to Copy, Export (Excel, CSV or PDF), or Print the Data Grid.
When dealing with the Errors/Queries shown, the Data Grid can be used to:
- Link directly to the required MIS Page to correct the Error/Query (please note, this is not available for all Errors/Queries):
Clicking the magnifying glass icon next to an Error or Query will open a new tab, taking you directly to the relevant MIS page where you can address the issue.
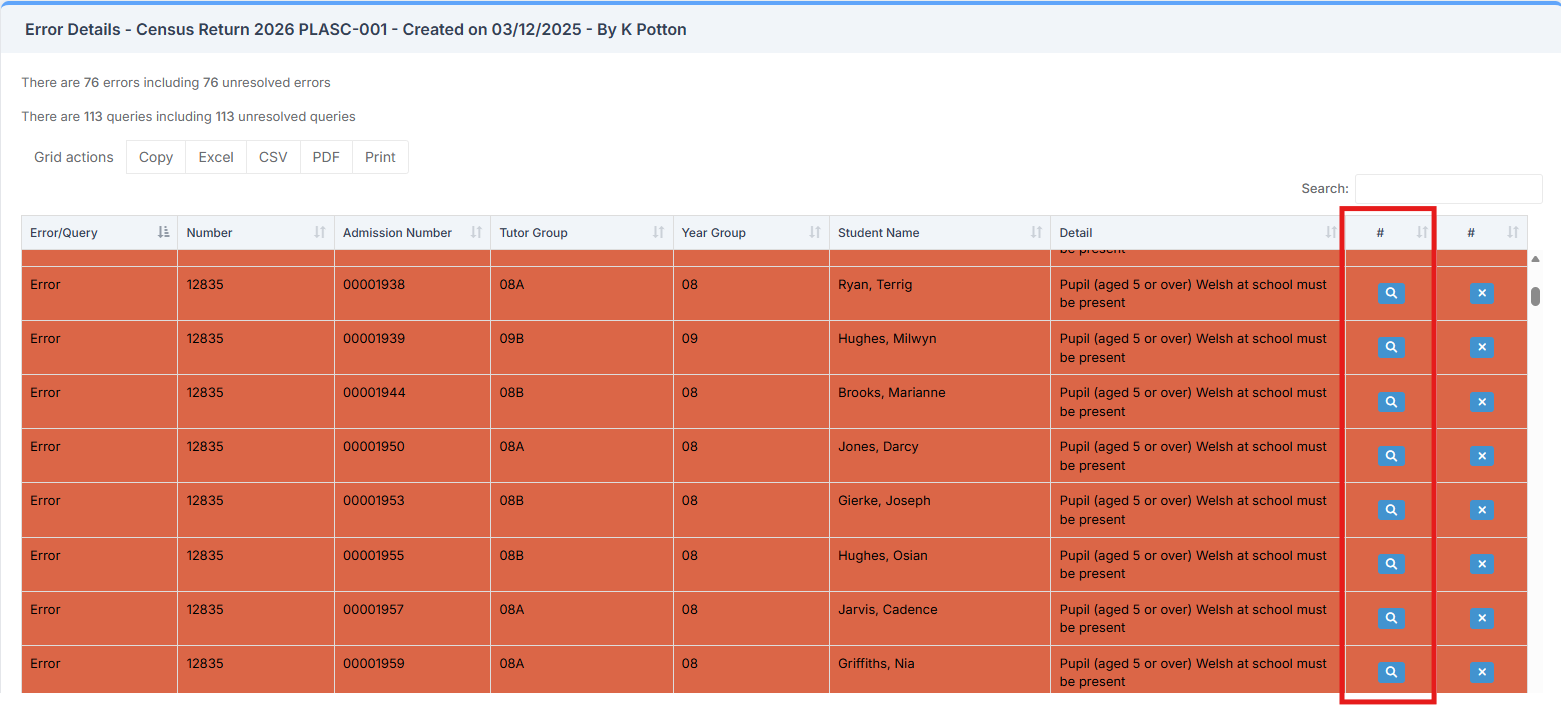
In any new window opened via the link, correct the error or query, then save any changes made and close the window.
- Mark Errors/Queries as Resolved or Unresolved (initially all will be Unresolved):
IMPORTANT: To remove resolved errors or queries from the list (and the Census File), a new Census file must be generated and validated.
It is recommended to mark each Error or Query as Resolved once it has been addressed. This helps when tracking which items still require attention.
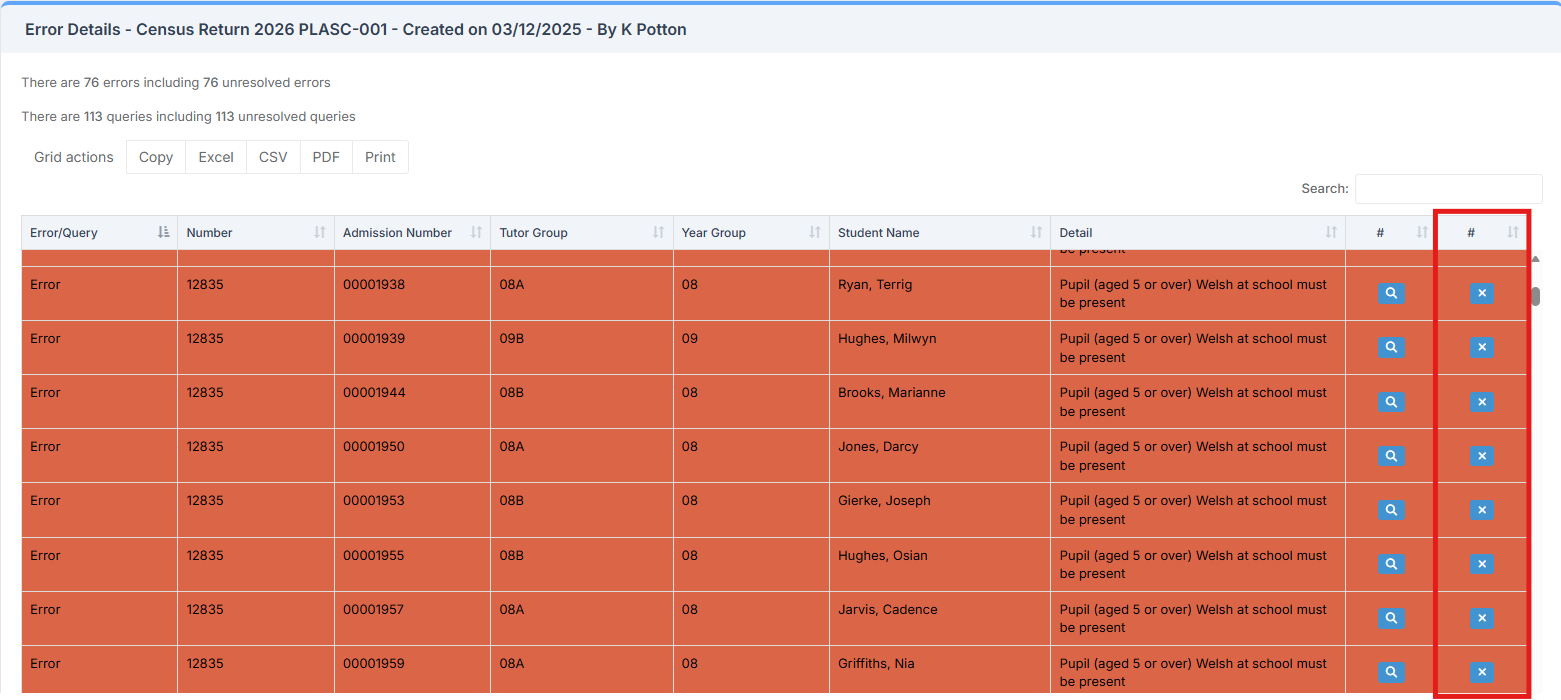
To change the Status of an Error/Query, click on the  (unresolved) icon.
The Error/Query will change to the  (resolved) icon and the row will be highlighted in green.
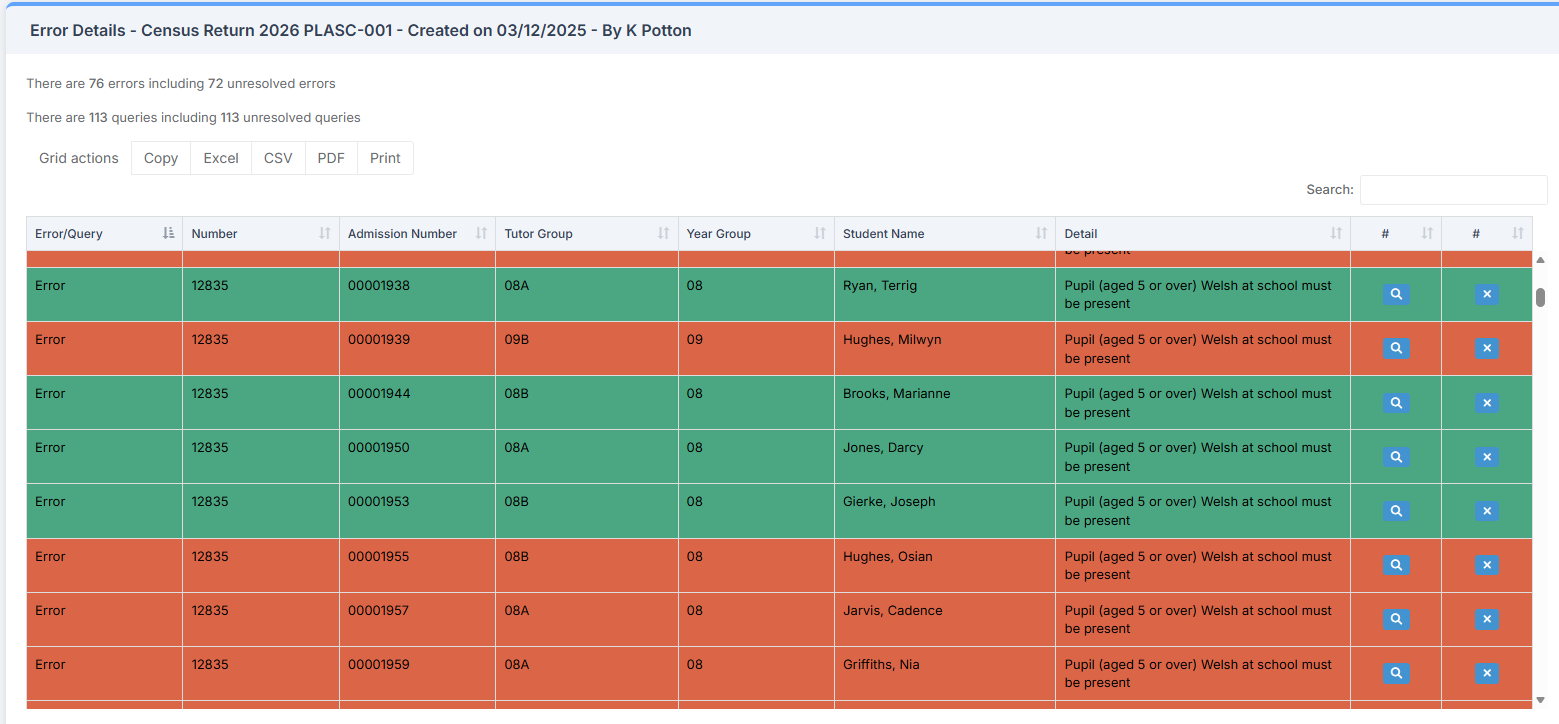
If required, a resolved error or query can be changed back to unresolved. Simply click the resolved icon again – this will toggle the status back and remove the green row highlight.
Once all errors have been resolved and any outstanding queries have been reviewed, re-run the Census to ensure the file is up to date.
The file can now be Authorised in preparation for submission. This will convert the Census file into the correct format (XML) to upload to the DEWi website.
It is possible to have multiple authorised files, each date stamped to help identify the correct version for submission.
To export, click the View File button – this will download a copy of the Census file to the computer’s Downloads folder.

For detailed information on all Errors and Queries see here.
Individual Errors/Queries can also be searched in the Help Centre for more specific guidance.