
This guide explains how to import a Nova-T6 timetable into wTimetable using the Import Nova-T6 feature available in the Curriculum Plan page.
Pre-Requisites
- Appropriate permissions to access the wTimetable module.
- An existing (or new) wTimetable Project and Timetable file. For further information, refer to wTimetable Guidance – Part 1: Pre-Planning.
- Exported Nova-T6 XML files (see Step 1 of this guide for further information).
Use this guide if:
- The school is transitioning away from Nova-T6 and wants to continue managing the timetable within wTimetable.
- Access to Nova-T6 for timetable management will no longer be available in the future.
Do not use this guide if:
- Nova-T6 will continue to be used for timetable management. In this case, refer to the How to Import a Timetable From Nova-T guide.
Note: As wTimetable is resource-intensive, users should refer to the ‘For office admin users and others’ section of the Minimum System Requirements guidance.
Access: The minimum permissions required to access wTimetable are found in the Timetable Module of Config > Setup > Roles & Permissions.

To access wTimetable from the MIS navigate to Modules > wTimetable.
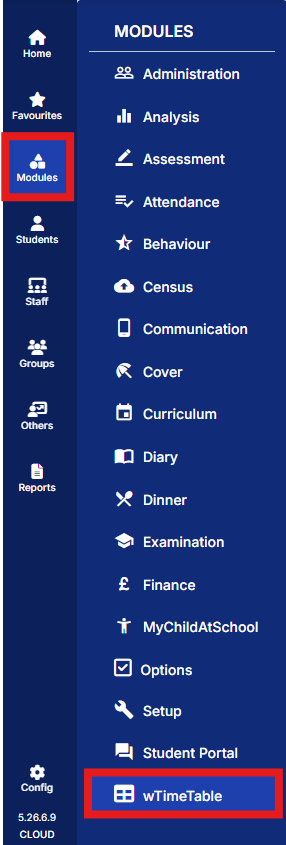
THE SCREENSHOTS USED IN THE GUIDE ARE FOR ILLUSTRATION PURPOSES ONLY AND MAY DIFFER IN A LIVE SCHOOL’S MIS.
The Import Nova‑T6 feature in wTimetable, enables you to import timetable data – such as year groups, lessons, non-contact codes, and curriculum blocks – from the Nova‑T6 system through a guided process.
Before starting, make sure you have created your wTimetable Project and Timetable file. Note that any information currently in the Curriculum Plan and Scheduling tabs will be cleared and replaced during the Nova T6 import.
Go to the Curriculum Plan tab and select Import Nova-T6 from the Actions dropdown.
Complete the following steps to import the Nova-T6 timetable:
- Step 1 Upload Nova-T6 export files
- Step 2 Map imported periods to system periods
- Step 3 Match lessons to blocks
- Step 4 Import Complete
Step 1 Upload Nova-T6 export files
Upload the required Nova‑T6 XML files.
Note: All files must be generated from the same Nova T6 export, in XML format via Data > Export to Third Party Systems.
The following files are required from the export:
- YNAMES.XML – Year group names
- NCLASS.XML – Non-contact codes
- NOVACURR.XML – Curriculum blocks
- TBTR*.XML – Lessons per year. There may be multiple files of this type; ensure all are included.
A summary panel shows how many year groups, curriculum blocks, lessons, and non-contact codes will be imported.
Managing files:
- Click Replace to remove a file, then browse or drag-and-drop a new one
- Click the tick icon to replace a file and go straight to file selection
- The wizard validates files before continuing. If any are missing or invalid, the panel highlights the issue – click Retry to remove and re-upload.
Step 2 Map imported periods to system periods
The wizard shows the wTimetable periods and, where possible, automatically maps the imported Nova‑T6 periods to the corresponding wTimetable periods in sequence.
- Each imported period must map to exactly one system teaching period
- This ensures lessons are placed in the correct timetable slots
The number of imported periods that have been assigned to wTimetable periods is displayed. You can adjust mappings using the dropdown for each period. A side panel shows lessons in each period to help you verify mappings.
Step 3 Match lessons to blocks
For each Year Group, the wizard attempts to match Lessons (TBTR) to Blocks (NOVACURR).
- Exact matches are hidden by default
- Each Year Group shows how many blocks are matched
Review and adjust:
- Select a Year Group to review suggested pairings for the remaining unpaired Lessons and Blocks entities. Selecting a different lesson updates the suggested block and vice versa.
- Entities in blue are in both Lessons and Blocks, and items in yellow are only found in one of those.
- Accepting the suggested pairing will import all lessons and blocks.
The Suggested Pairings summary at the bottom of the popup will show as either Overlap or Superset:
- Overlap – Lessons and Blocks share some subjects but not all.
- Superset – A more confident Overlap, where one side fully matches the other.
Click Confirm Pair to accept the suggested pairings.
Tip: For best results, you should pair all lessons and blocks for each year group for best results, though you can proceed without completing all pairs.
Note: Unticking the following checkboxes changes the behaviour as follows:
- Hide already confirmed pairs – when unticked, automatically matched pairs are shown.
- Automatically select suggested pairing – when unticked, you can manually select any Lesson and Block combination for pairing.
To complete step 3, tick: I understand all existing blocks, bands, and non-contact code entries will be permanently replaced by this import.
Then click Replace and Import.
Step 4 Import Complete
A summary screen shows what entities were matched and how many were created. Closing the popup takes you to the Project page. Navigate back to the wTimetable where your imported timetable is ready for review.