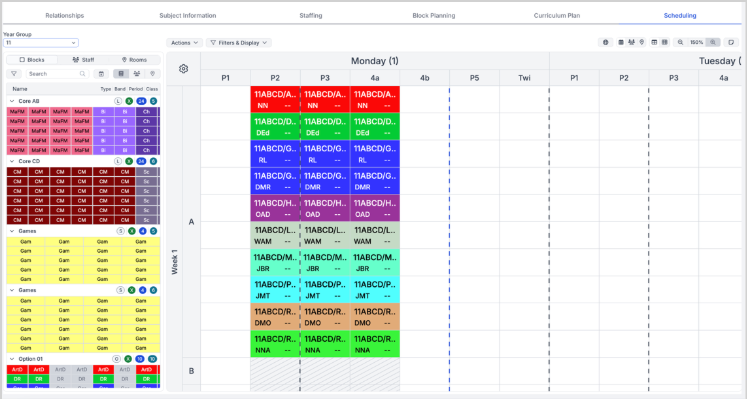
The wTimetable new UI introduces a redesigned scheduling experience focused on making better use of screen space, improving performance, and simplifying navigation.
Use this guide to learn about the enhancements introduced in the new UI.
- Switching to the new UI
- Scheduling Grid
- Side Panels
- Scheduling
- Assigning Staff and Rooms
- Left-click functions as right-click
- Session Conflicts Notifications
- Blocks on days default rules
- Year Group Simple View
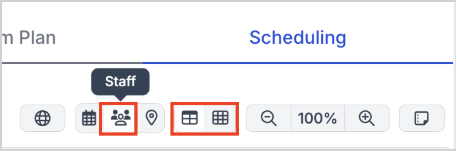
- Staff View
- Rooms View
- Non-Contact Codes
- Filters & Display
- Scheduling Overview
- Zoom In and Out
Access: The permissions required to access wTimetable are configured within the Timetable module of Config > Setup > Roles and Permissions. Select the Access checkbox for Timetable App to grant access to users assigned to the selected role.

Further guidance: wTimetable End-To-End Guidance
Switching to the new UI
You can easily switch between the current wTimetable interface and the new UI at any time.
- Use the Current UI and New UI buttons to switch between interfaces.
- The system will initially open in the current UI.
- When you switch interfaces, you will be returned to the Project page.
- Your preferred interface selection is saved and automatically applied in future sessions.
This flexibility allows you to explore the new scheduling experience while retaining the option to return to the current UI whenever needed.

Scheduling Grid
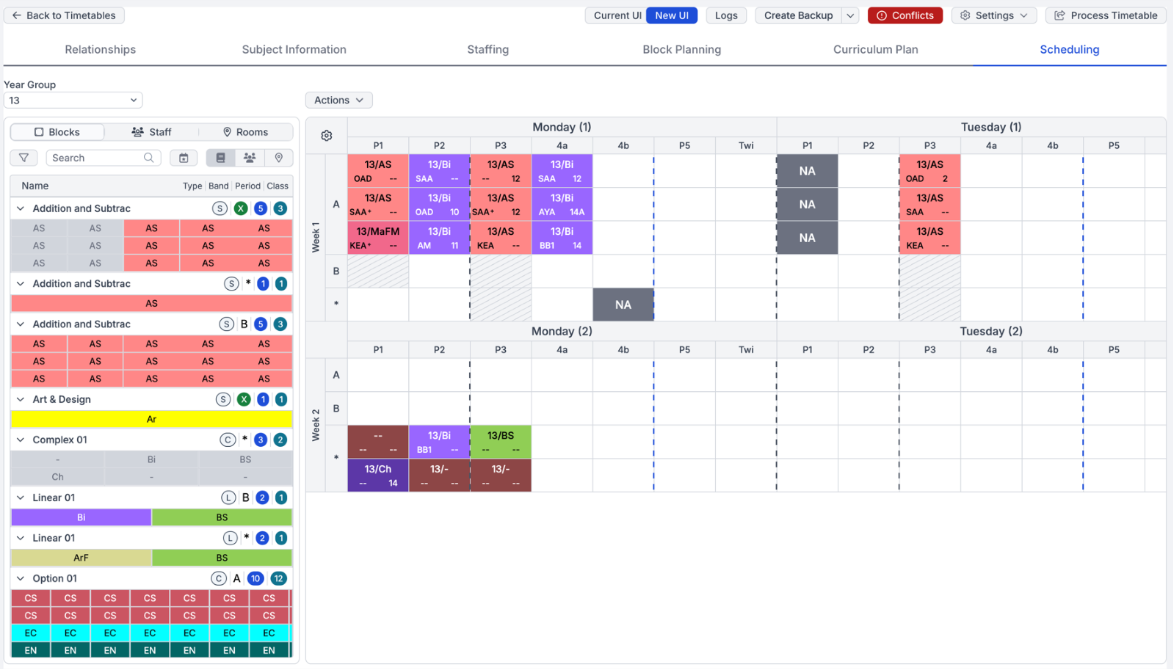
The scheduling grid has been redesigned to maximise available screen space and improve usability.
- Vertical week layout for easier timetable navigation.
- Reduced unused whitespace, allowing more timetable data to be displayed.
- Smaller period column to increase available scheduling space.
- Faster grid performance and responsiveness.
- Resizable side panels with drag-to-resize and double-click hide/show functionality.
Side Panels
The side panels have been redesigned to focus exclusively on active scheduling components (Blocks, Staff and Rooms).
Blocks Panel Enhancements
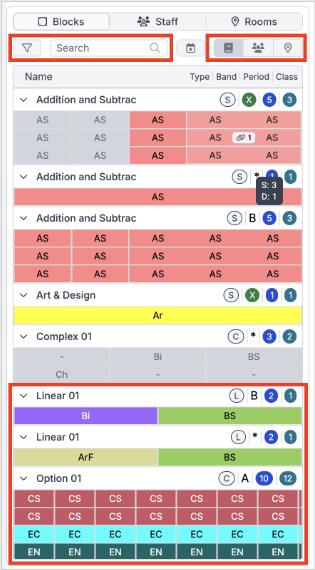
- New search functionality for quickly locating blocks.
- Filter blocks by both Band and Block Type.
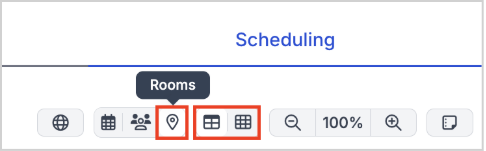
- New Rooms View.
- Hover indicators for linked periods.
- Hover breakdown of double and single periods.
- Expanded block display by default, with optional collapse controls.
- Show Unscheduled moved into the Blocks panel filter options.
Staff Panel Enhancements
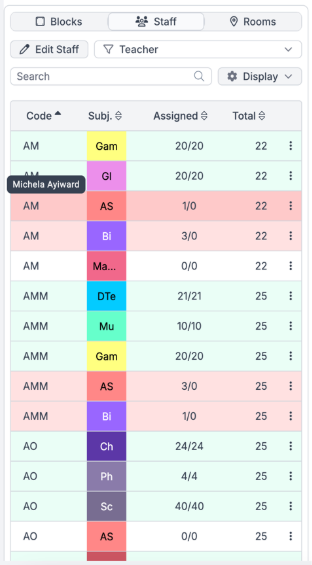
- Hover over a Staff Codes to display full Staff Names.
- Staff exceeding allocated contact time are highlighted in red.
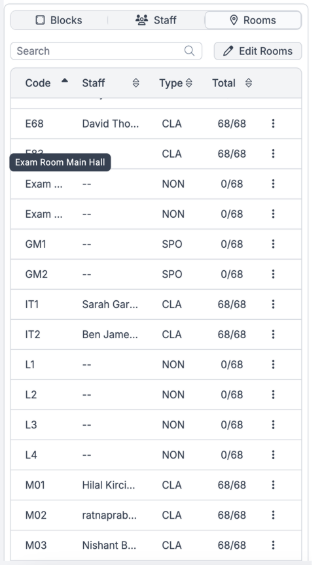
Rooms Panel Enhancements
- Hover over Room Codes to display full Room Names.
Scheduling
One of the biggest improvements is the move from drag-and-drop scheduling to a more efficient click-to-schedule workflow.
Schedule a Session
To schedule a session:
- In the Blocks panel, left-click to select a block period/class.
- The selection will be highlighted with a border.
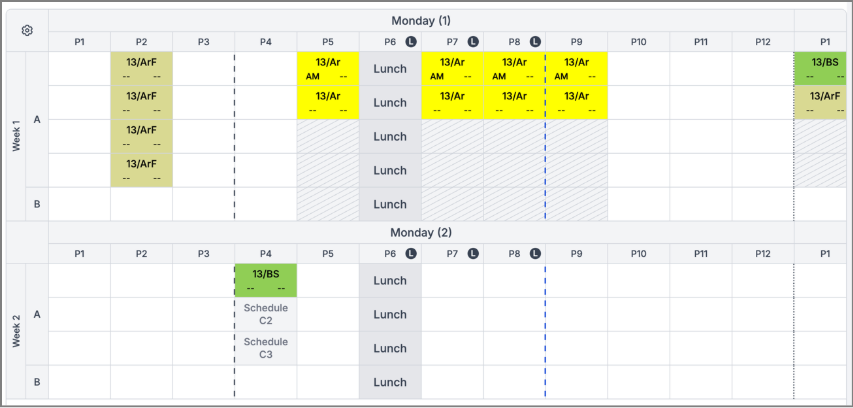
- Review the highlighted availability in the grid:
- Green – No conflicts (recommended)
- Yellow – Will create a conflict but can be scheduled (e.g. staff, rooms, or timetable specification rules)
- Red – Cannot be scheduled (e.g. unavailable or restricted)
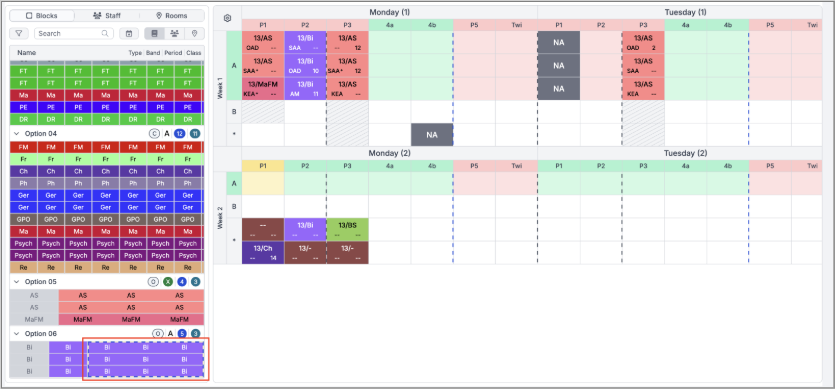
- Left–click an available slot to schedule.
- The scheduled session will appear greyed out in the Blocks panel.
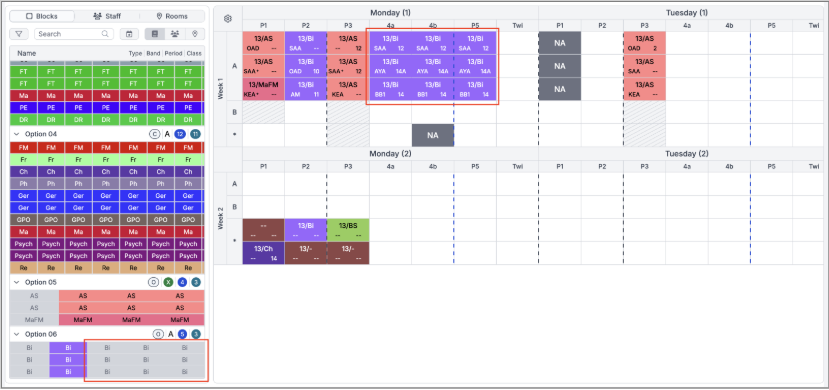
Move scheduled sessions
Sessions can be moved using the same simple left-click approach.
- In the Scheduling grid, left-click a scheduled session.
- The selection will be highlighted with a border.
- Review the highlighted availability in the grid:
- Green – No conflicts (recommended)
- Yellow – Will create a conflict but can be scheduled (e.g. staff, rooms, or timetable specification rules)
- Red – Cannot be moved to this period (e.g. unavailable or restricted)
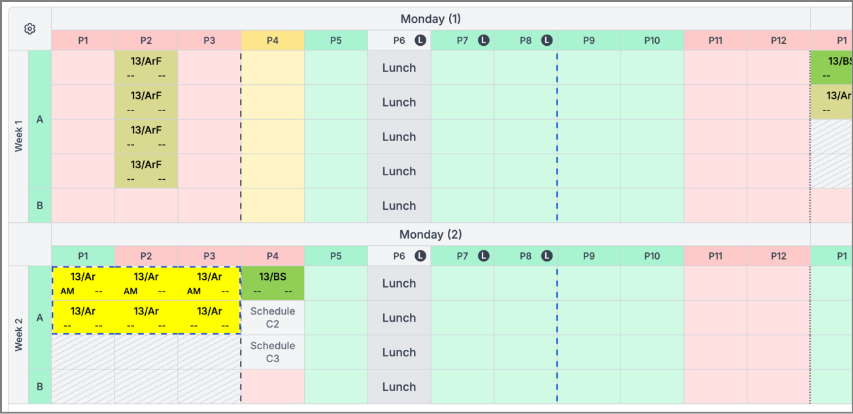
- Hovering over a valid destination will display a hand cursor.
- Left-click an available slot to schedule.
- The session will be moved to the new period and removed from its original timetable position.
Assign Staff and Rooms to a scheduled session
Assigning staff and rooms to sessions can be actioned using the same simple left-click approach.
- In the Staff or Rooms side panel, left-click a staff member or room.
- The selection will be highlighted blue.
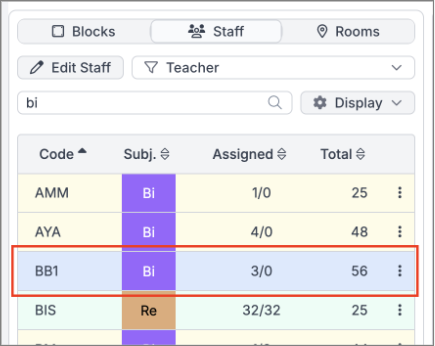
- Left-click a scheduled session to assign the staff or room.
- The staff member will remain selected for you to assign to more than one session if necessary.
- Click on the staff member again to unselect.
Tip: Hold Shift to select and assign additional staff.
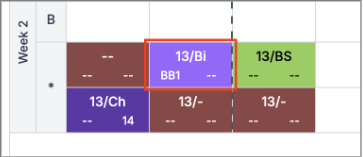
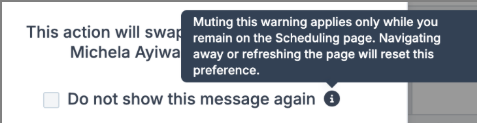
When a user attempts to assign a selected Main Staff member to a session that already has an assigned Main Staff member, a confirmation popup will be displayed asking the user to confirm they would like to proceed.
Click Proceed to swap the existing assigned Staff member with the selected Staff member.
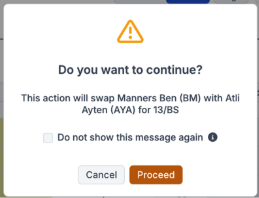
Note: Select Do not show this message again before clicking Proceed to hide the confirmation popup for the current Scheduling page session. Staff swaps are applied immediately without confirmation until you leave the page. When you return, the popup is displayed again and the checkbox is reset to unchecked.
Assigning Staff and Rooms
The following enhancements have been made when assigning staff and rooms to sessions in the Year Group View.
Swap Staff and Rooms
When replacing an existing Main Staff assignment, the second click has been changed from a left-click to a right-click.
- Left-click the scheduled session that has the staff member you want to swap.
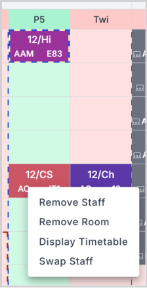
- Right-click the scheduled session that has the second staff member you want to swap.
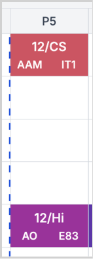
- Select Swap Staff from the menu.
- The session will swap between the staff members.
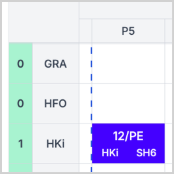
Move Staff and Rooms
The new UI supports moving staff or room assignments within the same period.
This example demonstrates how to move a scheduled session to another staff member.
- Left-click the scheduled session that you want to move. E.g. Staff Code GRA and P5.
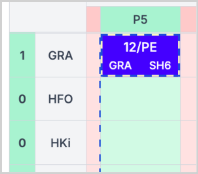
- Left-click where you want to move the session. E.g. Staff Code HKi and P5.
- The session will be scheduled with the new staff member.
Left-Click Functions as Right-Click
As left-click is now used for selection and scheduling, many actions previously available through left-click are now accessed via right-click menus.
Year Group View
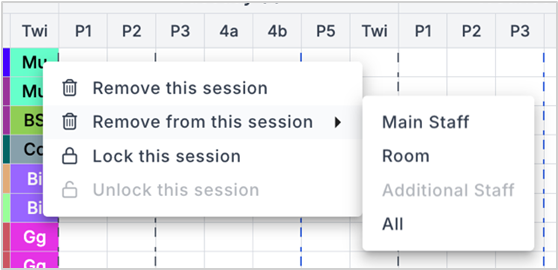
Right-click a scheduled session to Remove this session, Remove from this session, and Lock/Unlock this session.
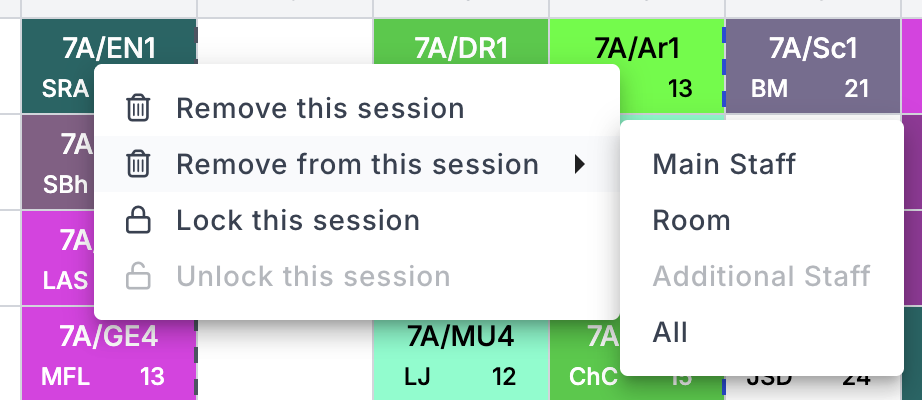
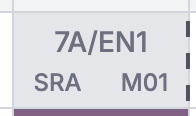
Note: When you lock a session in the new UI it becomes greyed out.
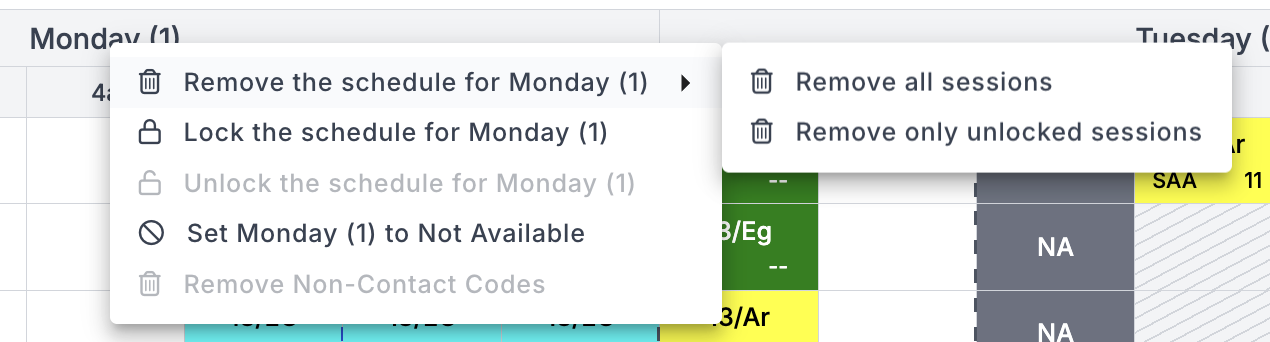
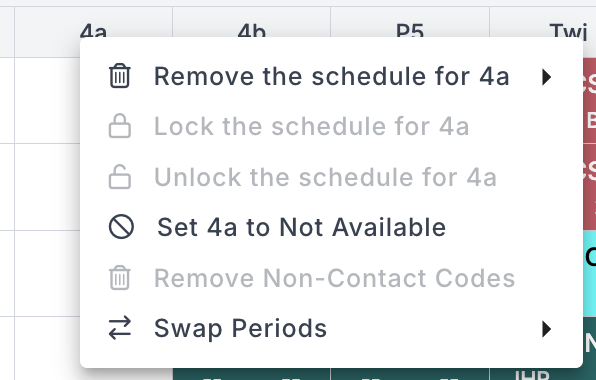
Right-click a header (week, band, cog) in the scheduling grid to Remove the schedule for, and Lock/Unlock the schedule for.

Right-click a header (day, period) in the scheduling grid to Remove the schedule for, Lock/Unlock the schedule for, Set to Not Available, and Remove Non-Contact Codes.
Right-click a period header only, in the scheduling grid to Swap Periods.
Staff and Rooms View
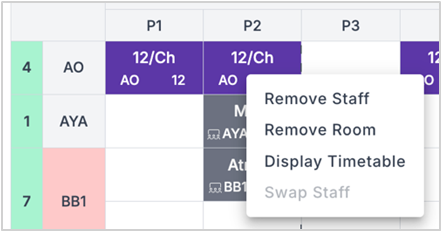
Right-click a scheduled session in the scheduling grid to Remove Staff, Remove Room, Display Timetable, and Swap Staff.
Session Conflict Notifications
When you select a block from the left-hand panel to schedule, the scheduling grid highlights sessions using colour-coded indicators:
- Green: No conflicts.
- Amber: Will create a conflict but can be scheduled.
- Red: Cannot be scheduled.
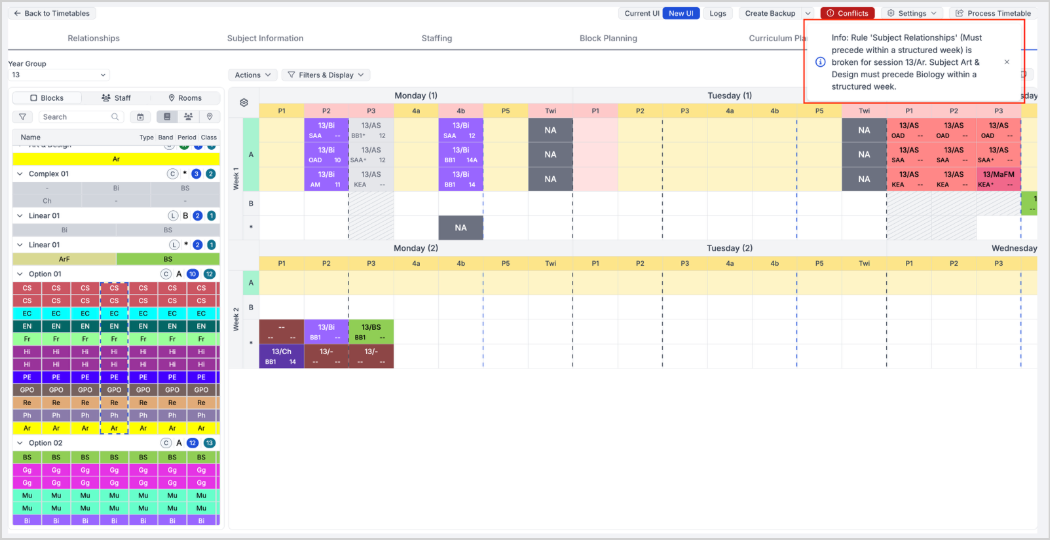
In addition to the grid highlighting, conflict notifications are displayed in the top-right corner of the screen.
When you hover over an amber or red session, the corresponding conflict notification is shown.
Conflicts may be caused by:
- Timetable Specification constraints
- Non-Contact Code (NCC) conflicts
- Staff teaching conflicts
- Room teaching conflicts
Blocks on Days Default Rules
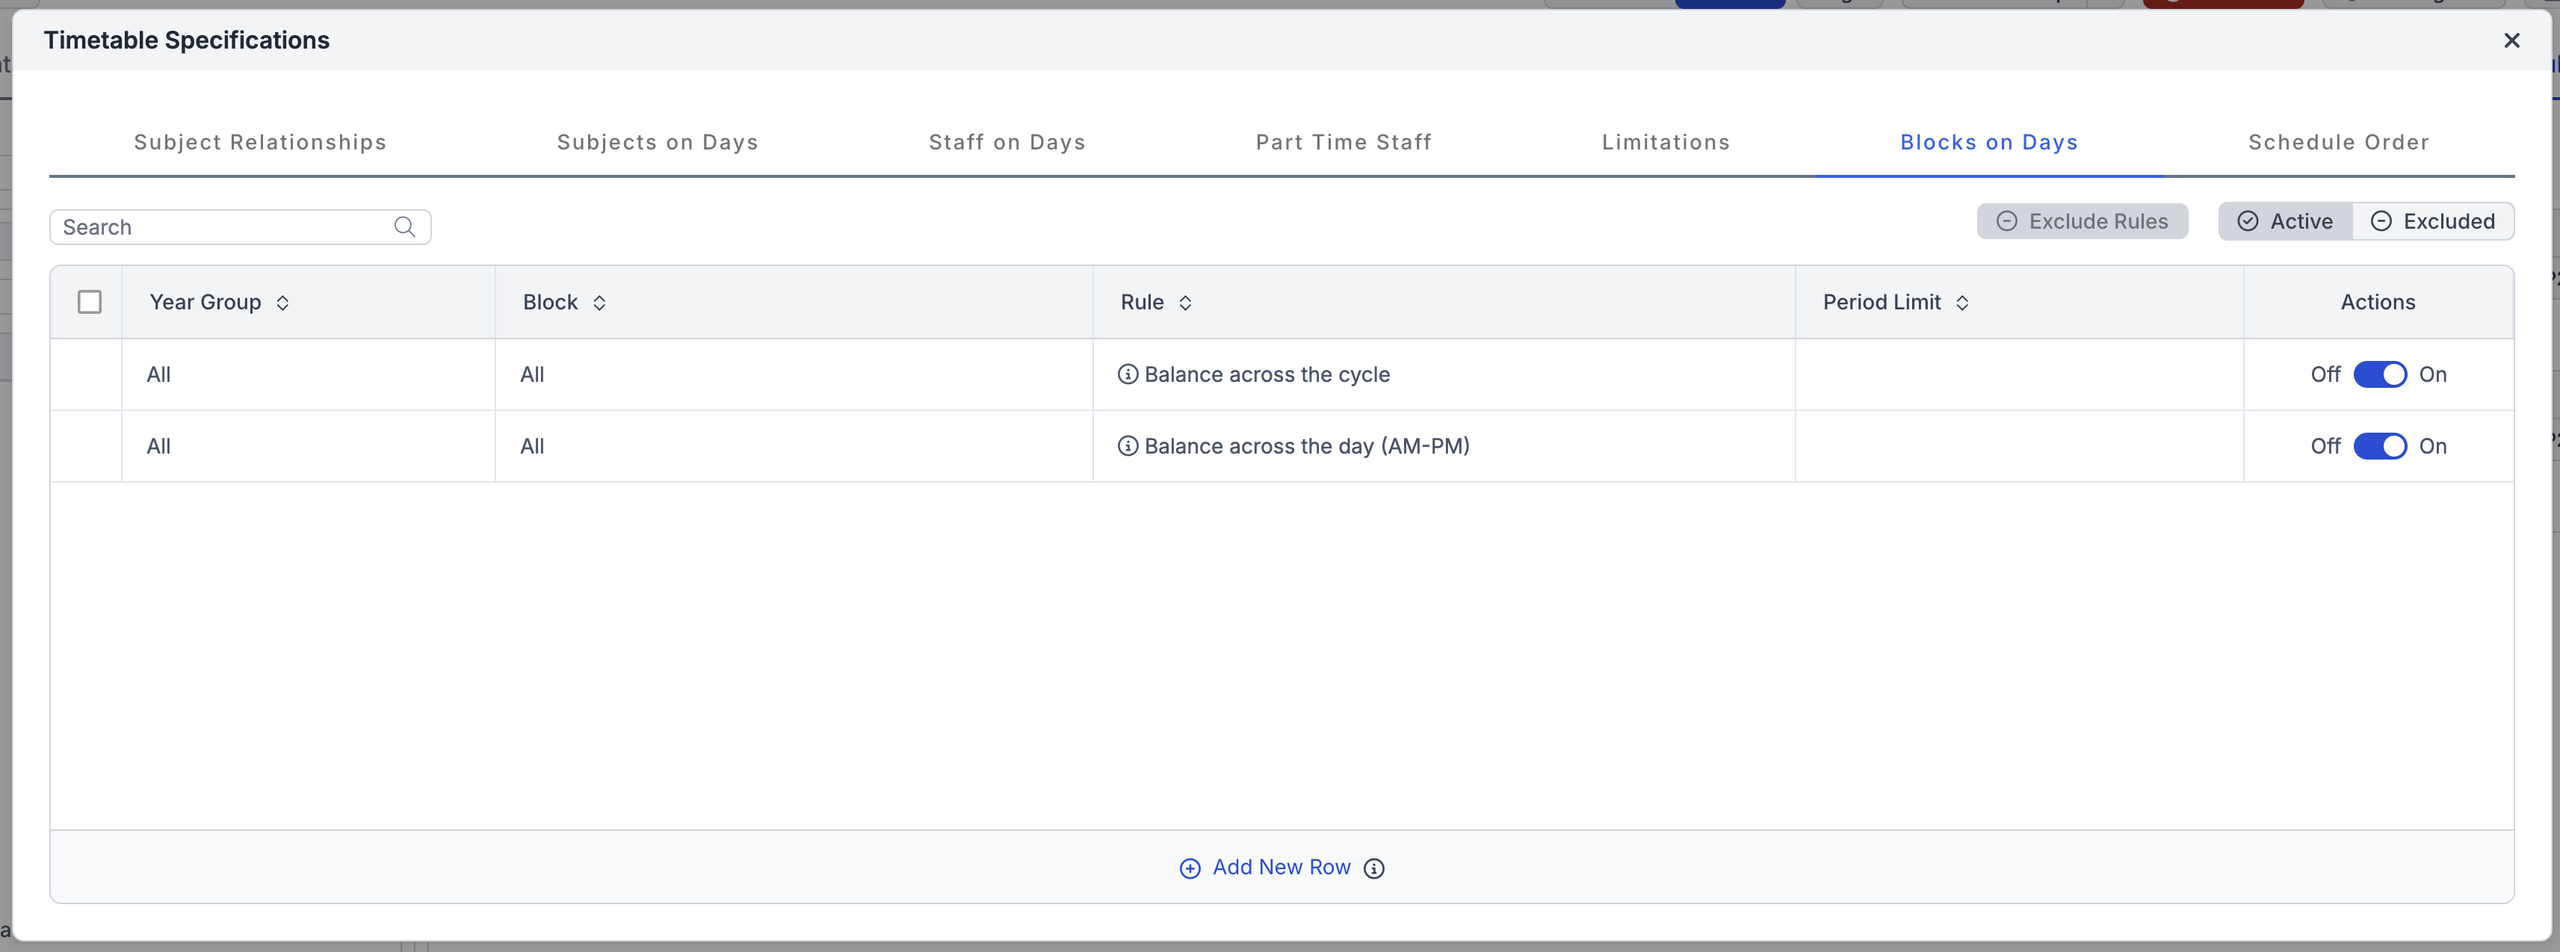
Default rules configured in Actions > Timetable Specifications > Blocks on Days are now always visible, making timetable rule management clearer and easier to review.
Year Group Simple View
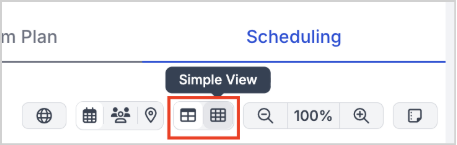
Simple View now consistently displays Subject Codes for all session types, including Linear, Option, and Complex blocks.
Select Simple View to display only the Subject Code for each session, or Detailed View to restore the full session display.
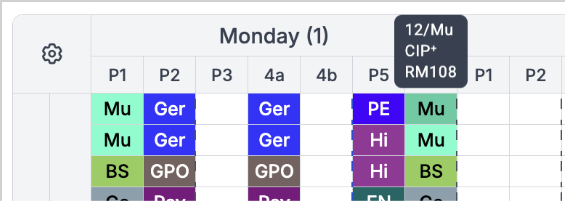
Hover over a session to view the Class Name, Staff Code, Additional Staff indicator (where applicable), and Room Code.
As in Detailed View, you can right-click a session in Simple View to perform the same actions.
Staff View
The following enhancements have been made to the Staff View.
The left-hand column displays the Staff Code. Hover over a Staff Code to view the full staff name.
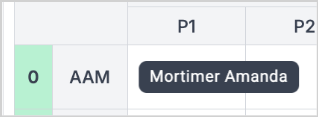
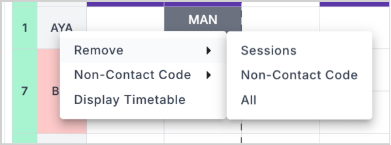
As in the current UI, right-click a Staff Code to: Remove (Sessions, Non-Contact Codes, or All) add a Non-Contact Code and Display Timetable.
In Detailed View, sessions display the Class Name, Staff Code, and Room Code.
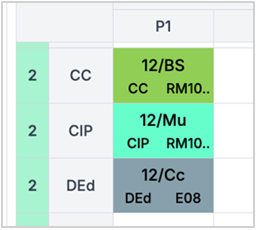
In Simple View, sessions display the Subject Code only. Hover over a session to view the Class Name, Staff Code, Additional Staff indicator (where applicable), and Room Code.
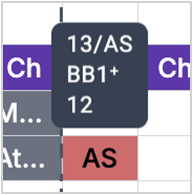
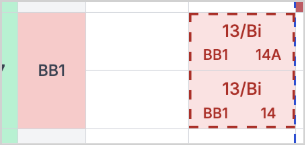
In both Detailed View and Simple View, staff conflicts are highlighted with a red border.
Rooms View
The following enhancements have been made to the Room View.
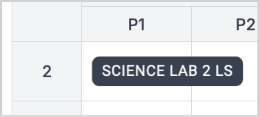
The left-hand column displays the Room Code. Hover over a Room Code to view the full room name.
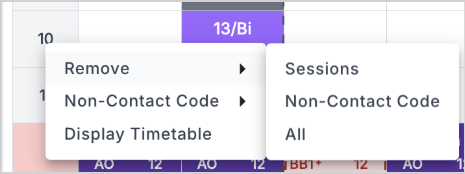
As in the current UI, right-click a Room Code to Remove Sessions, Non-Contact Codes (NCCs), or All, or to add a Non-Contact Code or Display Timetable.
In Detailed View, sessions display the Class Name, Staff Code, and Room Code.
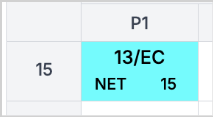
In Simple View, sessions display the Subject Code only. Hover over a session to view the Class Name, Staff Code, Additional Staff indicator (where applicable), and Room Code.
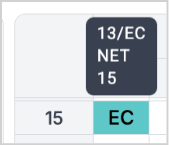
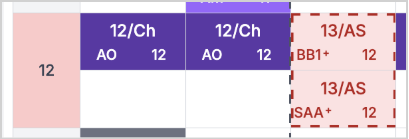
In both Detailed View and Simple View, room conflicts are highlighted with a red border.
Non Contact Codes
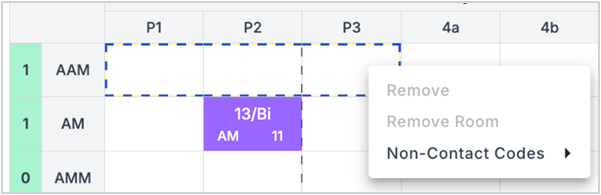
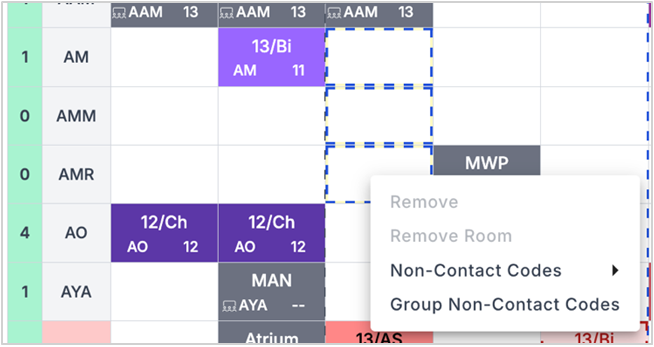
In the new UI, you can select multiple cells and apply NCCs to all selected cells at the same time.
To add a NCC to the Staff and Rooms view:
- Left-click one or more empty cells simultaneously.
- Right-click and choose Non-Contact Codes to add an NCC to all selected cells at once.
NCC session display varies by view:
- Staff > Detailed View: NCC, Staff Code, and Room Code.
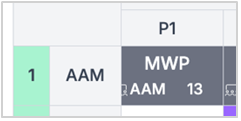
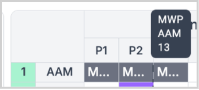
- Staff > Simple View: NCC only. Hover to view the Staff Code and Room Code.
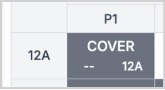
- Room > Detailed View: NCC and Room Code.
- Room > Simple View: NCC only. Hover to view the Room Code.

Remove/Amend Non-Contact Codes
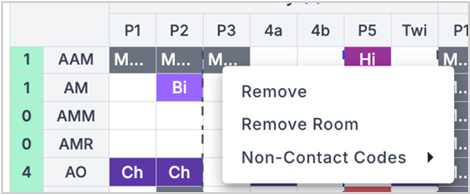
To remove or amend an NCC, right-click to Remove, Remove Room (Staff View only), or Non-Contact Code (to amend the NCC).
Add Group Non-Contact Codes
Staff view only.
In the new UI, you can create a Group Non-Contact Code from the scheduling grid.
To create a Group Non-Contact Code:
- Left-click to select two or more sessions in the same period.
- Right-click, and choose Group Non-Contact Codes.
- The Add Non-Contact Code Group popup will open.
Note: Once created, a Group NCC can be edited in Actions > Non-Contact Codes.
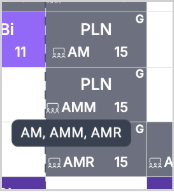
To view all Staff Codes in a Group NCC, hover over the Staff Code in Detailed View, or hover over the session in Simple View.
Filters and Display
A new Filters & Display menu consolidates several timetable display and analysis options.
- Filters
- Show conflicts (Year Group view only)
- Check for missing Staff Room (Year Group view only)
- Display unassigned sessions (Staff and Rooms view only)

Filters
Use filters to focus on specific timetable data. Select your criteria and click Apply.
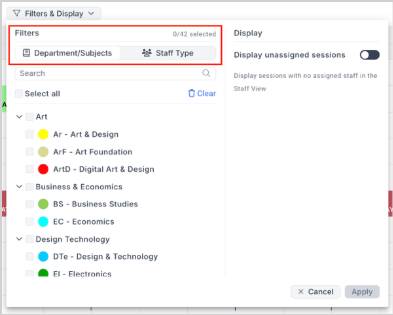
Department/Subject
Filter scheduled sessions by Department or Subject.
Sessions associated with unselected subjects are greyed out, while the details of all sessions remain visible.
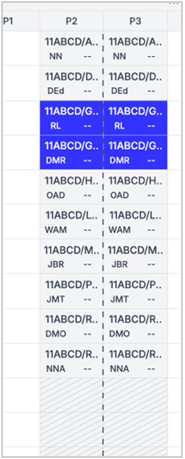
Staff Type
Available in the Staff view only.
When a Staff Type is selected, staff members who do not match the filter, and their corresponding rows in the timetable grid, are hidden from view.
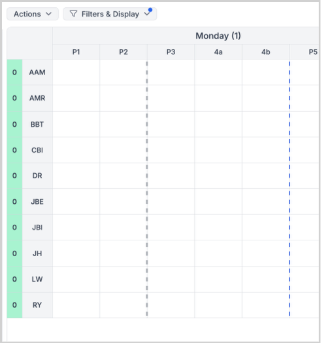
Show conflicts
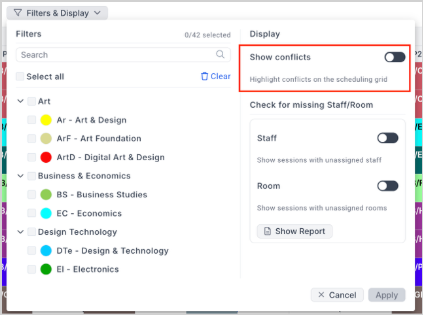
Available in the Year Group view only.
The Show Conflicts toggle highlights sessions with scheduling conflicts in the grid.
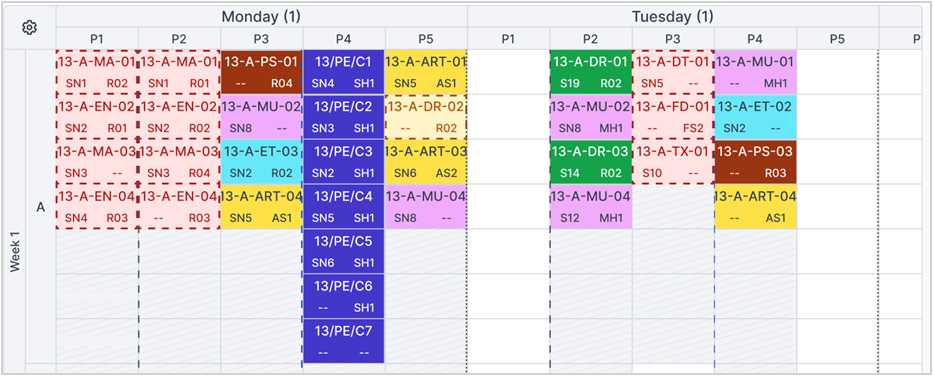
Conflict indicators are colour-coded as follows:
- Red: Active conflicts
- Amber: Accepted conflicts
Note: If a session has both active and accepted conflicts, the active conflict (red) takes precedence.
Check for missing Staff Room
Available in the Year Group view only.
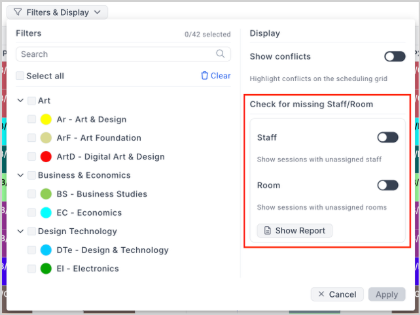
The Check for Missing Staff/Room toggles help identify sessions with unassigned resources:
- Staff – Show sessions with missing staff
- Room – Show sessions with missing rooms
- Staff and Room – Show sessions with both staff and room unassigned
Note: Thise functionality was previously located in the Actions dropdown.
Sessions that do not match the selected criteria are greyed out, while all session details remain visible.
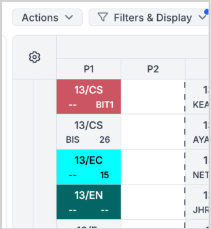
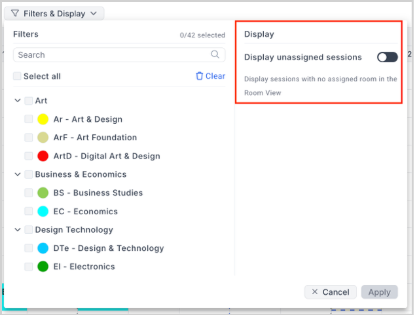
Display unassigned sessions
Available in Staff and Rooms views only
The Display unassigned sessions toggle displays sessions that do not have an assigned staff member and room.
Enabling or disabling this option in either the Staff or Rooms view automatically applies the setting to both views.
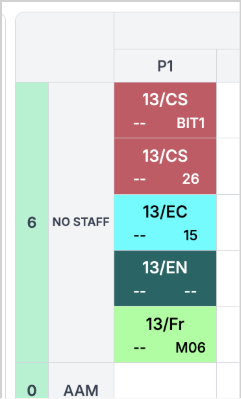
This feature improves on the current UI by:
- Displaying all unassigned sessions, with no maximum limit.
- Positioning the No Staff and No Room rows at the top of the grid for easier access.
Note: In the current UI, a maximum of four unassigned sessions could be displayed.
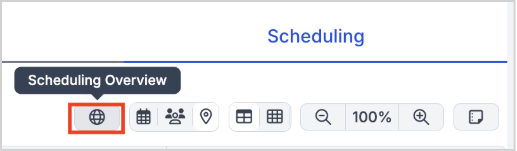
Scheduling Overview
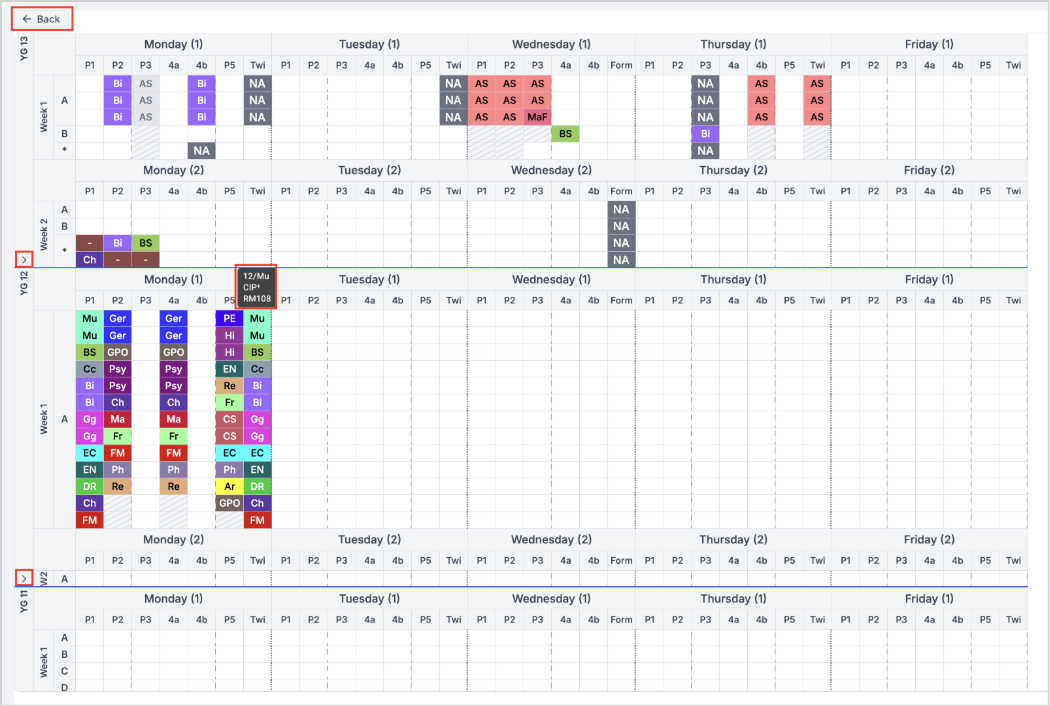
A brand new Scheduling Overview provides a high-level summary of timetable scheduling across all year groups.
Features include:
- Expandable and collapsible year groups.
- Full timetable visibility across weeks and days.
- Subject code display.
- Detailed session information available on hover.
Select Back to return to the Scheduling page.
Zoom
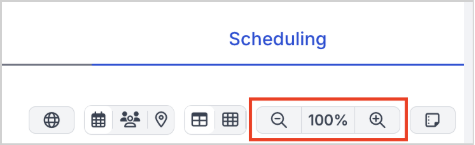
The Scheduling page includes zoom controls in the new UI.
Zoom Levels
- Minimum: 25%
- Maximum 150%
- Adjustable in 25% increments
The zoom setting is reset when you navigate away from the Scheduling page.