Use this guide to view and perform the following actions following a message received from a Parent/Carer
Access: The minimum permissions required to access the Received Messages page is found in the Communication Module of Config>Setup>Roles & Permissions.

From the left Menu go to Modules > Communication > Communication > Received Messages.

Any Messages received from a Parent/Carer will be displayed on the Received Messages page.
By default the page with show messages received today, use the Start Date and End Date to amend to view.
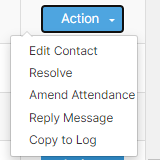
The Action column far right has a dropdown list with various Actions.

Edit Contact
Selecting the Edit Contact option from the Actions dropdown list will open a dropdown list in both the Contact Name and Student Name columns.
In this example the Contact is also the Contact for another Student, as Sammy has a Sibling. Here you can select <NOT SELECTED> to view the Attendance for both Students or select a particular Student, clicking the Green Disc to Save or the Red X to discard your selection.

Note: When viewing using the <NOT SELECTED> option both the Student Name and the Tutor Group columns will be empty.
Amend Attendance
Select either <NOT SELECTED> or a Student and click the Amend Attendance option from the Actions dropdown list.

The content of the Message is automatically added to the Mark Comments field by default. The first Unmarked or Absent Mark will be highlighted green ready to add the Amended Mark, click to the left of the name to select the whole Day to add a Mark, this will now display green. In the example the Marks have a pink edge, this shows the Mark has already been entered with the Comment and cannot be changed here. However, received Comment Messages can be edited before saving to the Marks selected.
Note: If there is more than one Student associated, they will be displayed on separate rows if the option in the Student Name column is set to Not Selected.
Note: The Amend Attendance pop-up will open with the current Date to add past Marks change the Date.

Further Actions
Click on a message and selecting Resolve will mark the message as Resolved.

Click Reply to Reply to a Received Message

Type your Reply in Message and click Send

Click Copy to Log to Copy the selected Message to the Student Communication Log