
The Suspend Classes page allows specific Periods of a defined Class to be Suspended. In this guide we’ll look at configuring Class Suspensions and then how to process a Class Suspension.
Note: Suspending Classes will not collapse the Timetable. The purpose of Suspending Classes is to free up Rooms and/or Staff so that they can be used for Cover.
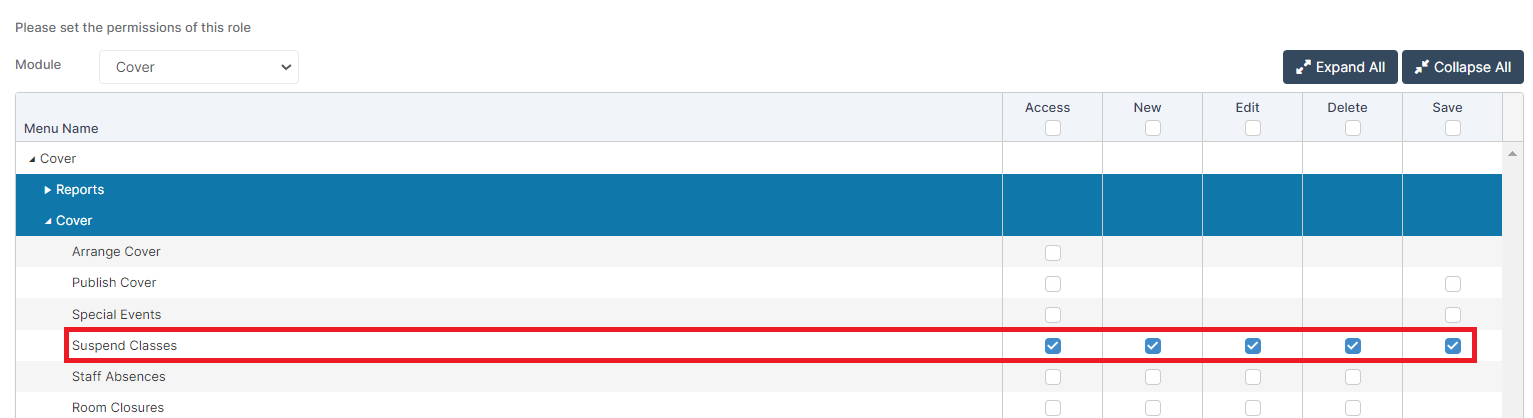
Access: The minimum permissions required to access Suspend Classes can be found in the Cover module from within Config > Setup > Roles & Permissions.
Also see: How to Configure Cover
Configuring Class Suspensions
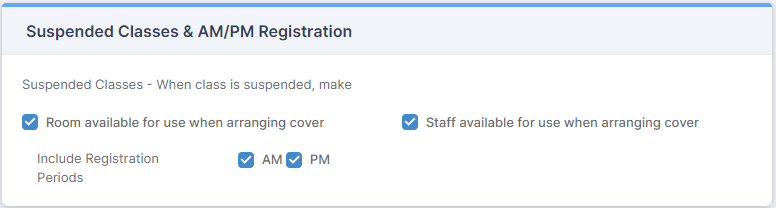
There are some settings you will need to configure to ensure that Class Suspensions work how you would expect. From the left Menu go to Config > Cover > Configurations
There are two Configuration options relating to Suspended Classes. The first option allows you to set a Room Available for use when arranging Cover, when a Class is Suspended. The second option allows you to set a Staff Member as Available when arranging Cover, when a Class is Suspended.
Suspending Classes
From the left Menu go to Modules > Cover > Cover > Suspend Classes.
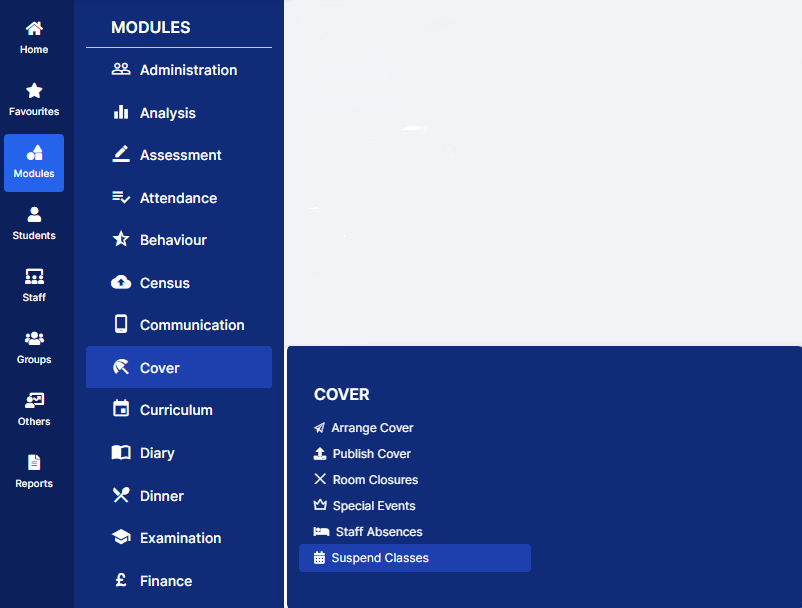
This will open the Suspend Classes page.

To create a new Class Suspension, click the New button, this will open the Suspend Classes pop-up
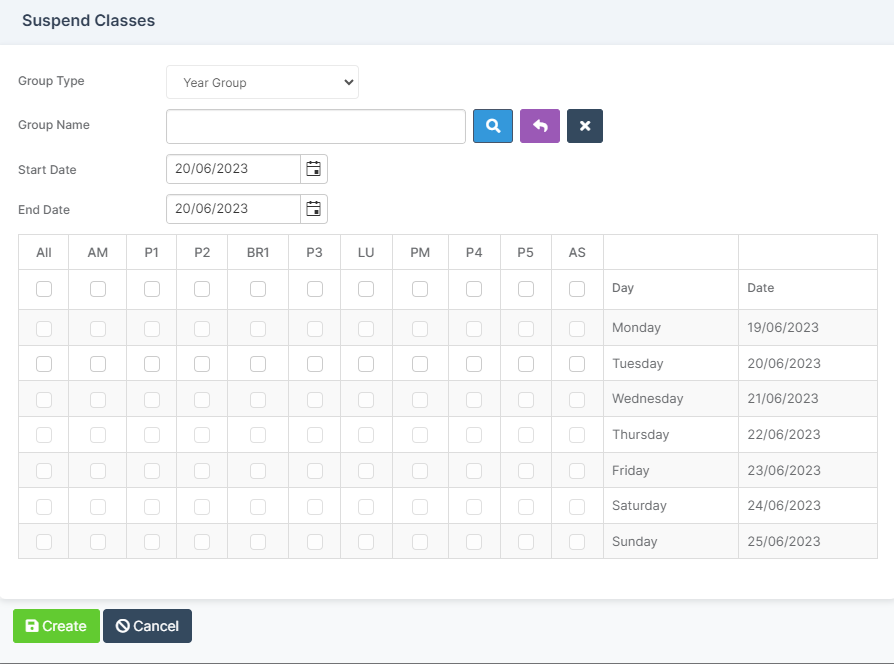
Select the options:
- Group Type – select from Class, Year Group and Tutor Group
- Group Name – enter the Name or use the Search option
- Start Date/End Date – select the Date Range the Suspension will cover
Select Individual Periods for Suspension by ticking each box. Do this for each day that you wish to have a Suspension.
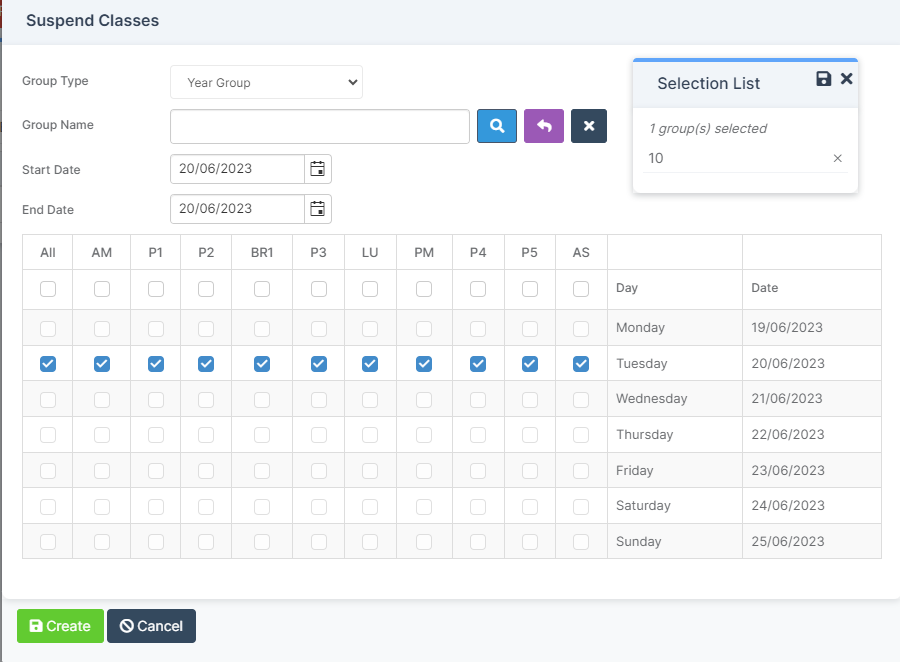
When finished click Create to Save.
The Suspension will now be displayed in the Suspend Classes table.
