In this guide, we will show you how to use the Quick Report conversion feature within Adhoc Reports.
This process does not affect or overwrite your original Report, it creates a separate copy as a Quick Report.
Pre-requisite: You must have an understanding of Adhoc and Quick Reports within the MIS, You also need to have some Adhoc Reports already created.
Access: There is no standalone permission needed to access Quick Report conversion, it is readily available if you have access to Reports>Adhoc>View Reports. The permission for View Reports is found in the Reporting Module of Config>Setup>Roles & Permissions.
Any current Permissions will be retained within Converted Report. Quick Report Schedules will NOT be Converted and will need to be added manually.

See also: How to create a Quick Report and Reporting
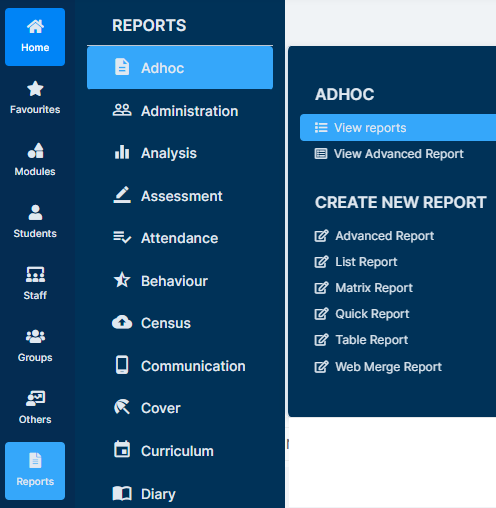
To begin, go to Reports>Adhoc>View Reports.
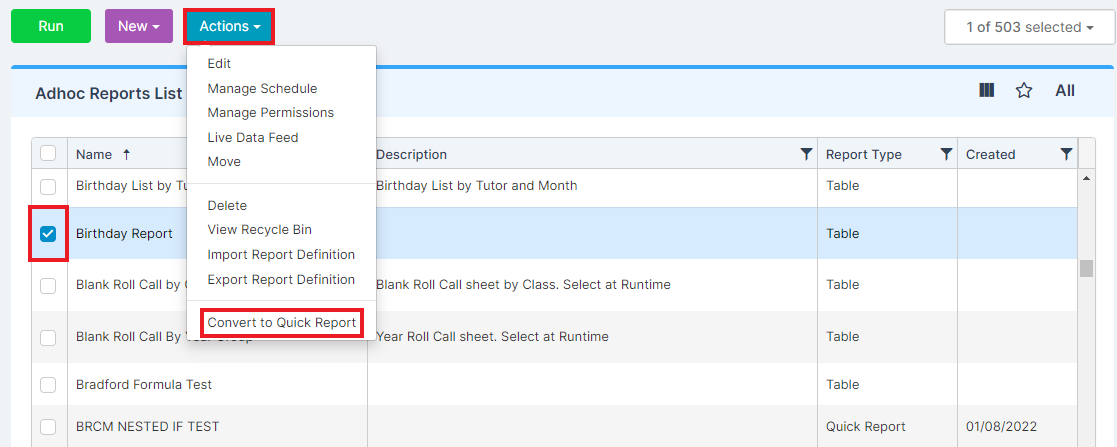
From there, select the Report(s) from the list so it is ticked, and press Actions>Convert to Quick Report.
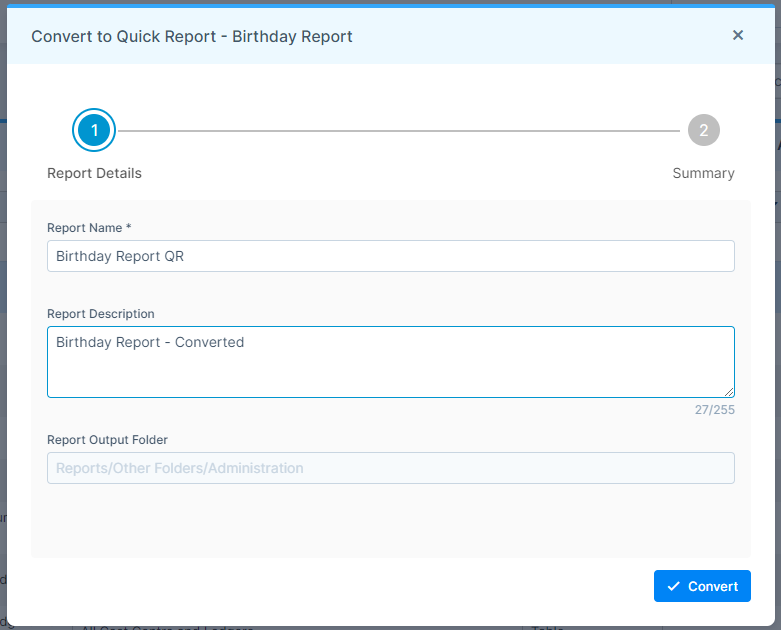
This will provide you with a wizard, where you need to complete the Report Details (Name and Description).
Once the Report Details are complete, press Convert.
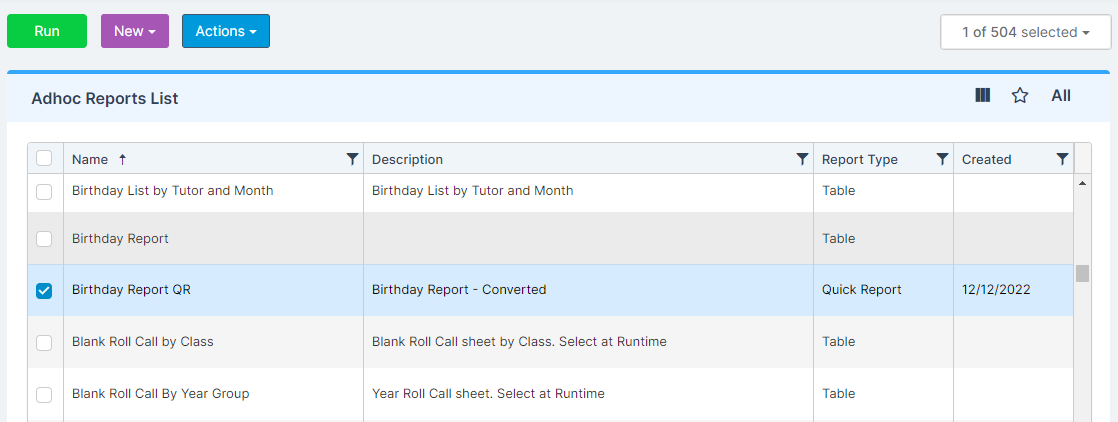
The original Report will remain in the Folder and a Converted Quick Report will be created in the same Folder, displaying QR at the end of the Name and will show as Report Type.
Once the conversion is complete, you will receive a success notification.
Press OK to complete the process.
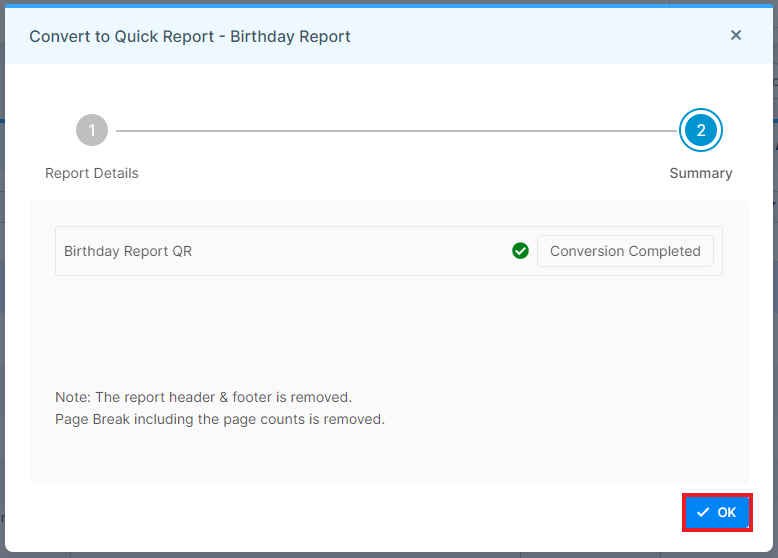
You will then see a Quick Report Conversion Summary


Hover over the i to see information on the Report. Use the top right Search to look for a report and use the Grid Actions to Copy, Export or Print the Summary.

You will then be taken back to the View Reports page, which will refresh automatically. Once it has refreshed, you will be able to see your newly created Quick Report.
