
In this guide, we will show you how to use the Import Pupil Choices page within the Options Module.
Access: The minimum permission required to use the Import Pupil Choices page is found in the Options Module of Config>Setup>Roles & Permissions.

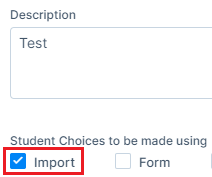
Pre-requisites: In order to use the Import Pupil Choices page, you must have already created an Options Setup which is published and had the Import ticked within the Setup Details.
See also How to use the Options Setup page and How to use the Review Pupil Choices page.
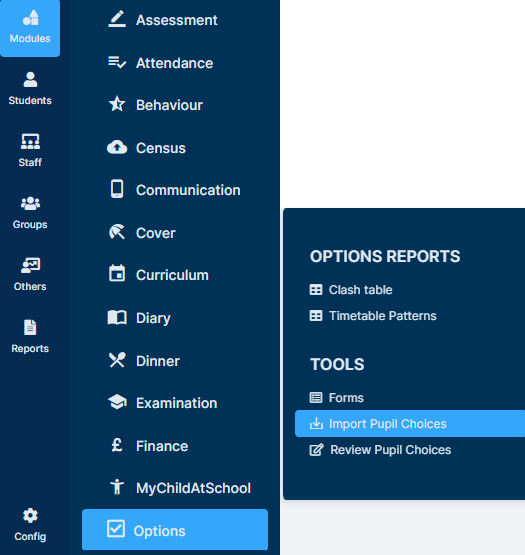
To begin, go to Modules>Option>Import Pupil Choices.
The Import Pupil Choices page will load and any active Options Setup which had Import ticked within the Setup Details will be visible.

You can either import pupil choices using the template or your own spreadsheet.
- How to Import Pupil Choices using the template
- How to Import Pupil Choices using your own spreadsheet
How to Import Pupil Choices using the template
Pressing the Info button will provide you with instructions/requirements for the Import.
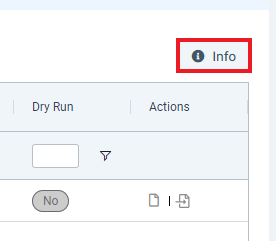
Please read this information carefully so that you enter the data correctly based on which Rules were set up. The template must be in CSV format to upload

Once you have read the requirements provided within the Info button, use the Download Template Button to export the Pupil Choices Template.
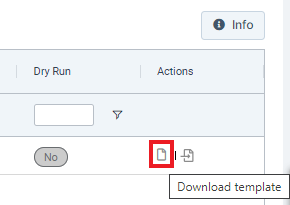
As long as you have no pop up blocker active or download windows open, the Template will download and appear at the bottom of your browser.

Once you open the Template, you can populate the Pupil Choices.
As specified in the Info section a few steps prior, the way you populate the choices here depends on which Rules you initially selected in the Options Setup.
In the example below, x’s are being used to indicate Pupil Choices because the rule set was Select 1 subject from each group.

Once the Pupil Choices have been entered, save the Template on your PC as a .CSV File. Only a .CSV File can be Imported with the Pupil Choices, .xls will not work.
Now return to the Import Pupil Choices page and press Import Template.

Select your Template and wait a few seconds for the Import to complete.
You will receive a success notification once it is done.
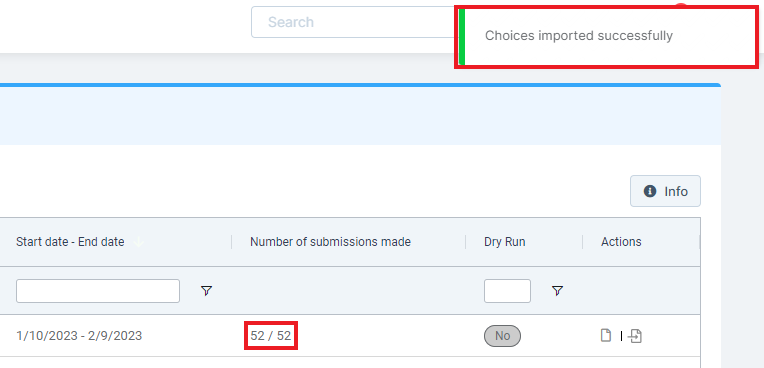
An information popup informs you that the choices require validation to update the submission. Users will need to go to the Review Pupil Choices page.

Go to Modules > Options > Review Pupil Choices

Select the Setup for review.
Click in the Actions column to review the pupil’s choices that have not met all of the rules, and validate them individually.
Note: The Rules met column is filterable to Yes / No.
The pupil’s choices will display the rules that have been broken. They will need to be amended and finally Validated.
Once all rules are met in the table, the Submit button becomes active and the user can Submit the choices into Setup.
Note: Another spreadsheet could be imported (with the validation process being repeated), and this will overwrite anything in the holding table, meaning duplicates will not be created of anything that has already been imported.
This concludes the process for Importing Pupil Choices using the template.
How to Import Pupil Choices using your own spreadsheet
Click the option to Import Own Spreadsheet.
Note: This process allows a CSV Spreadsheet to be Imported.
An Import Wizard will be displayed, with Step 1 Upload, after adding your your file, select Next.
Step 2, Spreadsheet Mapper, where the data on the Spreadsheet can be mapped with the system. Select which row the data starts from in Data start from row dropdown. Match the First Name, Last Name and Tutor Group to a column in the spreadsheet.

In step 2 Spreadsheet mapper, there is an Optional Columns dropdown. Selecting one or more of these will enable corresponding dropdowns to select a column for mapping. Note: 6th Form: Gender is available for 6th form only to add this field when creating new applicants.
Note: 6th Form: A mandatory dropdown labelled Date of Birth will also be displayed to select a column for mapping only for 6th form.
Selecting Next displays Step 3, Choices, where the column of Choices is Mapped to the Subject Group. Click Import.