Administrators can use this process to Bulk Assign Students to Classes, Tutor Groups and Bands by creating and Exporting a Spreadsheet from Bromcom to send to Departmental Staff to populate or amend and then Import back into the system.
Pre-requisites: You must have a thorough understanding of how Group Associations work in the MIS and an understanding of T-Sheets/Importing files.
If this process is being used to Bulk Assign Students to classes in the next academic year, please see our End of Year Guidance.
You cannot use the export/import routine within the Bulk Group Assignment tool to assign Pre-Admission students to groups. This will need to be done by selecting the relevant groups/students and clicking ‘Go’ or via Groups.
If you do not need to amend a spreadsheet before completing this process, see How to Bulk Assign Students to Groups.
Access: The minimum permissions required to access this feature are found in the Curriculum Module of Config>Setup>Roles & Permissions.

From the left Menu go to Modules > Curriculum and from Routines select Bulk Group Assignment

There are four options for adding Students to Groups which can be selected from the Bulk Update Type dropdown list. The options are, Class Memberships, Tutor Group Memberships, Class Memberships via Block and Band Memberships. In this example, we are assigning Class Memberships.
Note: Class Memberships via Block requires Students to have been added to Groups already.

Create the Export Sheet
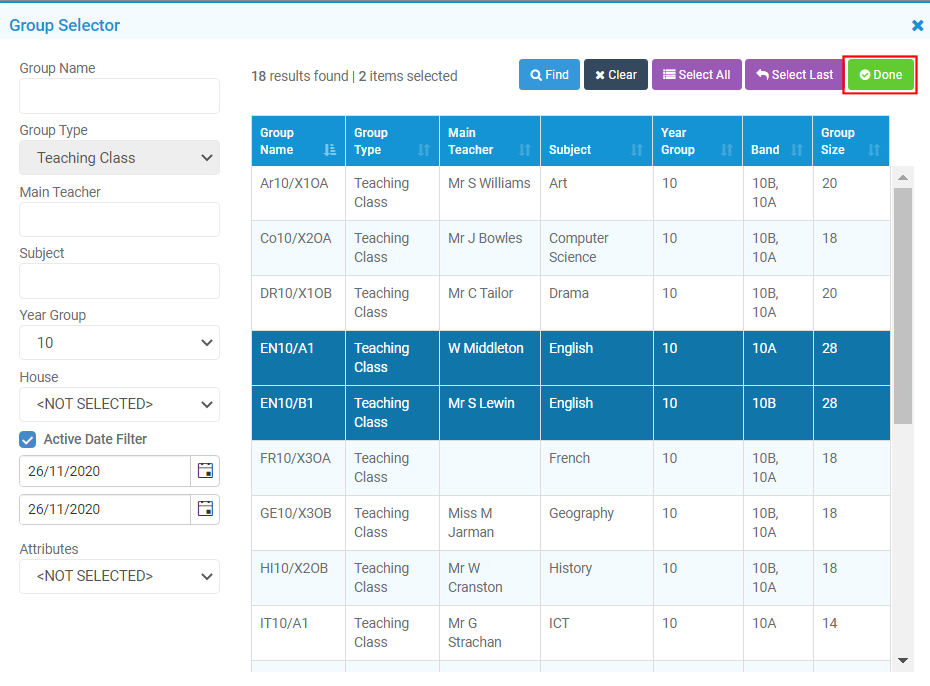
Select the Group Name of the Classes by clicking on the spy glass to the right of Group Name (this will be quicker than typing individual Groups). In this example 2 x Year 10 English classes have been selected.
Important Note: When searching for a Group in the next academic year, change the Active Date Filter in the Group Selector List to a date in the next Academic Year. This also applies when searching for students in the Student Selector List.

Select the classes you require and then click the Done button at the top right.
Next, find the Students using the associated Find button and again use the Filters to make the required selection of Students, select the students required and click Done to make the selection and return to the Bulk Assignment page. In this example the Year 10 Students have been selected to match the Year 10 English classes selected.

Click the Done button at the top right.

Click the Export button and then Export again. A csv. file will be downloaded with an export name, with a similar format to StudentClassExport_1907201912345. Rename this if desired.
Populating the Spreadsheet
The Spreadsheet can then be forwarded to the required Departmental Staff for example, the Head of English, to amend the 2 columns in this example populated with the capital letter T.
If populating students for the next academic year enter the capital letter T into each cell of the Groups required.
It is necessary to make sure that both Students and Groups have at least one T Membership. If no T exists for a Student or Group, these will not be Imported.
Important Note : In order to import the spreadsheet it is important to keep the format as exported from Bromcom.

Save the csv sheet once completed.
Importing the Spreadsheet
Once the Spreadsheet has been returned completed with amendments/additions ready to be imported, save the spreadsheet locally.
To Import the completed spreadsheet, there is no need to select Students or Groups first.
With the appropriate Membership selected from the dropdown list, click Import.

Complete the details, again paying attention to the Active On date.
If any of the selected Groups for example Teaching Classes have an individual End Date before the Active on date selected, then these Groups will not appear in the Import.
The Start Date is the date the Students will be assigned to the Groups selected, so in the example that the next academic years memberships are being updated the Start Date would be in the next academic year.
Click Import when you’re done.
Important: Any files below 40kb will Import very quickly. Larger files above 40kb will continue to Import in the background as long as you don’t log out of the MIS. You will be notified when it has completed.

Changes can be made to this page before saving, using the tools available, then click the Save or Save & Close button.

