
In this guide, we will cover how to create a Club in Bromcom and limit which Students it is available to in MCAS. This can be used to create a discounted version of a Club for certain Students.
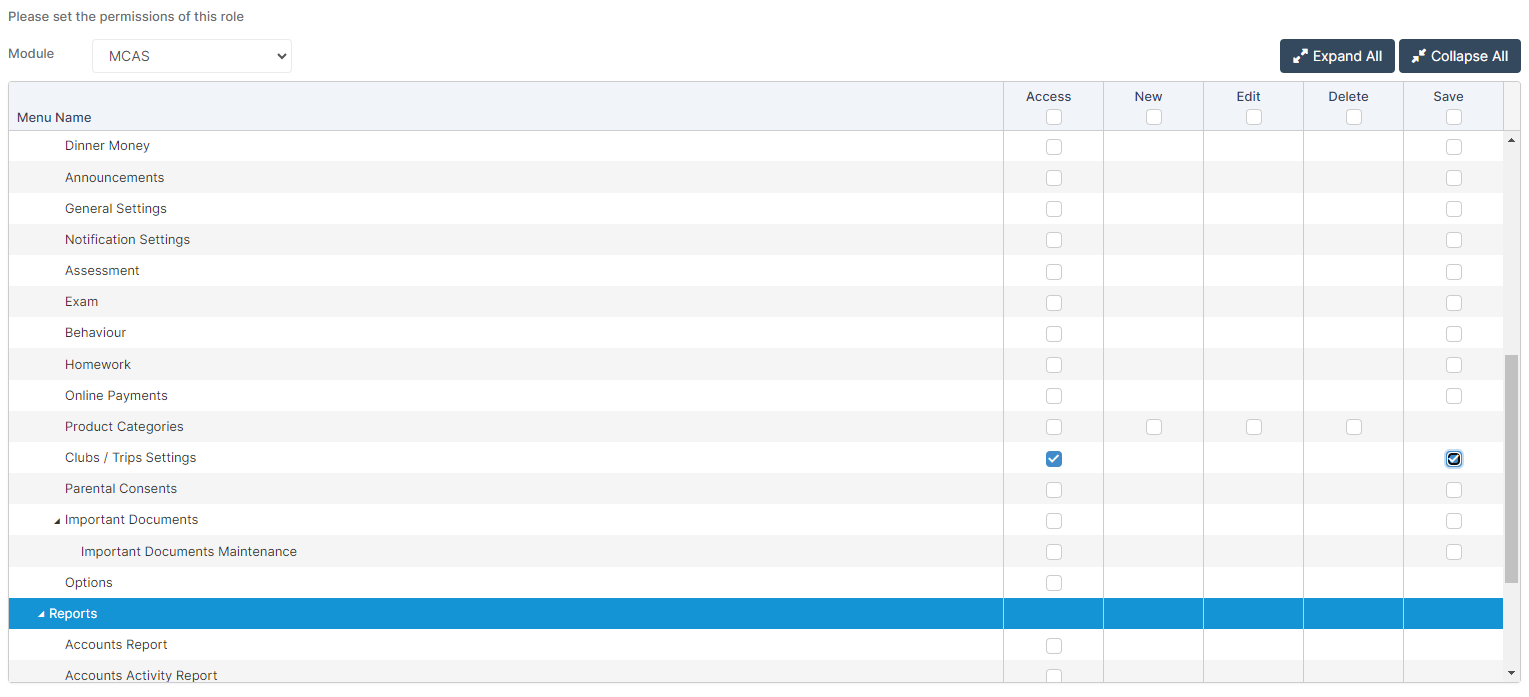
Access: The Permissions required to access Clubs and Trips can be found in the MCAS module from within Config > Setup > Roles & Permissions.
See also: How to Create and Pay Orders (for MCAS Administrators) and How to create a Club or Trip.
Note: There is a £1 minimum check out on MCAS, meaning any Club charges must have a minimum cost of £1.
Creating a Report Group
To begin, you will need to create a Report Group containing all of the specific/chosen Students.
This is done by selecting Groups from the left hand menu and filtering the Group Type drop down to Report Group .
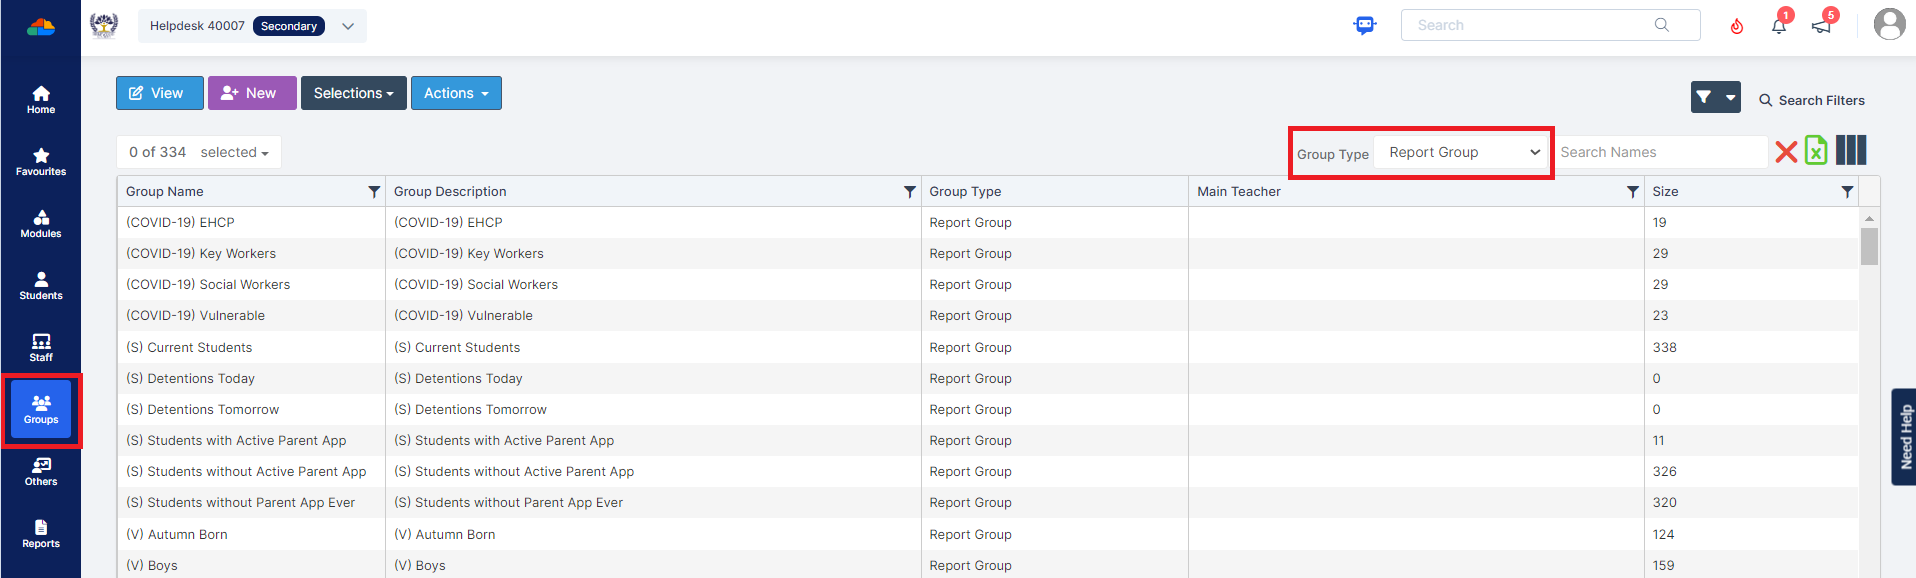
Once this is set, press New at the top of the page.

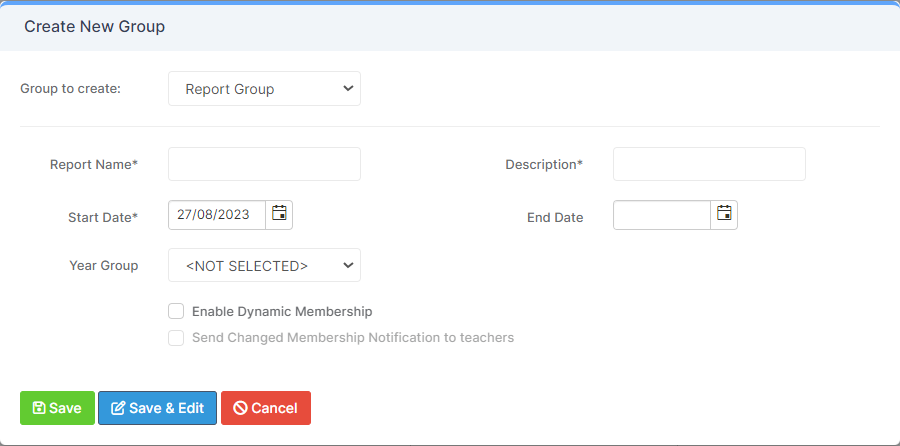
This will open a Group creation pop out where you need to enter the basic details of the Report Group.
Make sure to leave Year Group as NOT SELECTED, as this will allow you to select from all Students when creating the Student Memberships. You can also leave the Enable Dynamic Membership and Send Changed Membership Notification to Teachers tick boxes blank for the purposes of this task.
Once the information is entered, press Save & Edit.
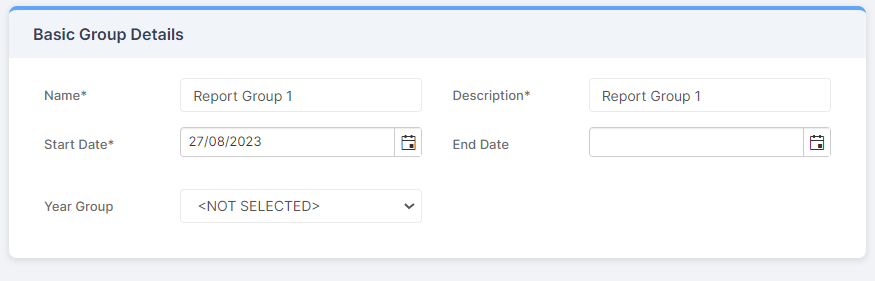
This will automatically open the Group page in a new tab.
The first panel on the Group Page is Basic Group Details, which will be automatically populated with the information you entered earlier.
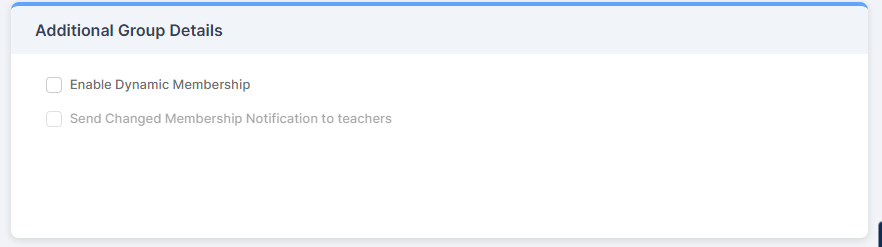
To the right of the Basic Group Details panel is the Additional Group Details panel containing Enable Dynamic Membership and Send Changed Membership Notification To Teachers, for the purposes of this guide, leave both unticked.
The Associated Staff panel gives you the option to add Staff Members to the Report Group using the Add New Record button. When creating a Report Group to limit a Club to specific Students you usually do not need to add any Staff Members.

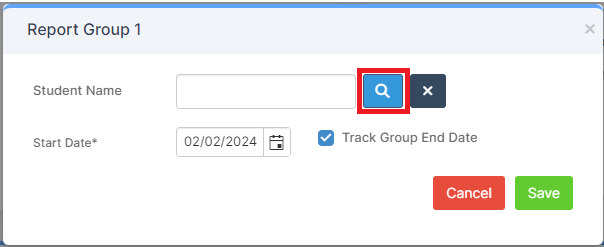
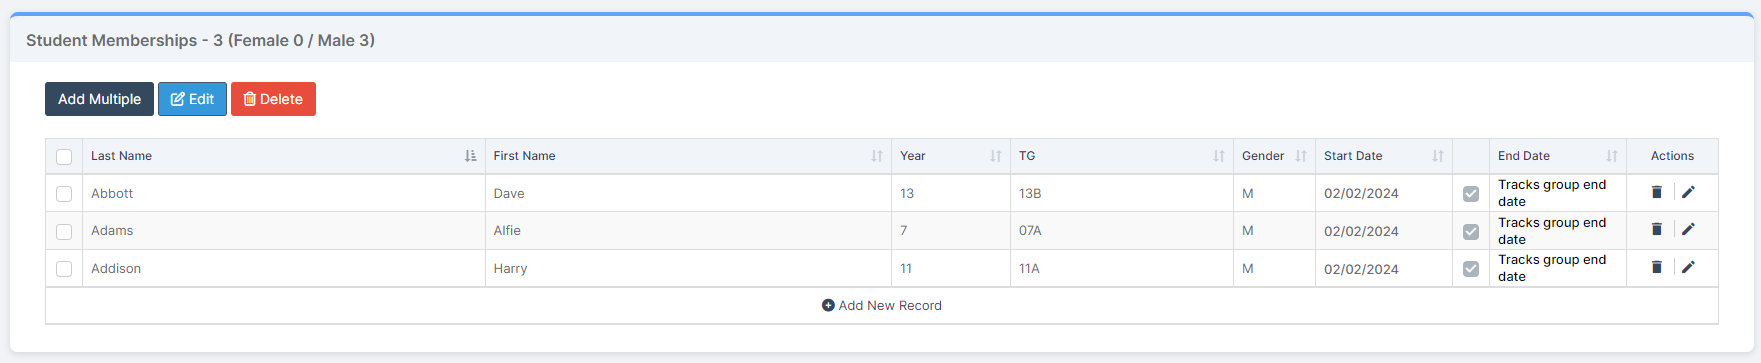
In the Student Membership panel, select Add Multiple.

This will open a Pop Up, click the Magnifying Glass next to the Student Name field.
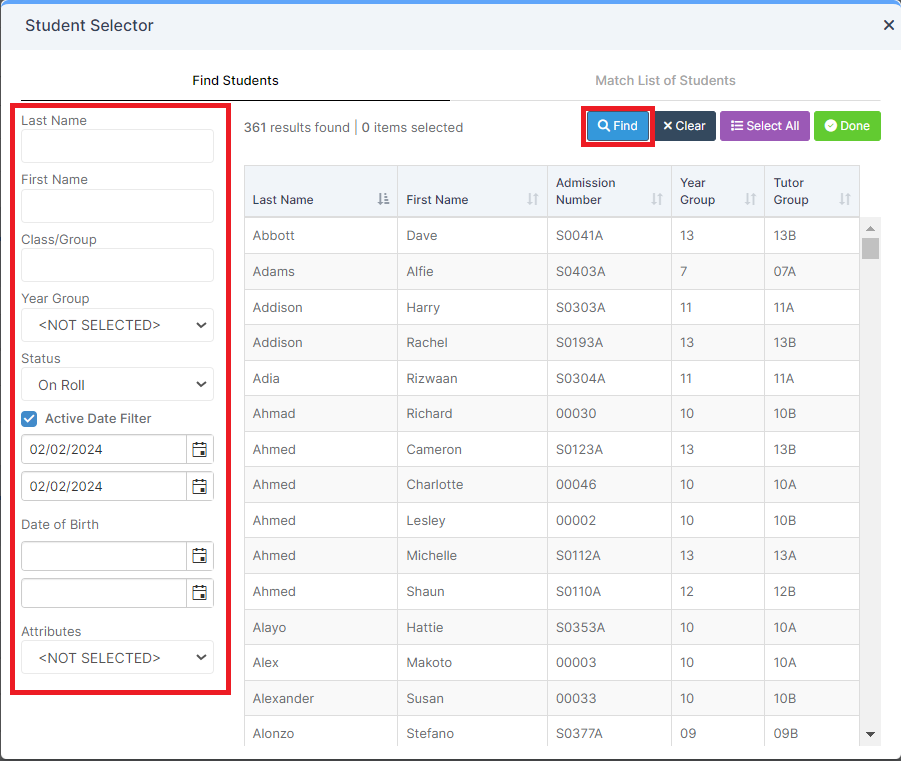
This will open the Student Selector, select the required Students by clicking on them once to highlight them.
Tip: You can use the Filters on the left hand side to refine your search, enter the required information or select from the drop downs and then press Find to update the list.
Once you are happy with your selection, press Done.
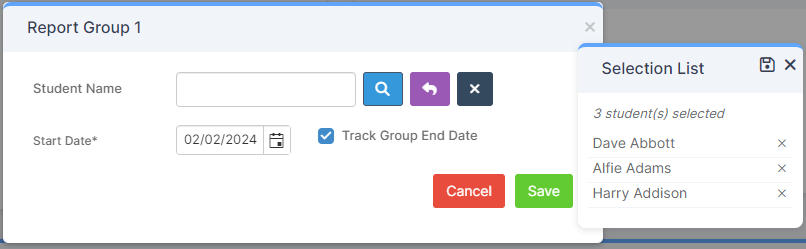
This will take you back to the previous pop up. Check that the Start Date is correct, you can also enter an End Date, if required by unticking Track Group End Date. Once you are happy, Press Save.
Note: The Selection List of Students automatically sits in front of Save, drag it out of the way by clicking and holding on the Selection List heading to press Save.
Once you press Save, the Students will become members of this Report Group from the Start Date you have selected.
Scroll back to the top of the page and press Save.

Linking the Report Group to a Club
Once a Report Group has been created, you can now create a Club to link it to. This section will focus on the specific options you need to select to link the Report Group to the Club. For a more detailed explanation of the options available when creating a Club, please refer to How to create a Club or Trip.
When creating your Club, to link the Club to your Report Group you will need to select it in the Associated Group Details section of the Club page.

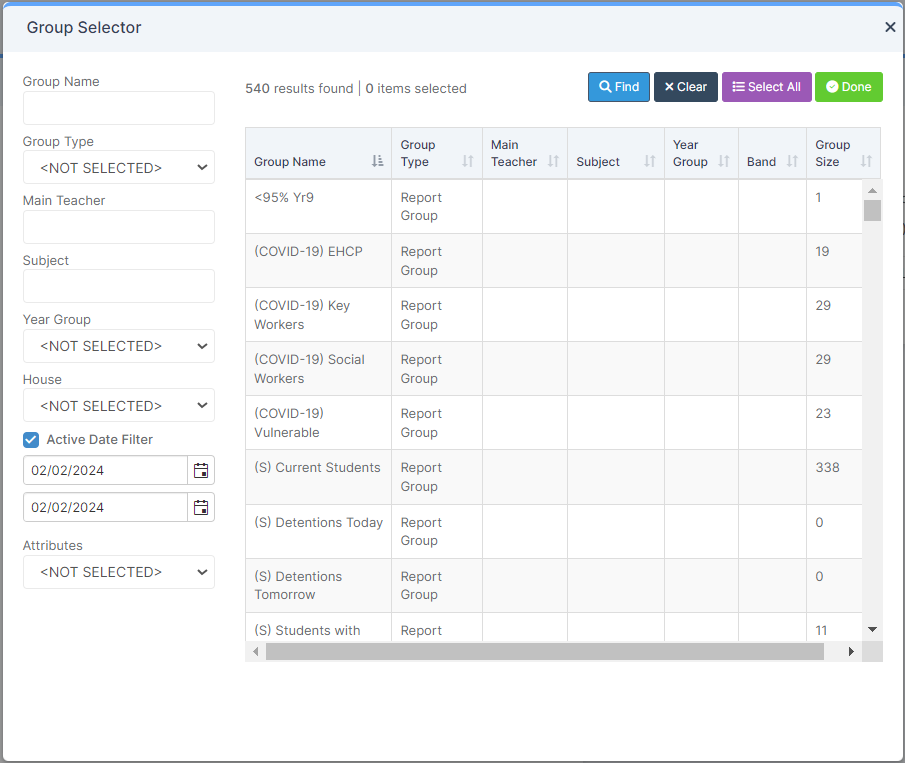
Choosing Selective Groups will prompt the Groups field to appear, click the blue Magnifying Glass to open the Group Selector.
In the Group Selector, Report Groups will automatically load first, from here you can scroll or search to find the Report Group using the filters on the left. Once you’ve found it, click on it to select it, then click Done.
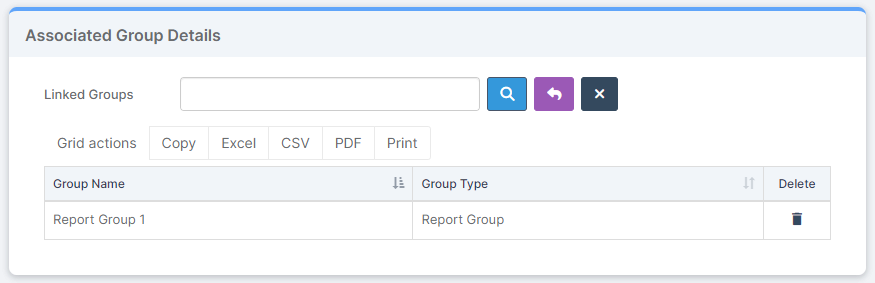
The Report Group will now appear in the Associated Group Details panel.
Now complete all of the other relevant fields of the Club. Once you’re happy, scroll up and press Save.
The Club has now been created and linked specifically to the Report Group so only those Students in the Report Group will be able to see it in MCAS.
Note: If you add any further Students to the Report Group they will gain access to the Club in MCAS.
You can now verify that it is not visible by comparing MCAS accounts for two Students, one who is included in the Report Group and one who isn’t.
The Student who is in the Report Group will see the Club within the Clubs area of MCAS.

While the Student who isn’t in the Report Group will not be able to see the Club within the Clubs area of MCAS.

If you would like to set up Orders for the Club on the Parents behalf, please see How to Create and Pay Orders (for MCAS Administrators)