Use this guide to perform the following functions:
- Settings
- Create a Seating Plan
- Copy a Seating Plan
- Default Seating Plan
- Add and Remove students
- Toolbar
- Student Tiles
- Zoom Functions
See also: How to Create and Copy a Seating Plan (Old Interface)
Access: The Permissions required to Create and Copy a Seating Plan are built on with the Teacher Role.
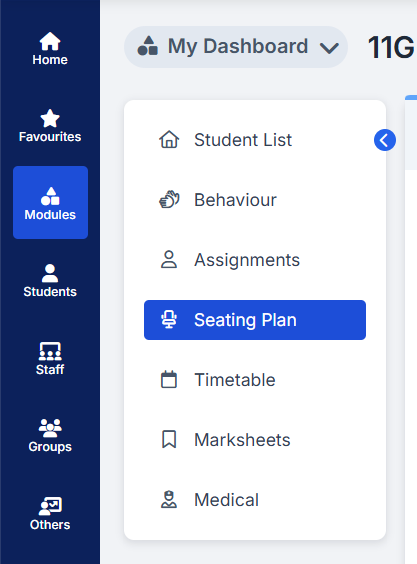
Go to Home > My Dashboard > Seating Plan
Settings
Users will have the option to switch between the new and old interface when administrators have ticked the checkbox ‘Allow users to switch between new and old user interface’ in Config > Setup > System Settings > New UI Settings.


February 2026 update: The new Teacher Dashboard Seating Plan is now available in areas that still use the Old User Interface (UI).
Administrators can choose whether to force users to use the New UI for Seating Plan and Room Layouts or retain the option for the Old UI.
- This brings the same modern seating plan experience already available in the New UI to more areas of the MIS.
- This applies to the Groups, Take Register and User Timetable pages.
- If you select Old UI, the Lesson Dashboard will operate exclusively in the Old UI for seating plans and room layouts. You will only be able to view and use existing Old UI plans and layouts there, and you will not be able to access, create or use New UI seating plans or layouts from the Lesson Dashboard.
Create a Seating Plan
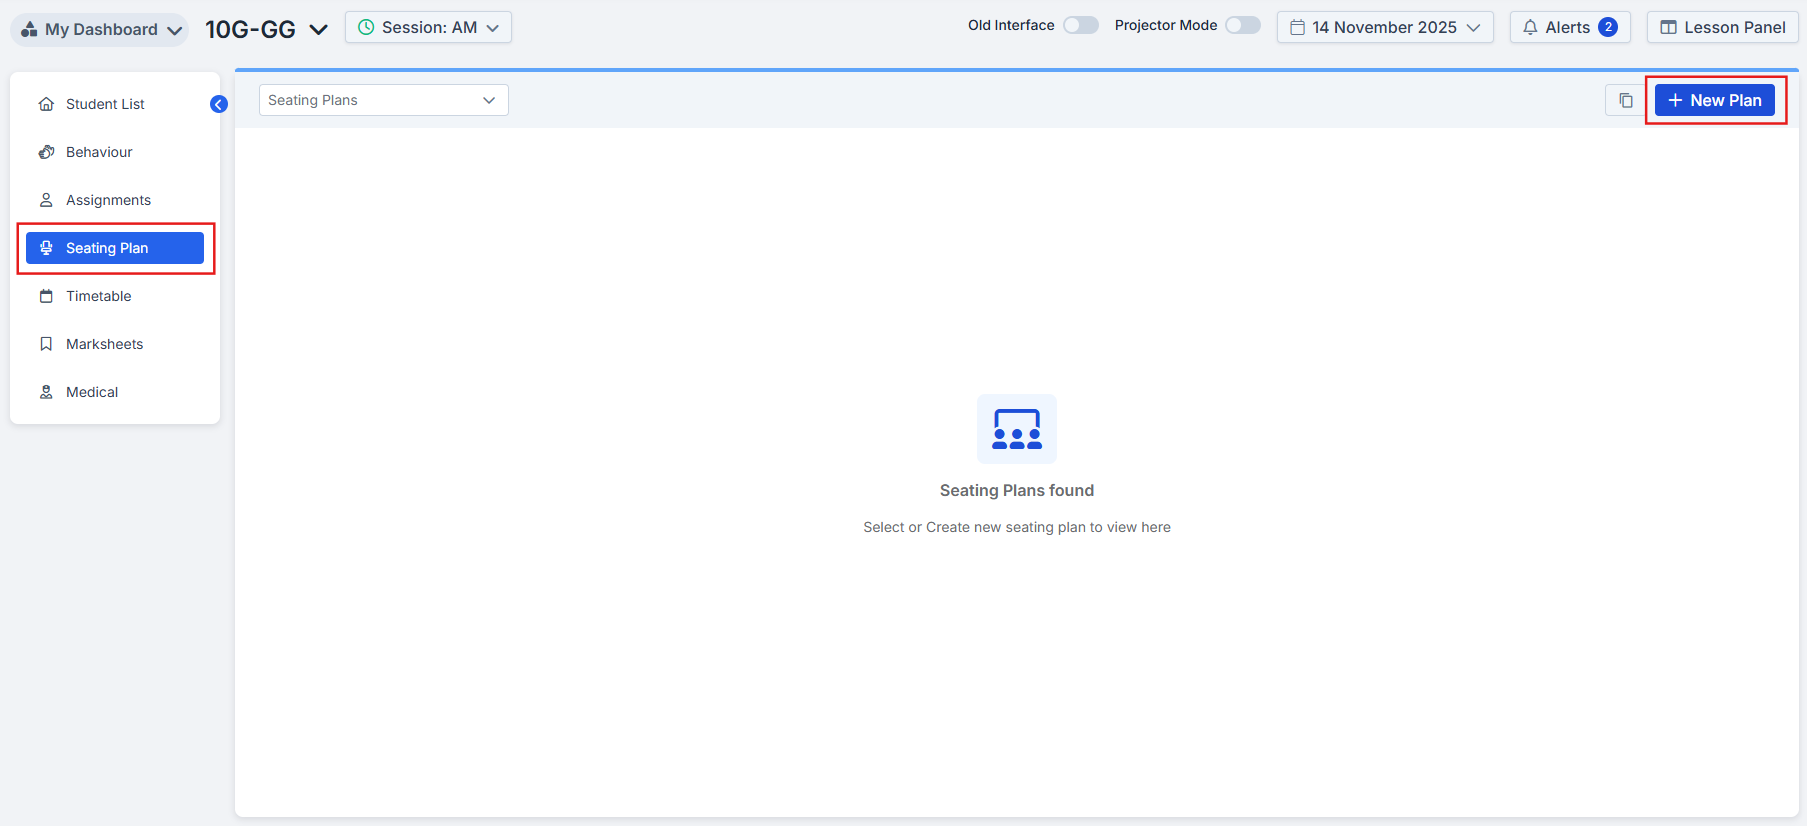
To start a new Seating Plan, go to the Teacher Dashboard and select Seating Plan from the dropdown menu. Click the top-right button + New Plan.
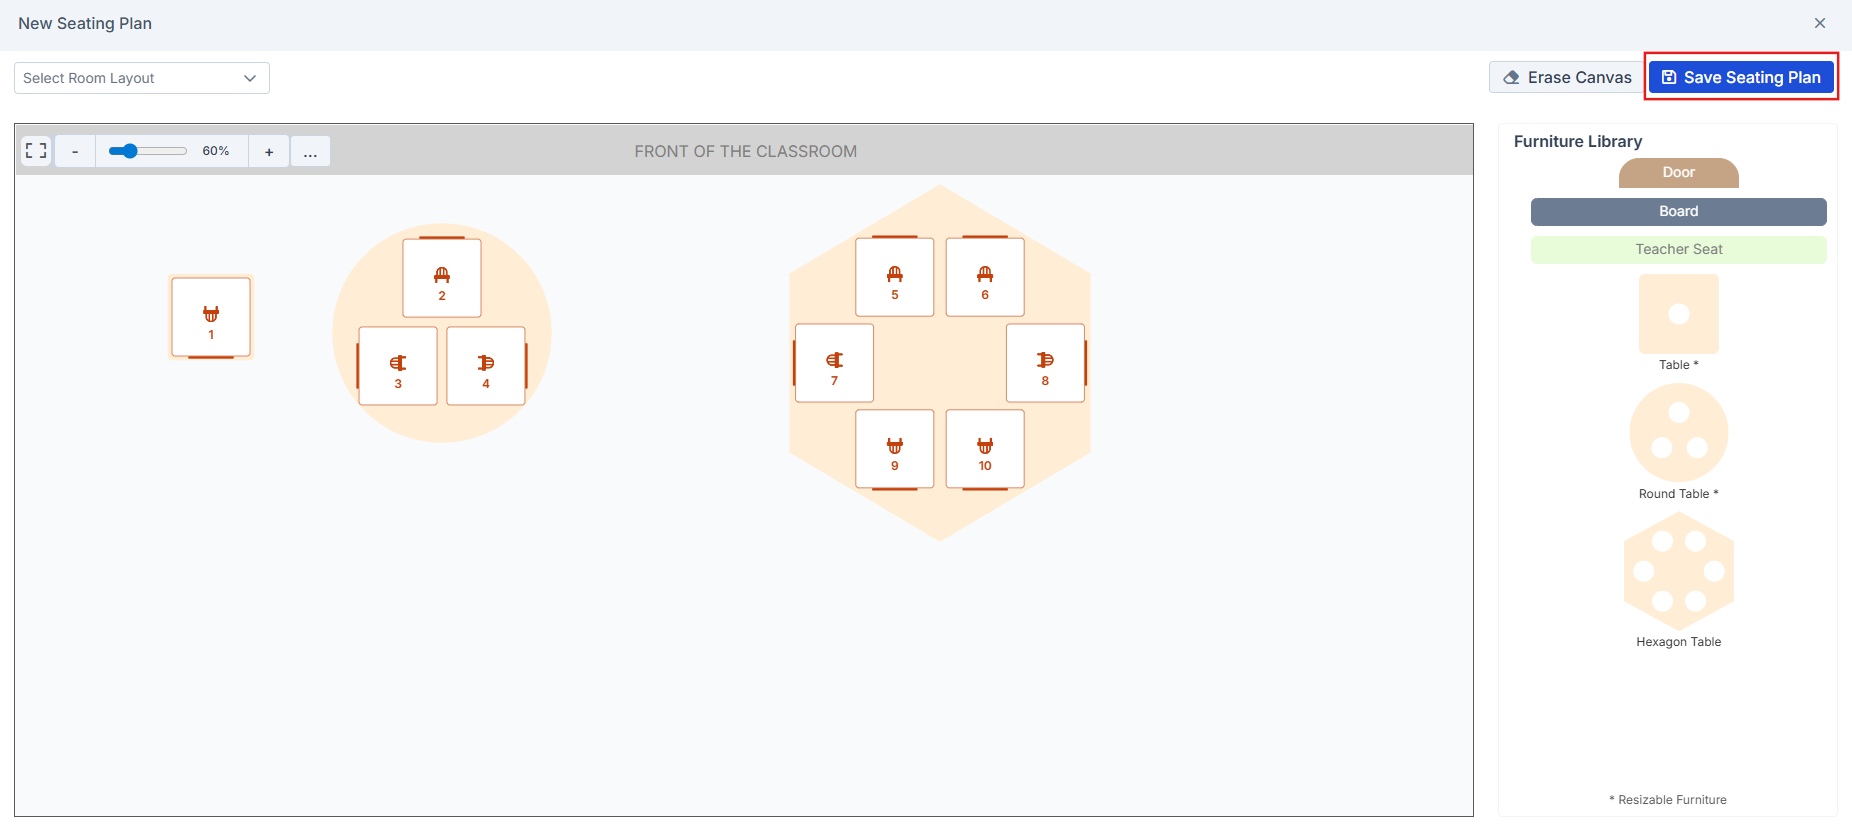
This will open up a blank canvas with a Furniture Library sidebar on the right. All items can be dragged and dropped onto the canvas.
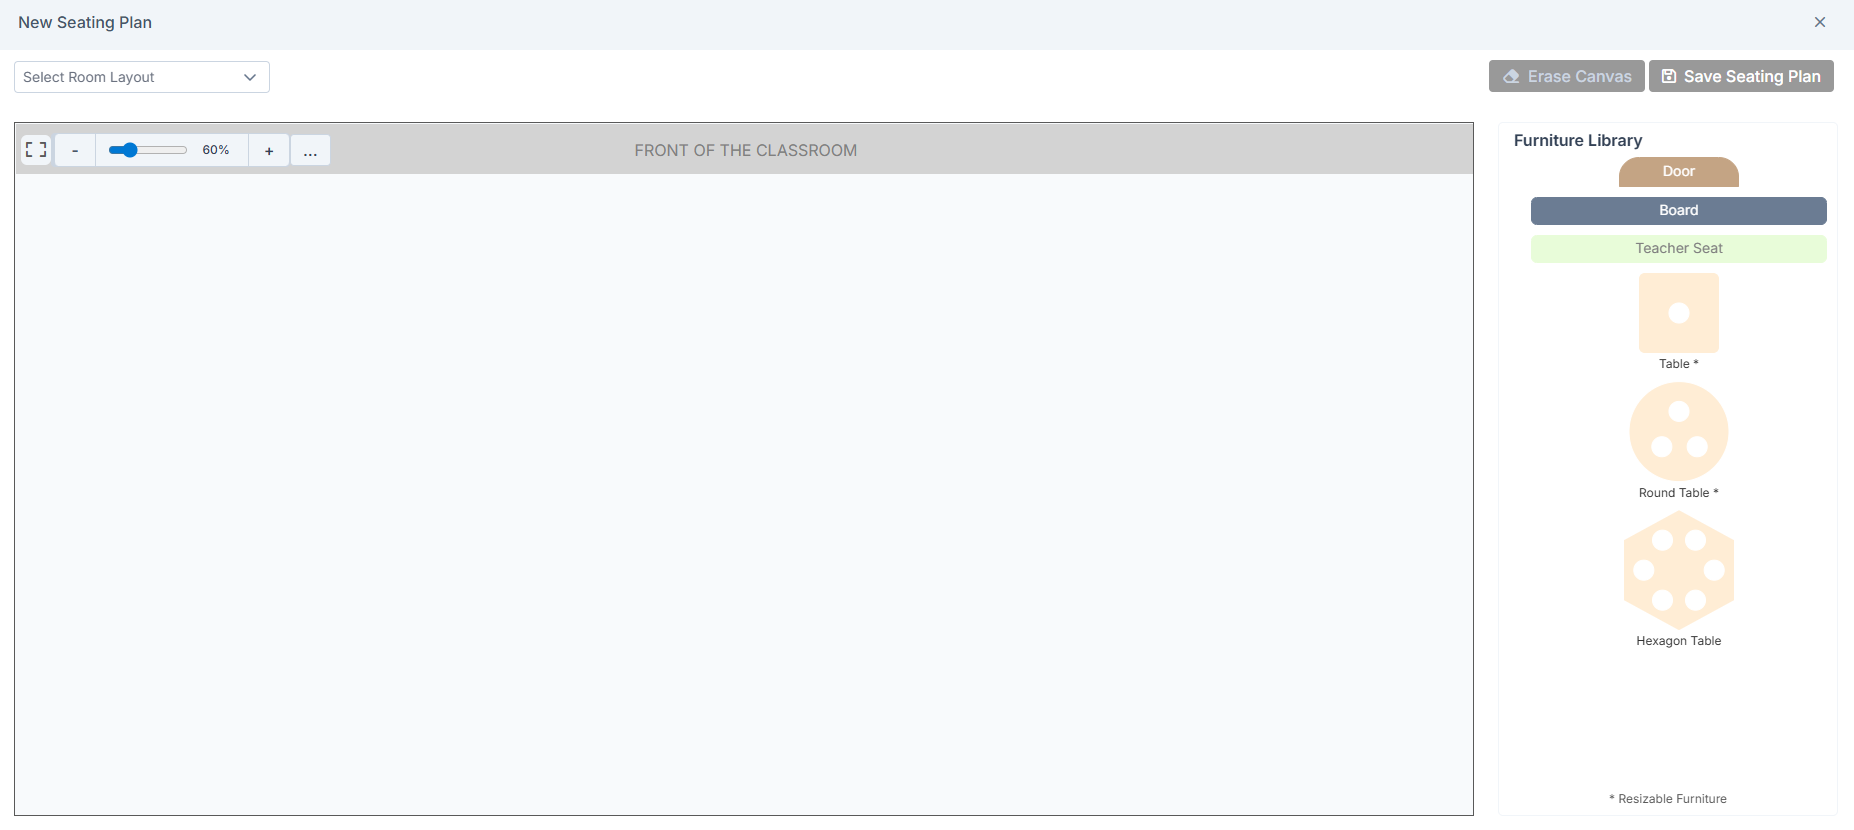
Door, Board and Teacher Seat can be placed anywhere and rotated, but cannot be resized.
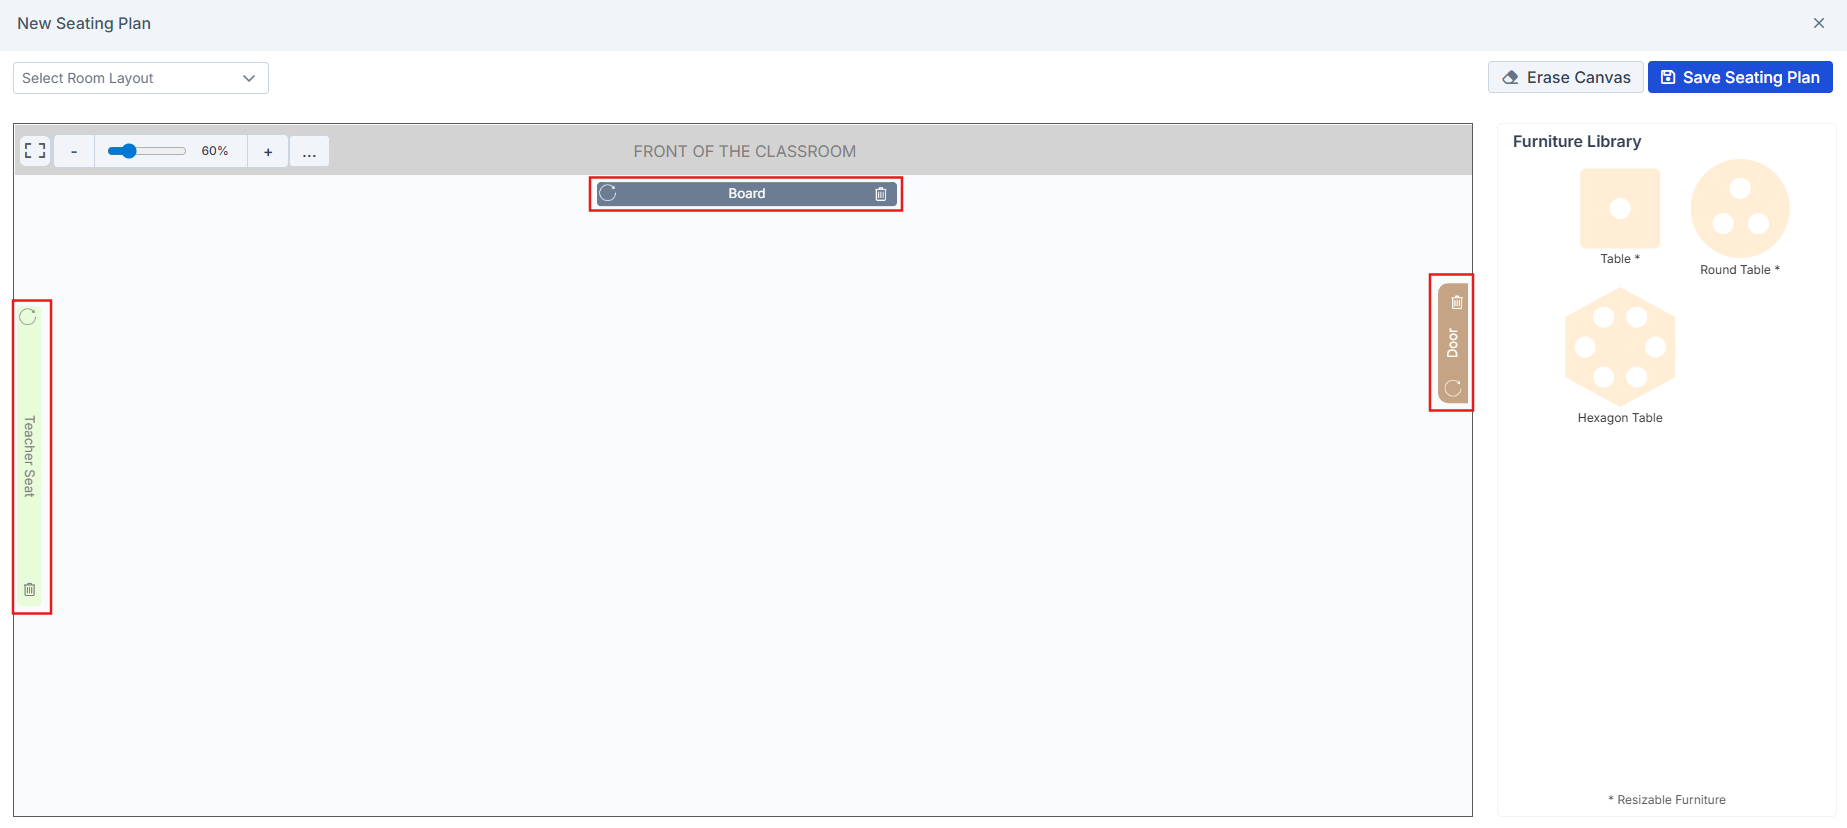
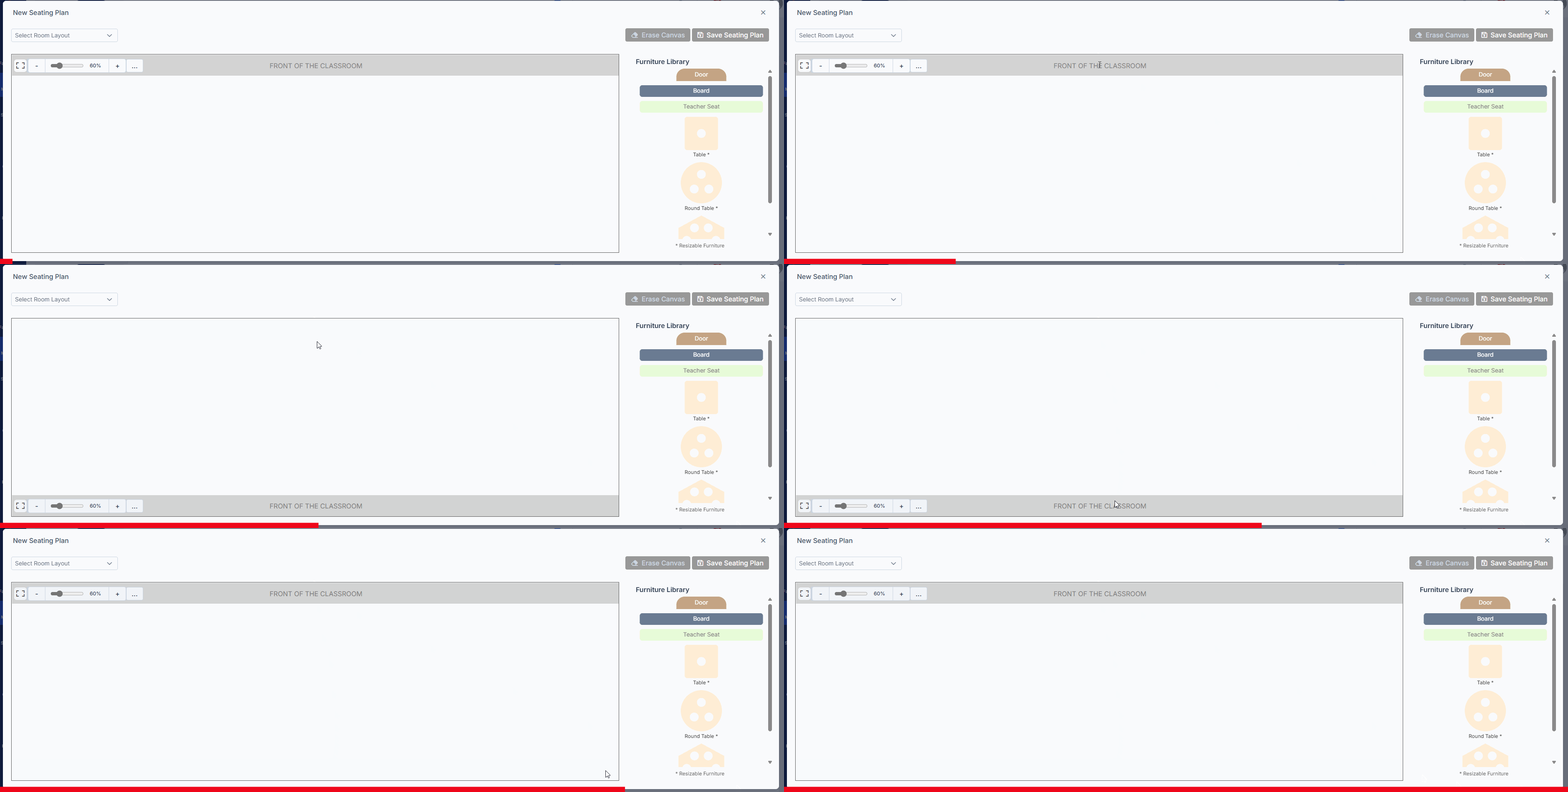
Clicking the Front of the Classroom panel will flip it to the other side of the room.
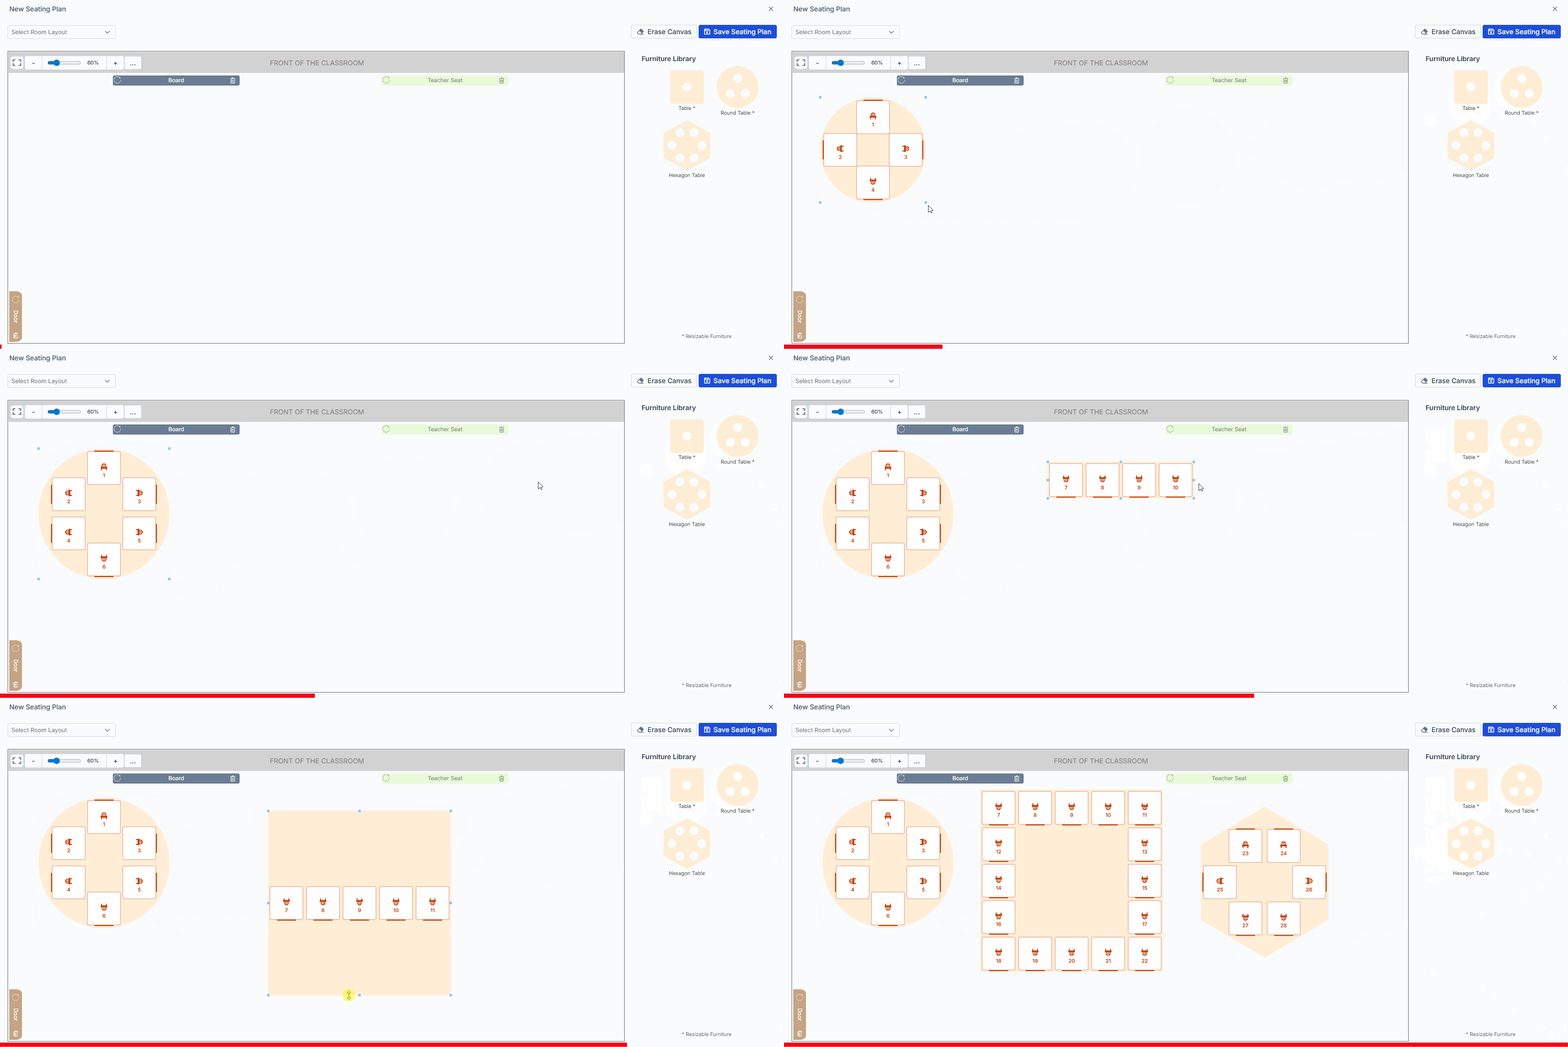
Tables:
- The Square table will remain as a single seat unless expanded.
- It can be expanded to a maximum 15 seats in a row or side.
- It can also be expanded to a maximum square of five seats by five seats.
- The Round table can have between three and six seats by expanding.
- The Hexagon table cannot be resized and has six seats.
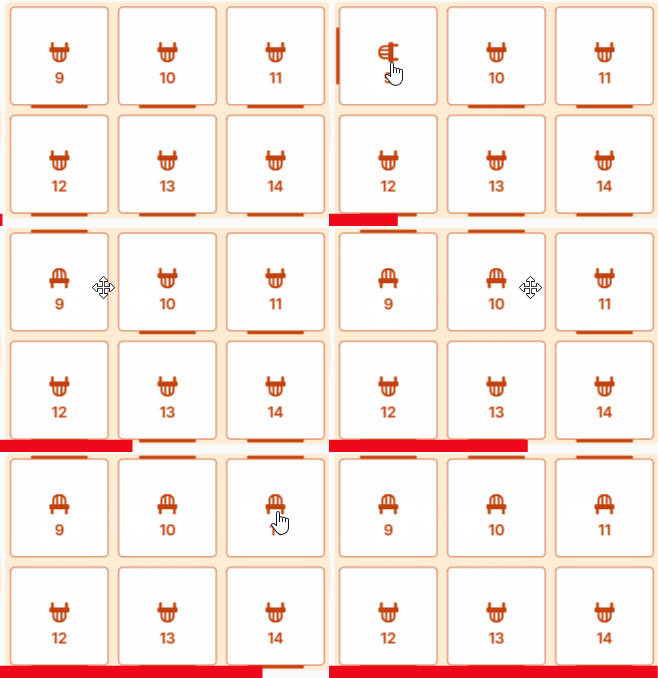
Rotation: The seats at all tables can be rotated clockwise by clicking on the seat tile to ensure they are facing the direction you want them to face. This direction will be retained unless the seat is deleted.
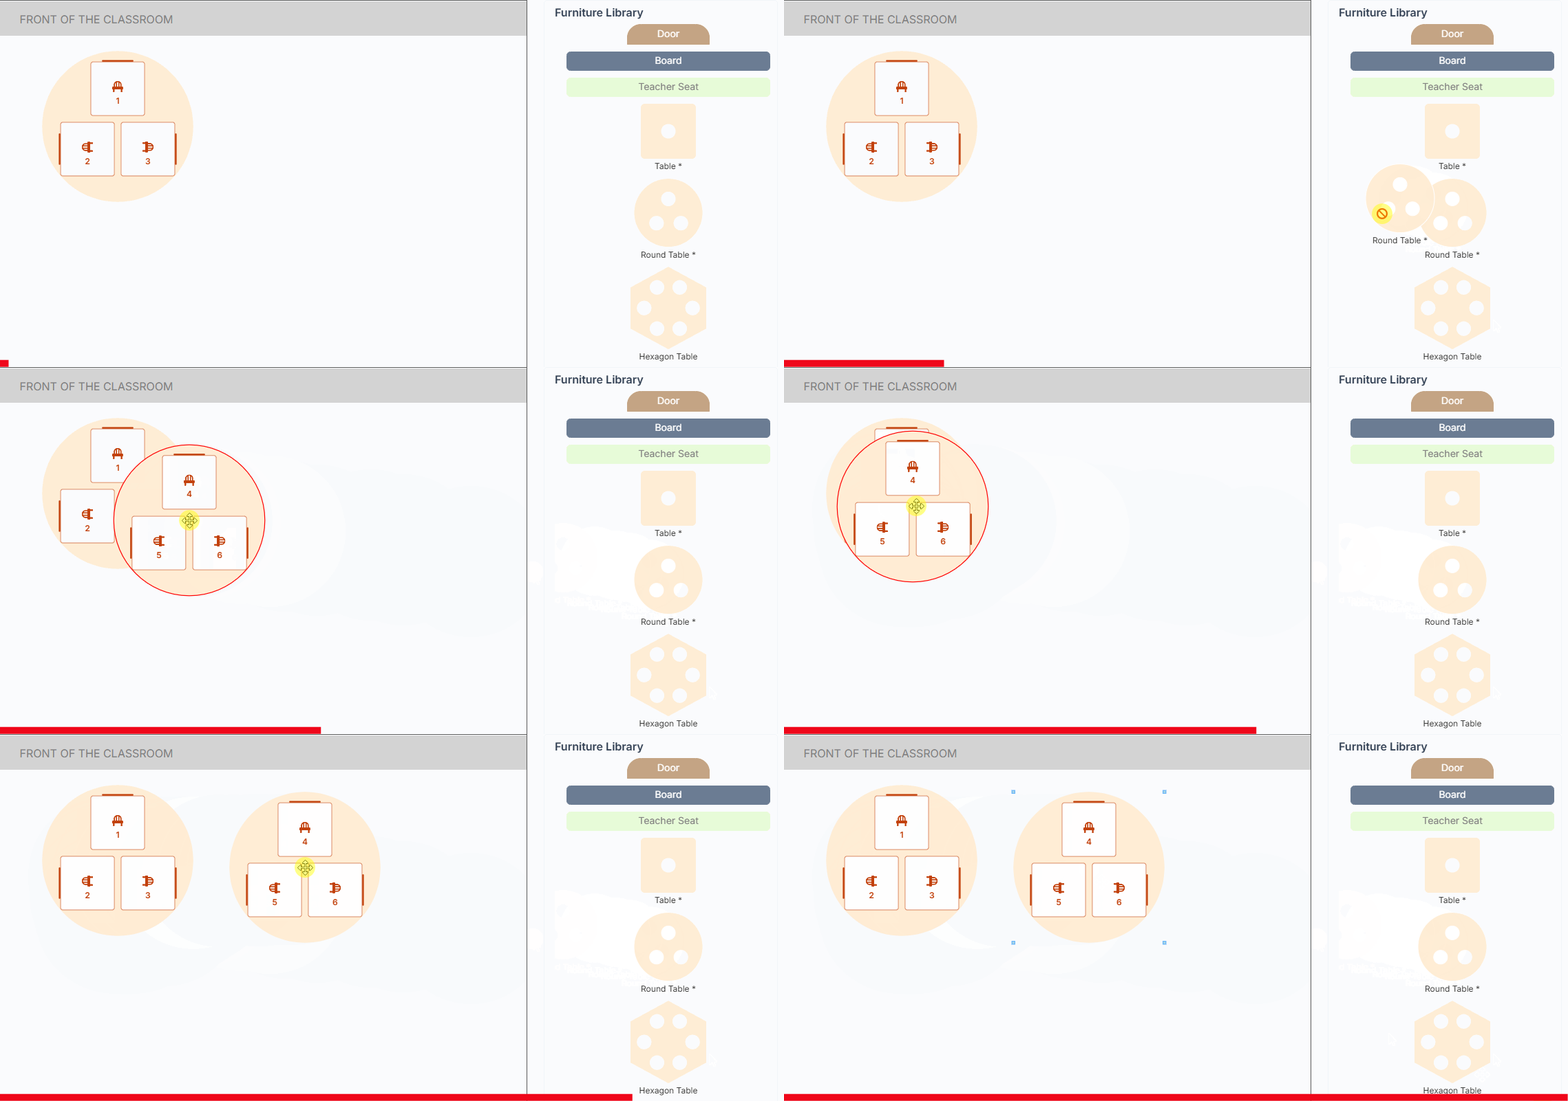
Collisions: All furniture can be moved freely around the canvas but if you try to place it where furniture already exists a red outline will display to show the action cannot be completed. The outline disappears when the furniture is moved to an area it can be placed.
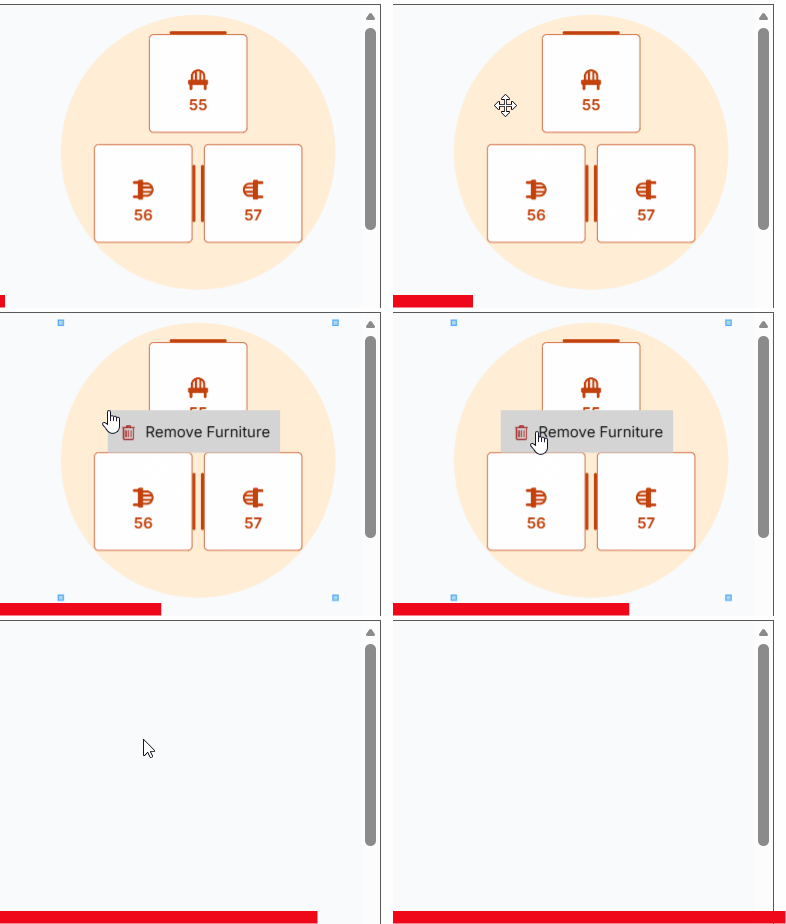
Remove Furniture: You can remove a piece of furniture that has been placed on the canvas by right-click on it and selecting Remove Furniture.
Erase Canvas: To start over, click Erase Canvas, then click Erase to confirm in the pop up.

Save Seating Plan: Your canvas does not auto-save. You must click Save Seating Plan to retain the canvas after placing furniture. The name must be unique and consist of allowed characters only. After saving you will be returned to the Seating Plan page.
Copy a Seating Plan
Users can create a copy of a Seating Plan in the Teacher Dashboard, and have the ability to save it under a new name.
While on the main Seating Plan screen click on Copy Seating Plan.

The Copy Seating Plan popup allows the new Seating Plan to be renamed. This name must be unique and consist of allowed characters only. If the Copy Student-Seat Allocations toggle is on, the plan you have copied will retain any student allocations already on there. If it is off, the plan will only contain furniture. To copy a Seating Plan into another class, simply select the class followed by the Seating Plan from the list in the Copy Seating Plan popup.
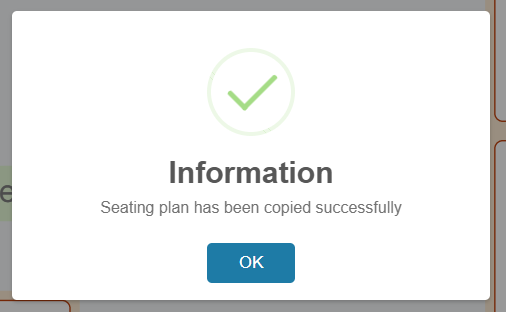
When you click on Copy a confirmation pop up will display and you will be taken to your copied Seating Plan.
Note: Due to compatibility issues, Seating Plans created in the new UI cannot be opened in the old UI. When a user attempts to open a Seating Plan created in the new UI from the old UI, the following message will appear:
Tip: You can save a Seating Plan with no students allocated as a template. Make copies of this master version and save each new version depending on student seat allocations.
Default Seating Plan
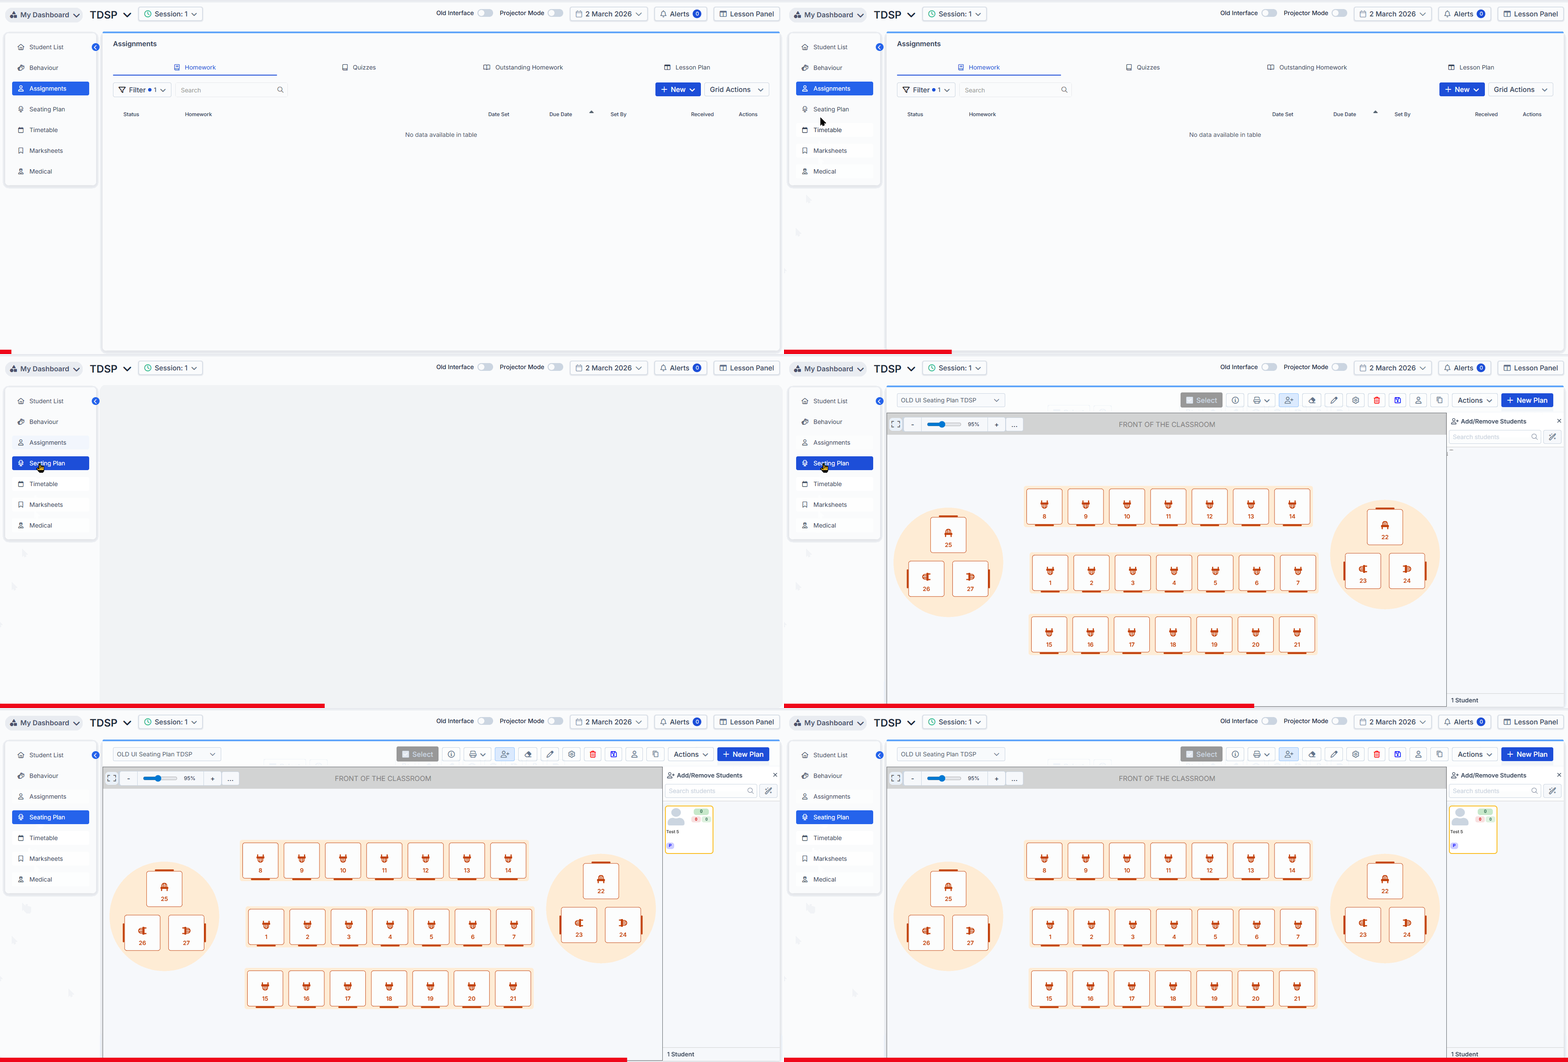
If a class or tutor group has only one seating plan, that plan will open automatically when Seating Plan is launched from the Teacher Dashboard.
Add/Remove Students
When on the Seating Plan page the new Add/Remove Students sidebar can be toggled on and off by clicking on the Add/Remove Students option in the toolbar.

Students can be allocated seats manually by dragging and dropping student tiles from the sidebar to the classroom canvas or you can use the Auto Allocate button.
The sidebar also includes a student count that updates as you allocate seats.
Partial searches are possible and this will filter in real-time as you type. At any time when conducting a search or partial search you can auto-allocate the filtered students.
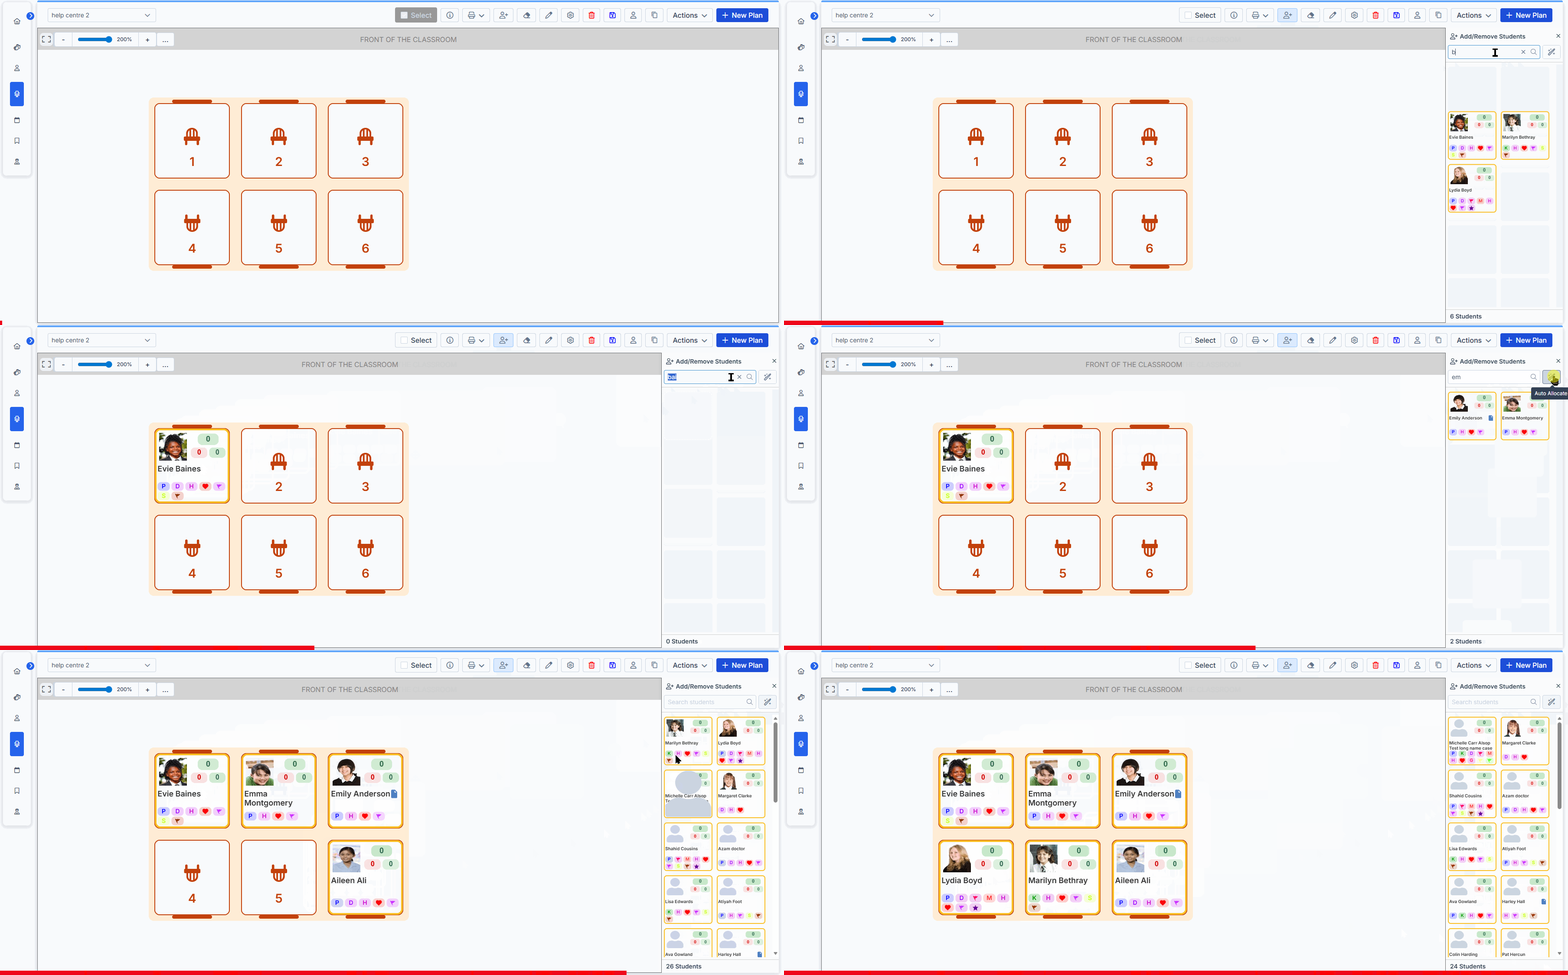
You must click Save Seating Plan with Students when you are done – there is no auto-save.

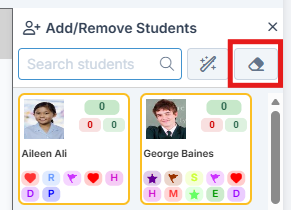
To Remove all students currently assigned a seat click the eraser icon. This does not change the layout of the classroom or display a confirmation warning.
Toolbar
The toolbar has the following features:

Save Seating Plan With Students
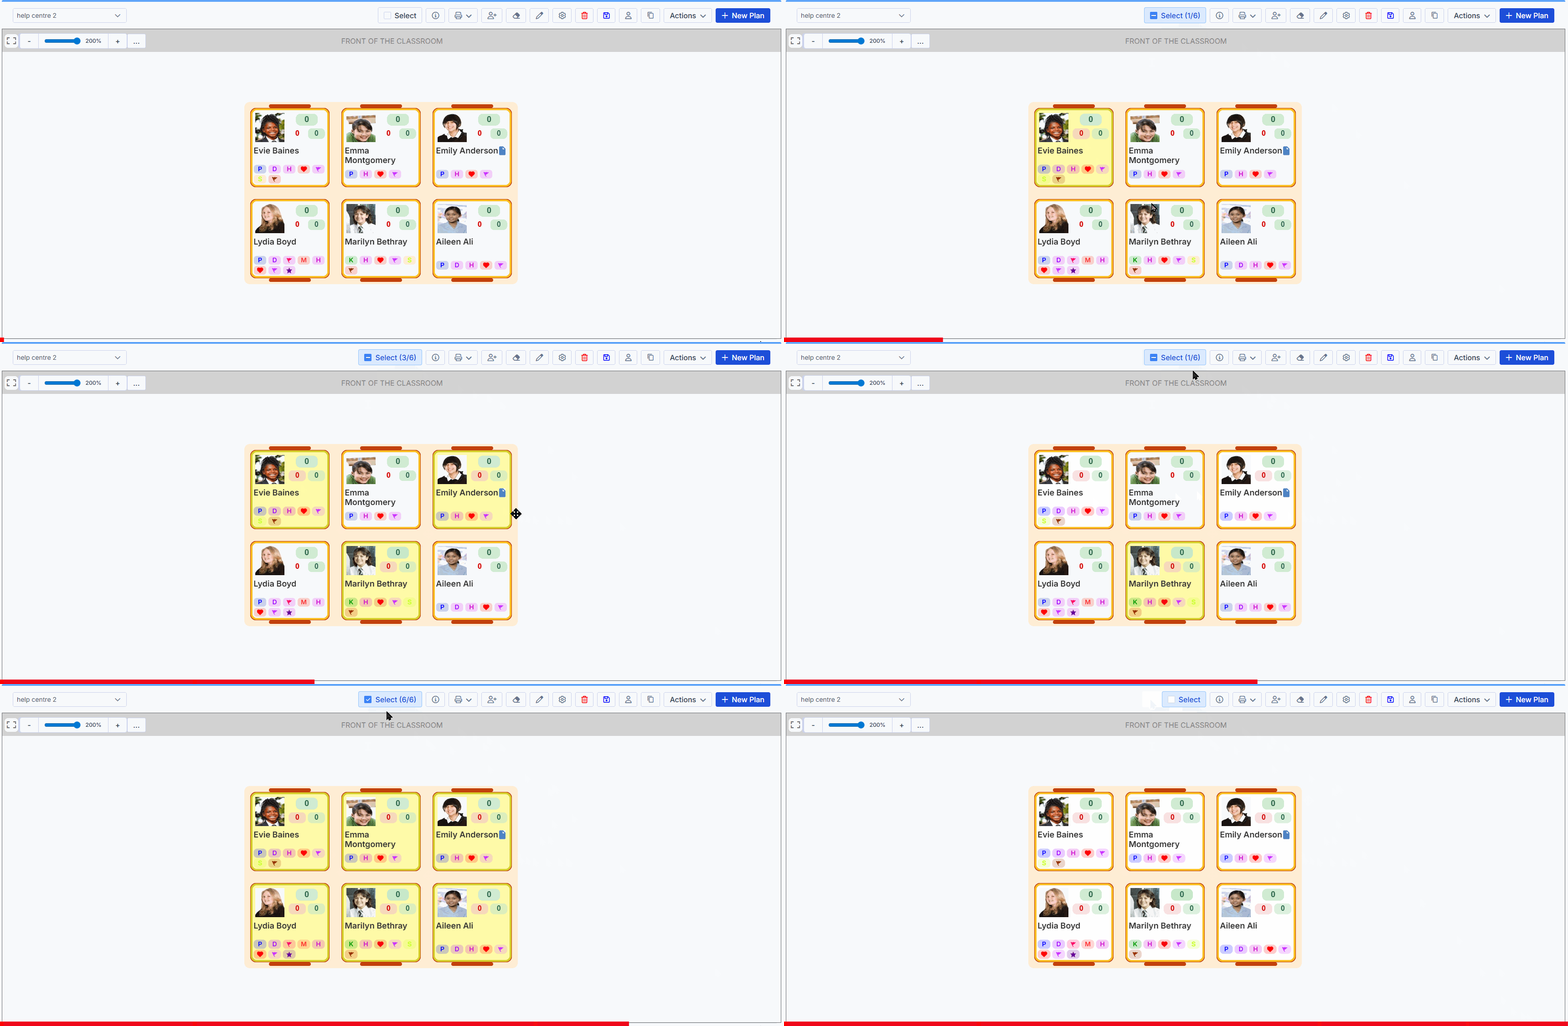
Select: A new Select button has been added to the toolbar. When the checkbox is ticked, all students are selected; unticking it deselects all students.
Clicking the Select button activates Select mode and highlights the button in blue. In this mode, users can also select or deselect individual students by clicking their tile, allowing individual selections without affecting the entire group.
When Select is active it will display a count of how many students have been selected out of the total placed on the seating plan.
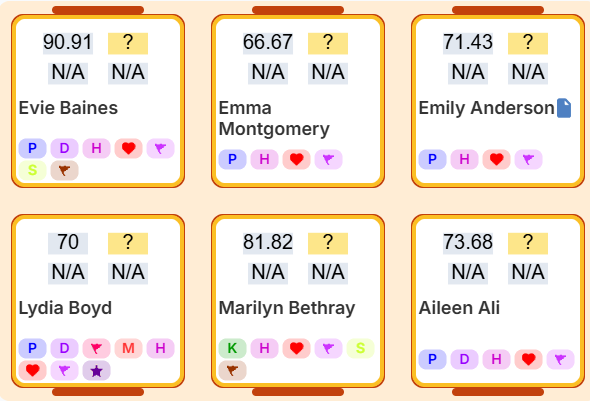
Toggle Student Information: Swaps out student photos (where they exist) for attendance and assessment data.
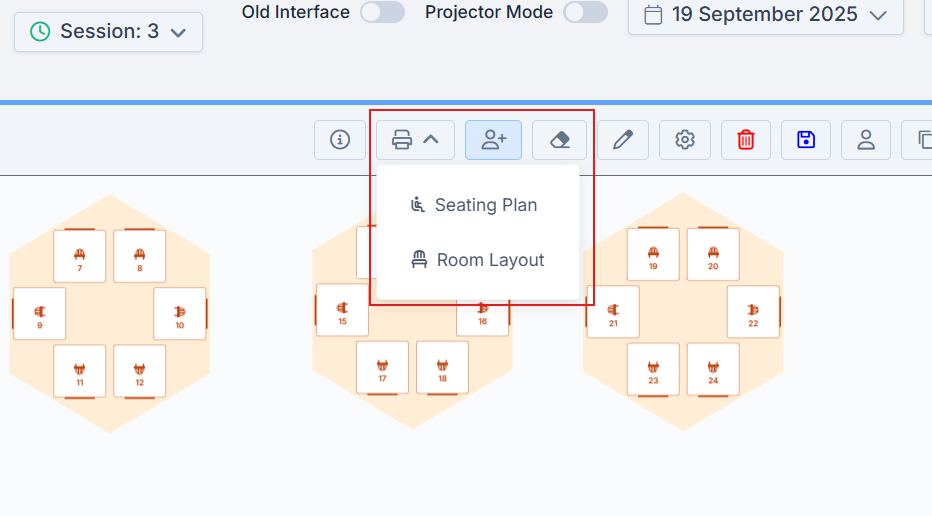
Print: Gives the option of Seating Plan (which includes students who have been allocated seats) and Room Layout (which only shows the furniture). Both options feature live preview and auto fit-to-page scaling. If printing while in Projector Mode sensitive information will not be printed.
Add/Remove Students: Covered above.
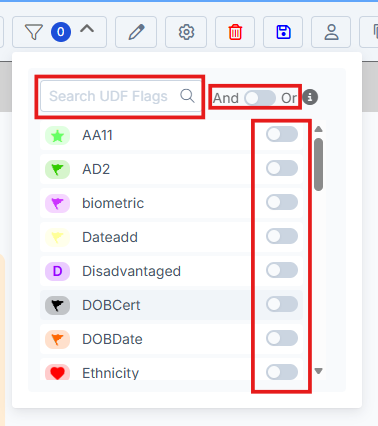
UDF Filters: The dropdown shows your school’s UDFs. When a UDF is toggled on, the relevant student tiles remain white while those students who do not have that UDF are dimmed. The number in the toolbar will update to show many toggles are selected.
The UDF Filter applies to all students who are already assigned a seat in the Seating Plan and those who are not. Students can be placed in an empty seat whether they are filtered or not.
- Toggles indicate active filters and multiple filters can be active at once.
- The search box allows users to find a flag quickly.
- And shows students who have all the selected flags.
- Or shows students who have any of the selected flags.
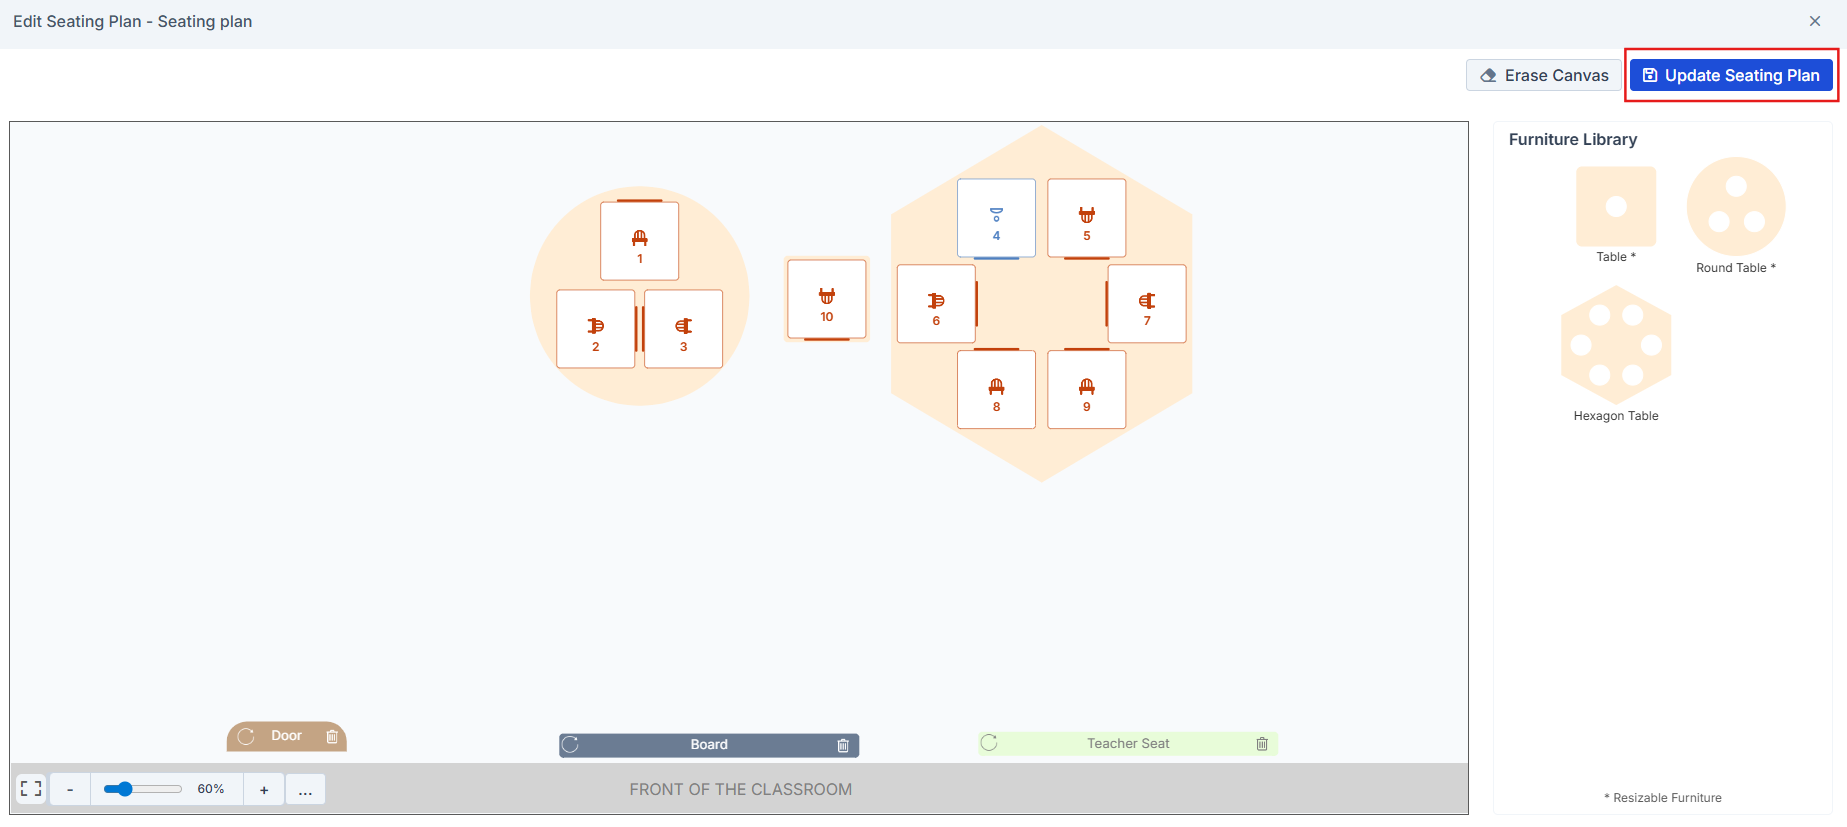
Edit Seating Plan: Takes you back to the canvas so you change furniture configuration.
You must click Update Seating Plan to save your changes.
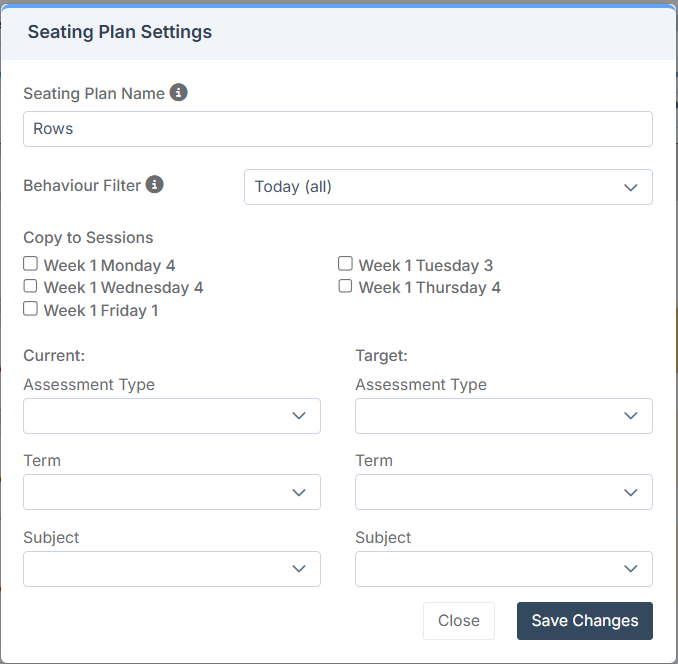
Seating Plan Settings: click the cog symbol on the toolbar.

This will open the Seating Plan Settings pop up. Use this for the following functions;
- Seating Plan Name – give the Seating Plan a name
- Behaviour Filter – choose from the drop down choices of Today, or Year to Date for mine or all.
- Copy to Sessions – tick to copy the Seating Plan to other periods.
- Define Assessment Information – choose from the drop downs to select Assessment Information to show for each student on the Seating Plan
Once complete click Save Changes.
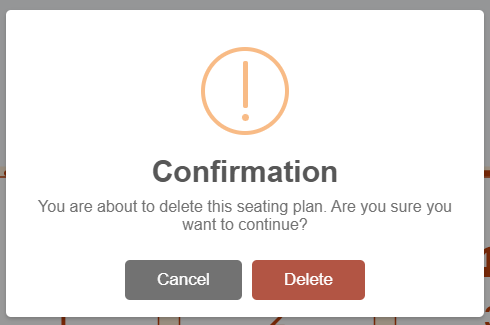
Delete Seating Plan: Deletes the current Seating Plan and removes it from the list of saved versions. Displays a confirmation warning before deletion.
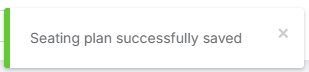
Save Seating Plan With Students: This must be used to save your current Seating Plan. There is no auto-save. Displays a confirmation in the top right of the screen.
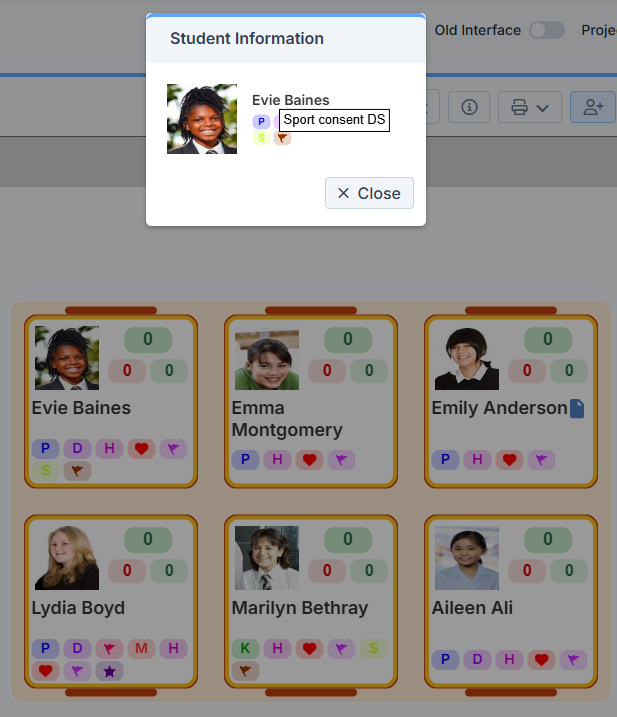
Select Random Student: This pop up shows full name, a photo (if one exists), year group and User Defined Flags. It no longer shows assessment or attendance data. The icons are not shown in Projector Mode. The pop up can be closed by either clicking Close or clicking away from the pop up. Hovering over a flag will display a tooltip. This also applies to student tiles on the Seating Plan.
Copy Seating Plan: Covered above.
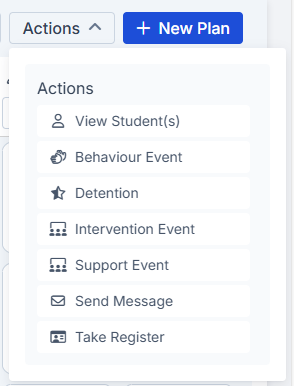
Actions: This dropdown menu allows teachers to View Student(s), record a Behaviour Event, set a Detention, record an Intervention Event, record a Support Event, Send Message or Take Register. At least one student must be selected using the Select button or an error message will show.
New Plan: Covered above.
Student Tiles
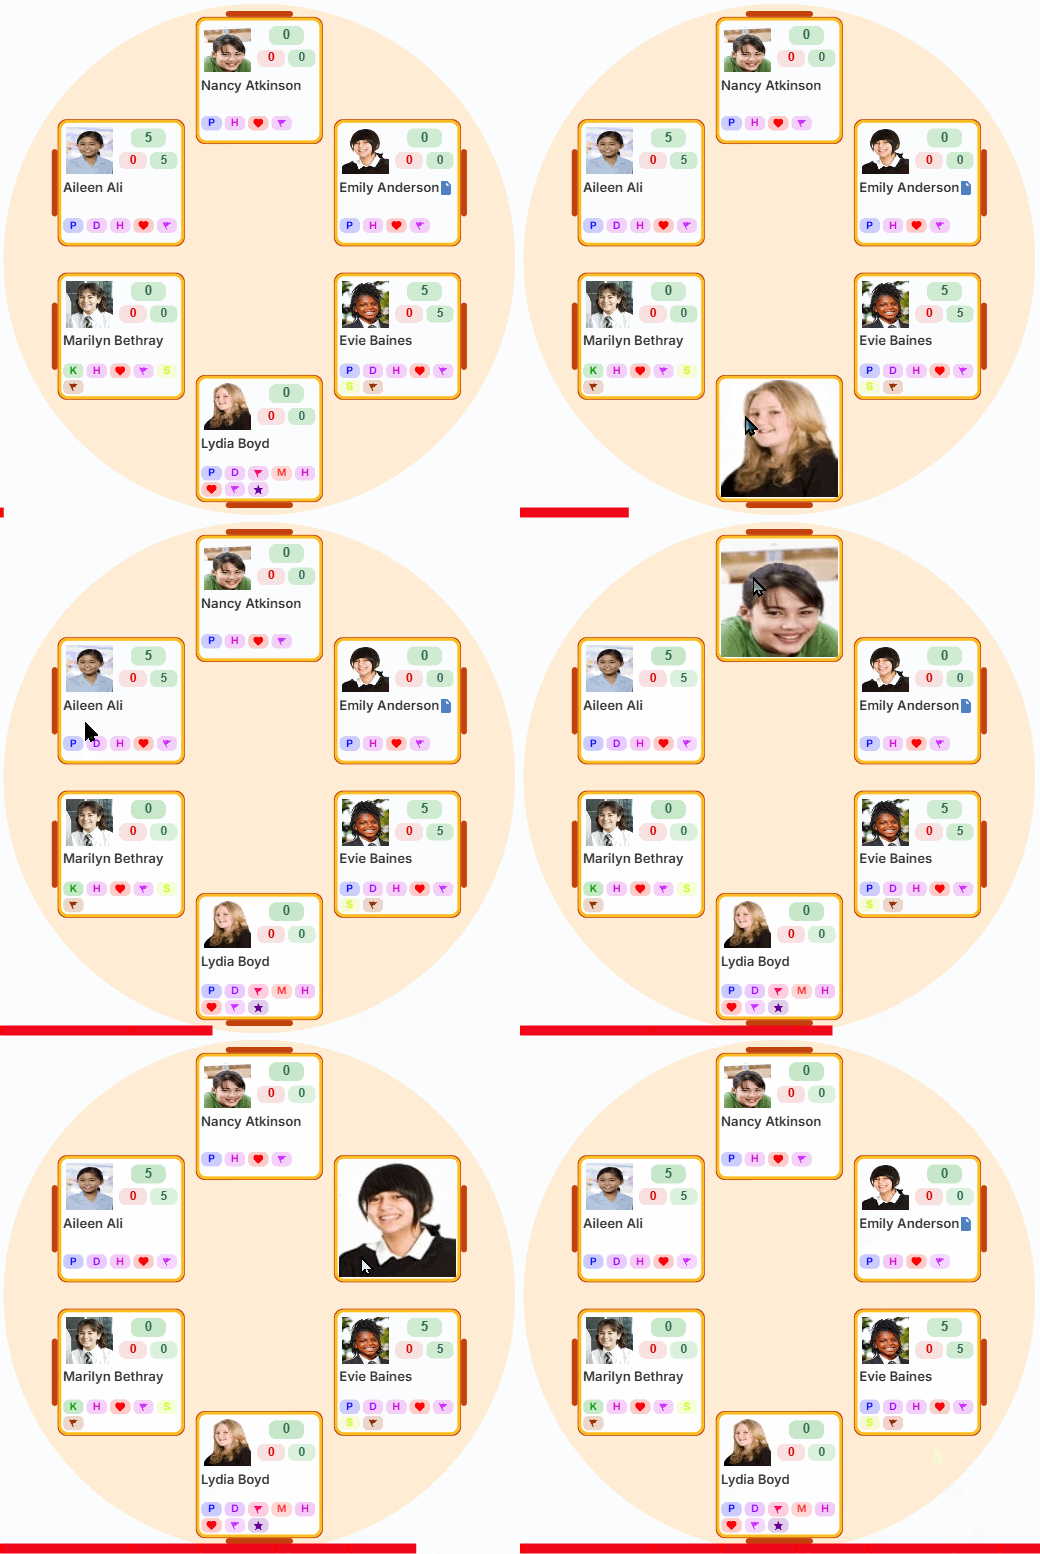
Profile photos are shown in the top left. Hover to enlarge.
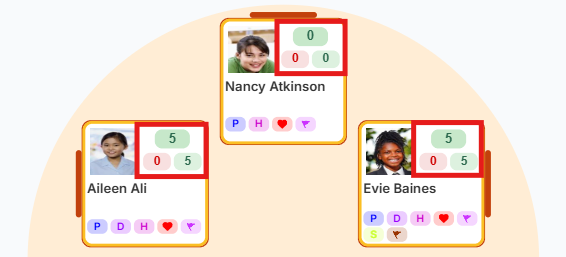
Behaviour points can be found in the top right.
- The number at the top shows the current day’s overall total – this will be green if it’s positive or red if it’s negative.
- Below it on the left are negative points shown in red.
- Below it on the right are positive points shown in green.
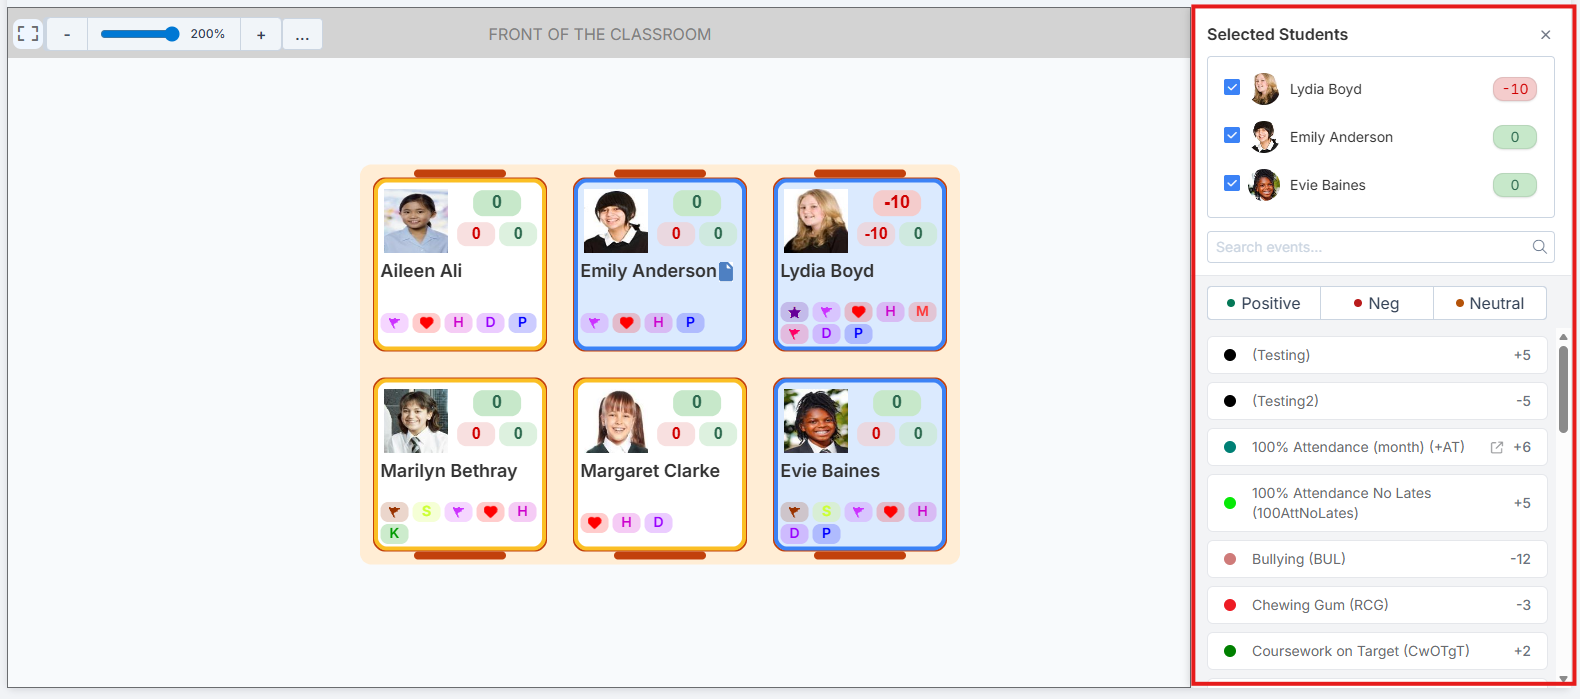
Left-clicking a student tile opens a sidebar with student photo, name, current behaviour score and a list of behaviour events. Positive, Negative and Neutral events can be logged from this sidebar for one or more students at once. Click the events in the sidebar to assign them to the selected pupils. Point totals will update immediately. A notification will confirm the points have been saved successfully. If no mandatory fields are required for the event, logging an event is a two-click process.
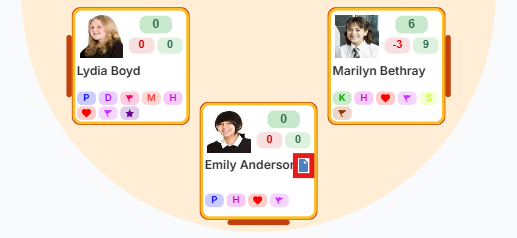
The blue Document icon appears to the right of the student name if a document exists.
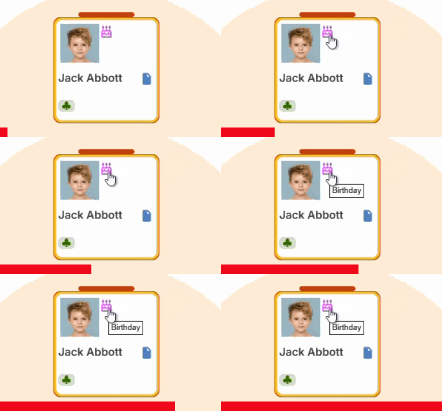
A birthday icon appears on a student’s tile on the day of their birthday only.
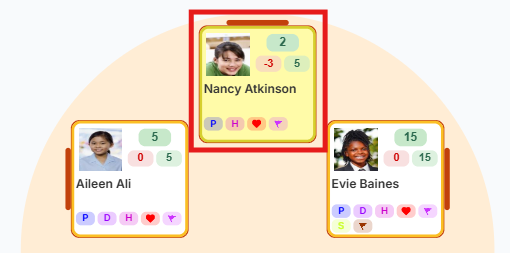
When a student is selected, the entire tile is highlighted in yellow, making it easy to see which student is currently selected.
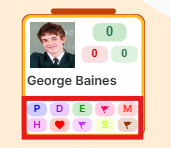
Up to 10 UDF (User-Defined Flag) icons are shown on each tile.
Behaviour points, UDFs, birthday icons and document icons are hidden in Projector Mode. Profile photos and names are larger and clearer in Projector Mode.
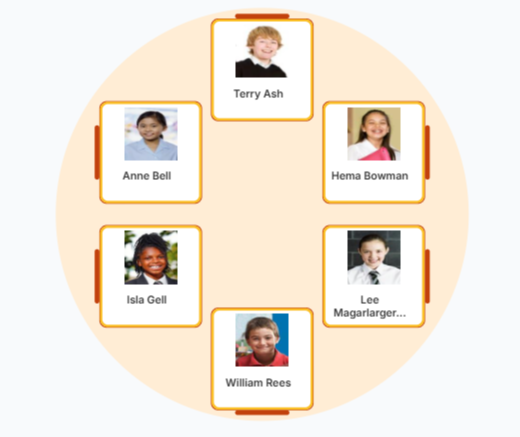
Zoom Functions
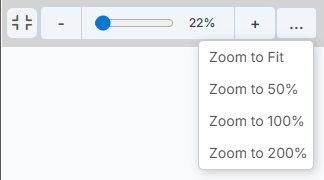
Zoom controls are found in the Front of the Classroom bar on the Seating Plan Canvas. Zoom goes from 20% to 200%. Dynamic scaling ensures all seating plan objects (desks, students, labels) adjust correctly at any zoom level.

- Full-screen mode opens the Canvas to its maximum size on your screen but retains the current zoom percentage.
- Users can increase the zoom one percentage point at a time by clicking the – and + buttons.
- CTRL + Mouse Scroll can be used to zoom smoothly.
- There is also a slider to change the zoom faster.
- The final option features predefined zoom levels: Zoom to Fit, Zoom to 50%, Zoom to 100% and Zoom to 200%.