
Use this guide to create a Student Broadsheet in Tracking Templates , this will produce an Assessment Sheet which will show one row per Student with multiple columns. This would normally be used in the example a Head of Year wanted to look at Students Assessment information across multiple subjects.
Access the minimum permissions required for Manage Templates is in the Assessment Module from Config> Set Up> Roles and Permissions

See also How to Create an Assessment Sheet for creating Subject Specific Assessment Sheets as appose to a Student Broadsheet with all Subjects.
From the left go to Modules>Assessment>Manage Templates.

Click New

All fields marked with an * need to be completed.
In the Template Details panel give the Template a Name , this will be your title for your Assessment Sheet.
Add Notes as required.
Choose a single Year Group from the dropdown.
For the Subject as you have to choose at least one I’ve chosen English however, it doesn’t matter which Subject you choose as you are going to define what Subjects you want to appear in the Broadsheet when you add the columns.
Tip: you could create a Subject called for example All Subjects and select that one.
You don’t need to choose multiple Subjects.

In the Columns panel we’re going to add the Columns we want to be visible.
You can Add Student Information Columns in here as well.

Click Add
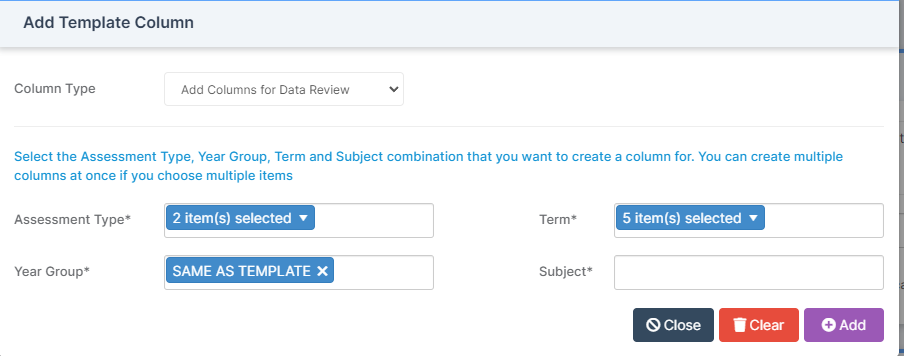
In this example we’ve chosen to Add Columns for Data Review as we want the viewer of the Assessment Sheet to be able to see the data but not Edit the data, if you did want the viewer to be able to Edit the data you would choose Add Columns for Data Entry.

Now we are going to define the Assessment Type, Term, Year Group and Subject of the Assessment data we want to see columns for.
As an example I’ve chosen Current and ATL in the Assessment Types, Autumn 1, Autumn 2, Spring 1, Spring 2 and Summer 1 in my Terms and Year Group is SAME AS TEMPLATE.
IMPORTANT – In the Subject in order to create a Broadsheet DO NOT SELECT SAME AS TEMPLATE. SAME AS TEMPLATE is used to create individual Subject Specific Assessment Sheets.
To create a Student Broadsheet you need to individually select the Subjects in Subject i
Then Click Add.

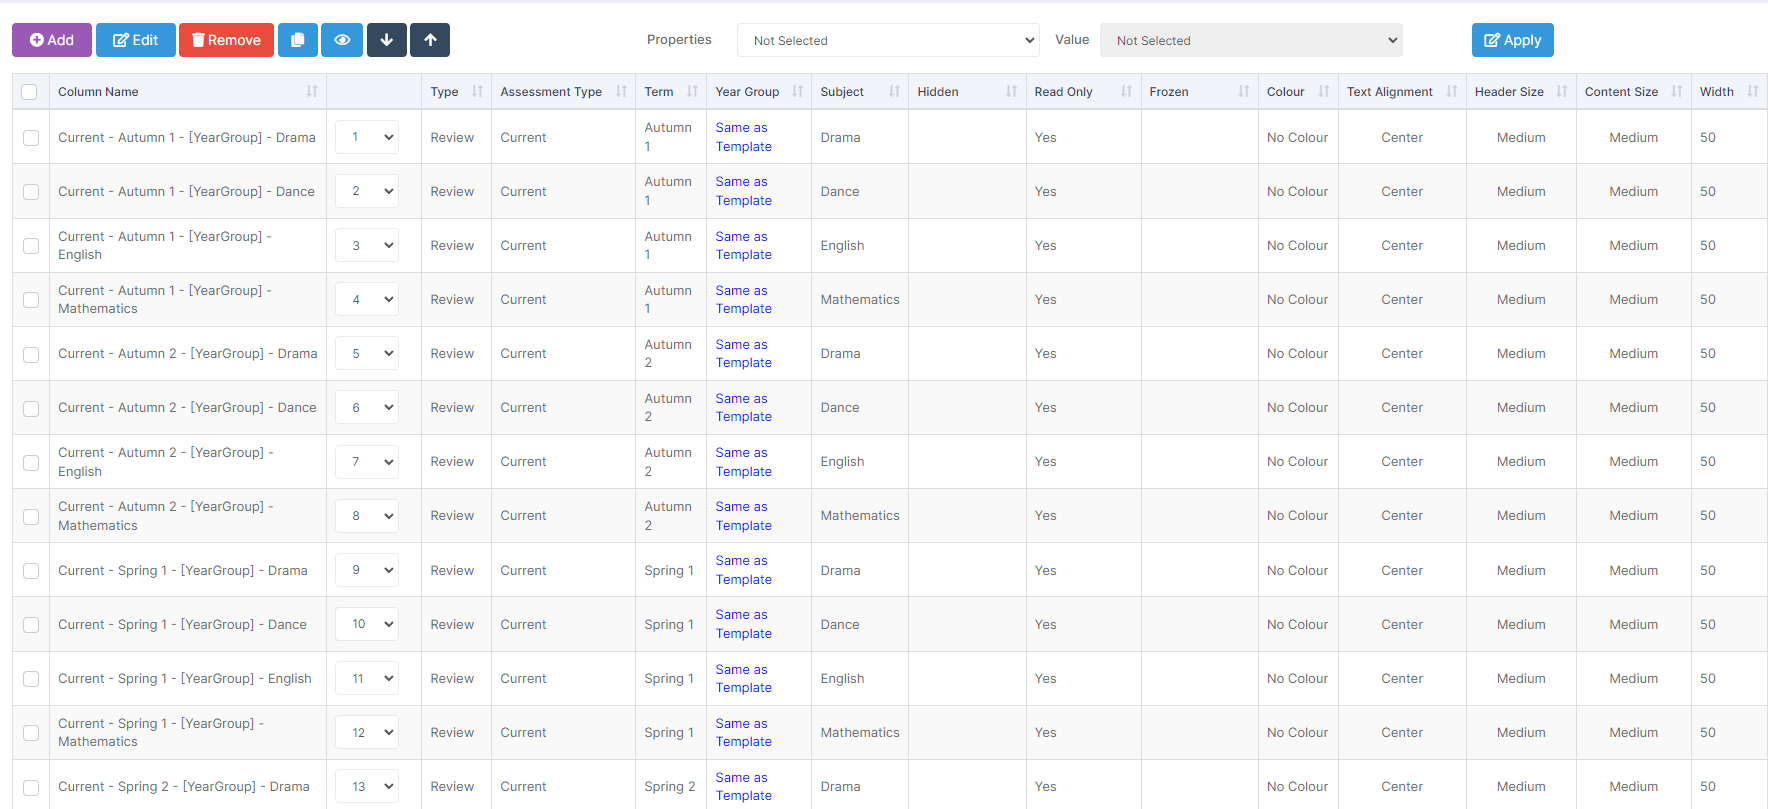
Below is an example of the columns added, note the Subjects are named in the Subject column as appose to SAME AS TEMPLATE.
Lastly in this example we want to Student Broadsheet to be visible for the Head of Year 11 so in the Marksheets Panel click Add and choose Year Group in the Group Type from the Group Selector List, in this example we’ve chosen Year 11. This means that any teachers associated with Year Group 11 will be able to see this Assessment Sheet.
You can view/add associated staff from Groups>Year Group>View>Associated Staff.

In this example these three members of staff will be able to see the Broadsheet.

DO NOT TICK DISTRIBUTE TO ALL CLASSES WITH ASSOCIATED YEAR GROUP AND SUBJECT OF THE TEMPLATE as this would create Assessment Sheets for all Year 11 English Teachers as you have defined Year 11 and English in the Template Details Panel.

In the example if you wanted to create a Student Broadsheet just for Year 11 Pupil Premium Students you could create your own Dynamic Report Group for Year 11 Pupil Premium Students and then choose that Group in the Group Selector List. Then any staff associated to this Report Group will see the Broadsheet in Assessment Sheets.
See How to Create Dynamic Report Groups
If we now look in Modules>Assessment>Assessment Sheets List in this example we can see the 2 groups we added to the Tracking Template , so one Broadsheet for Year 11 and one Broadsheet for Year 11 Pupil Premium.

When we click on the Assessment Sheet we can see one row per child as a Student Broadsheet.
