
This guide will cover the how to Import and Update your Basedata and the steps you need to take in Preparation.
Access: the permissions required to follow this guide can be found in the Examination module within Config>Set Up> Roles and Permissions.


Preparation
In Preparation to Import Basedata you will need to ensure you have a Season Pattern and a Season in place that spans the dates covered by the Basedata.
This guide covers how to set up Season Patterns and Seasons – How to Create an Examination Season Pattern and Season
Once you have your Season set up you will need to ensure that all the Exam Boards you will need to import Basedata for are set to Active within the Season you have created.
This guide covers how to activate Exam Boards – How to Manage Exam Boards
Automatic Import
From the left Menu go to Modules > Examination > Routines > Manage Base Data.

From the Actions list select the Import/Update Data option.

From the files area select the Basedata file you wish to Import and select the Match Import for Series from the dropdown list.

Note: If required, you can use the Season and/or the Board dropdown list in order to refine the list of available files.
The Convert Text to Lower Case tickbox will convert any BLOCK CAPITAL DATA found within the Basedata, into a lower case format.
Click the Go button to display the Import page.
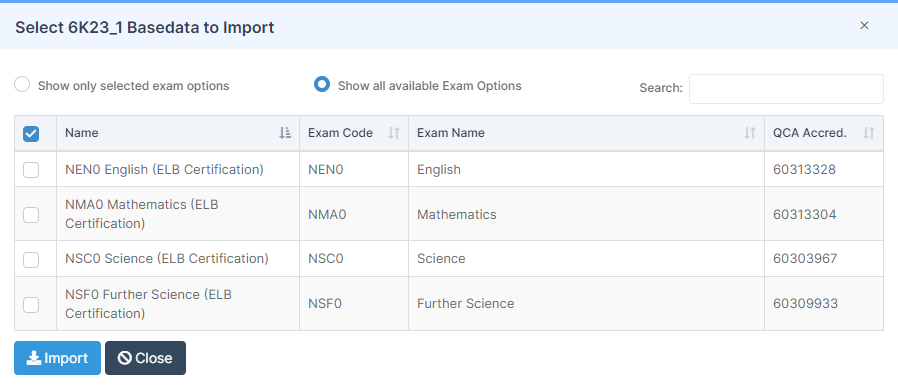
From here, you can individually select the required Exam Options, or use the Select/Deselect All Option.
Once selected click the Import button to Import the data.
Note: The order/presentation of the Exam Options can be altered by checking the use of the Exam Option Code First and Exam Option Name First checkboxes.
Note: If no Files have been Imported or none were available to match from the previous year the Show All Files Tick box will be ticked, to show all available Files.
Manual Import
If the Basedata file you would like to import isn’t listed automatically you do have the option to Import it Manually.
You will first need to download the Basedata file from the Exam Board directly. Once you have the Basedata file, from the left Menu go to Modules > Examination > Routines > Manage Base Data and select Actions > Import/Update Data as above.
In the pop up that appears, toggle Auto Select to Off.

Then select Upload

This will open My Files, select the Basedata file to be uploaded and select Open.
Note: it is the Zip file you need to upload, you do not need to extract the individual files.
You will get Confirmation in the top right hand corner that the File has Uploaded Successfully.

Tick the box to Show all Files.

From the files area select the Basedata file you wish to Import and select the Match Import for Series from the dropdown list.

The Convert Text to Lower Case tickbox will convert any BLOCK CAPITAL DATA found within the Basedata, into a lower case format.
Click the Go button to display the Import page.

Alternatively, if there are no available options in the Match import for series dropdown or you need to alter the selections, choose Show all available exam options

From here, you can individually select the required Exam Options, or use the Select/Deselect All Option.
Once you are happy with your selections click Import.
Updating Imported Basedata
Where a file has already been Imported and is selected again the Import button changes to Update. When selected a file displays the the Date and Time of when it was last Imported below the file box, it will also shows the same information when using the mouseover pointer.
Note: if you are using the A2C Integration refreshing Basedata is an automatic process except for Pearson BTEC and CIE.
