
Note: All pages shown below are subject to having the relevant Roles and Permissions.
In this guide, we will cover the methods available for providing Staff with login credentials to the MIS, for those who are not using Single Sign on.
To login into Bromcom for non SSO – Single Sign On you will need your School ID, your Username and your Password. Dependant on your role they may be other functions that require your Username and Password for example deleting a student record or accessing e-timetable software.

There are currently two methods available, which are:
Send Reset Password Link
The first option is to use the Send Reset Password Link from the User record.
Note: To do this they will need to have a work email address.
From the left menu go to Modules > Setup > System Users.

Select the member of Staff and click on View.

If their work email is already in place, click on Send Reset Password Link.
If they have a work email address but it is not in the Work email field, you can add it in and then click on Send Reset Password Link.

A pop up message will ask you to confirm you want to send the password reset email, click on Proceed.
They will then receive an email with a link to reset the password.

Note: For emails to send you must have an email address present under Config > Communications > Config > School email.
Manual Data Export and Import
If the staff member does not have a work email then you can’t do the above process, the alternative is to do a Manual Data Export / Import process to update the password.
You can then share it with them, making sure the account is set to prompt them to change the password and next login.
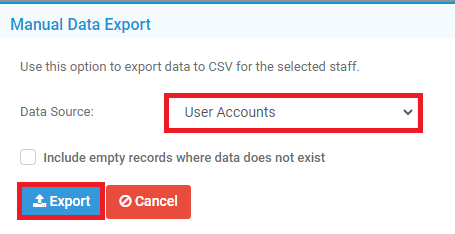
To begin, go to the Staff page, select the staff member and click on Actions > Manual Data Export.

For the Data Source select User Account and Export. This will create a .CSV file which you can open.
Once the file is open you can update the Password and Save the file.

Back on the Staff page go to Actions > Manual Data Import.

Click on Browse and find the file you saved, then click Next to continue to the next step.

On step two set the Data Destination to User Accounts.
As long has you have not changed any of the headings in the file you will not need to update any of the mappings.
Click on Import to complete the process.

You should then receive the following success message shown below;
