
MCAS (MyChildAtSchool) User Accounts are used by Parents/Contacts to view their children’s data through the MCAS App or Website.
In this guide, we will show you how to
Pre-requisites;
- From the side menu, go to the Others page and ensure you do not have duplicate records for any Parents/Contacts see: Duplicate MCAS User Accounts.
- If you have Staff with children at your School, you must create a separate Contact Record for these Staff, do not link their MCAS Account to their Staff Record. They must exist on the system as Contacts to link with MCAS successfully.
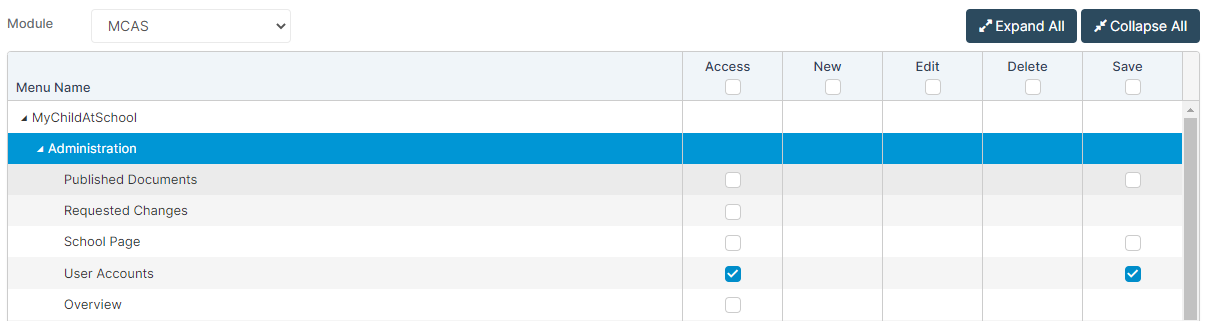
Access: The minimum permissions required to follow this guide are found in the MCAS Module of Config>Setup>Roles & Permissions.
See also: MCAS – Changes to MIS and How To Manage MyChildAtSchool User Accounts.
Enable Self Sign Up for parents
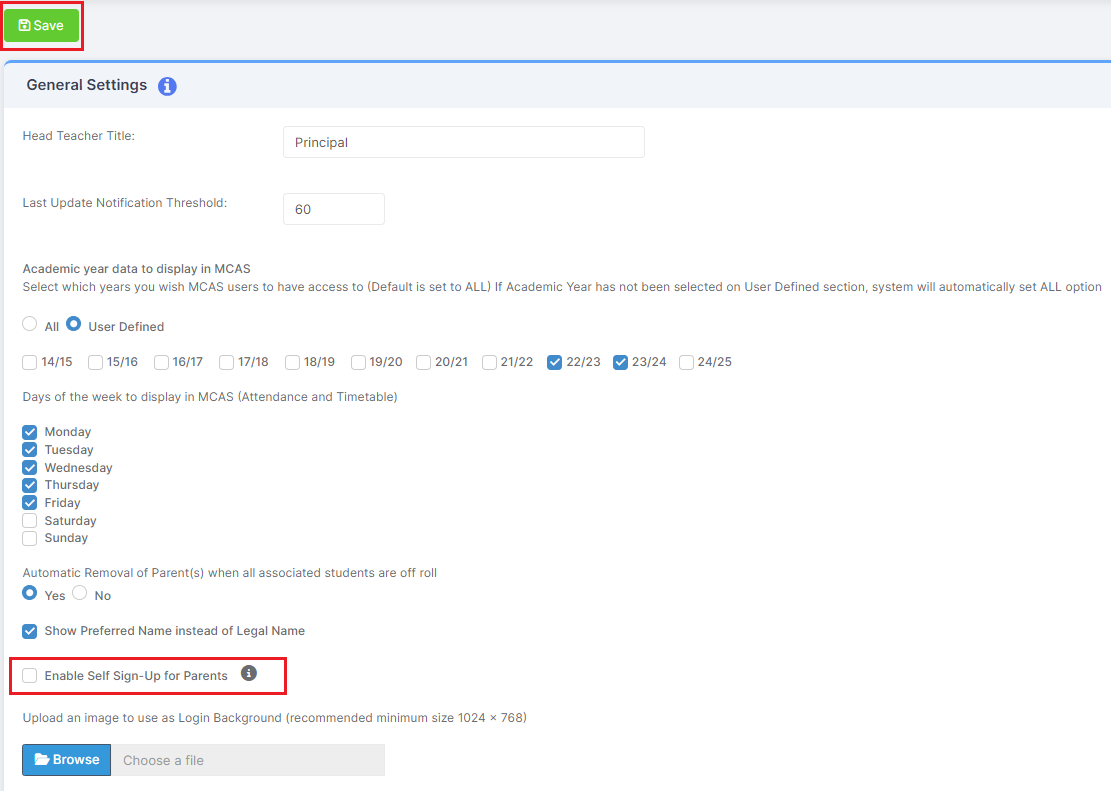
Config > MyChildAtSchool > General Settings

Self Sign Up enables parents to set up a password for their MyChildAtSchool account directly from the parent login screen, using their registered email address, without having to receive a link from the school to do so.
To allow parents to perform Self Sign Up the school must tick the checkbox labelled Enable Self Sign-Up for Parents in the General Settings page.
Things to Consider:
- This feature will only work if the parent has been given Parental Responsibility (found in Students > Student Details > Contacts > Linked Students).
- This feature Is Not Suitable for Parents that have existing MCAS accounts. Where this is the case you will need to follow the steps in the User Account Creation section of this guide ensuring that the Parent has provided you with the same Email Address as they are using with their existing MCAS account.
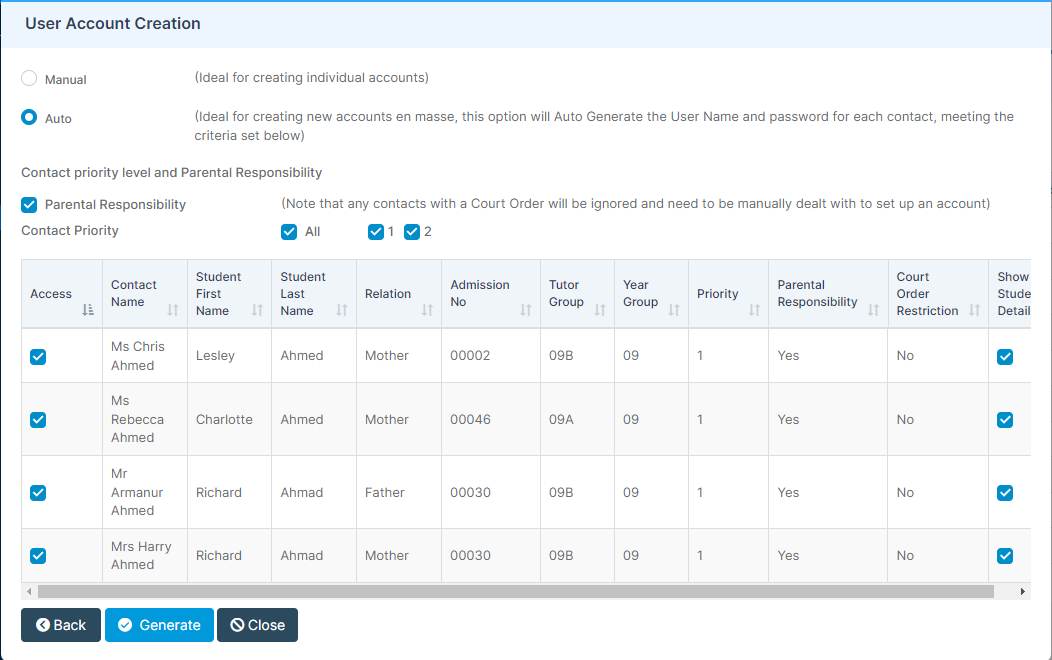
User Account Creation
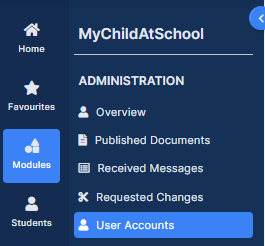
Modules > MyChildAtSchool > Administration > User Accounts
From User Account Maintenance page click New to get to the User Account Creation popup.
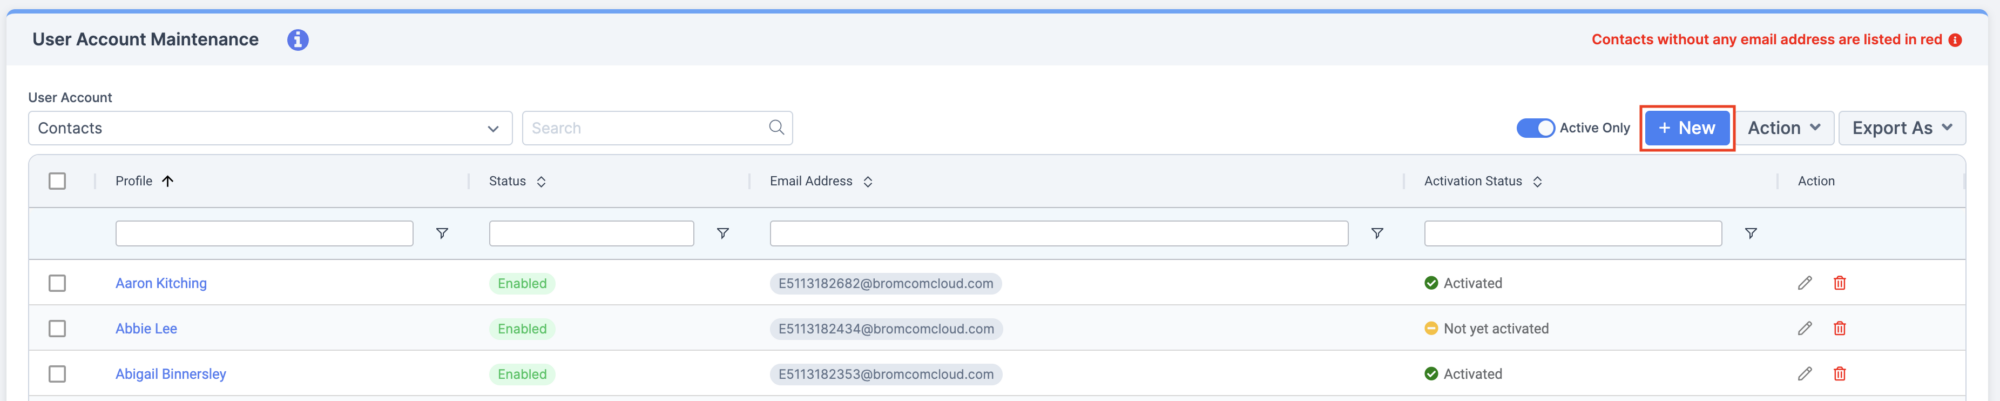
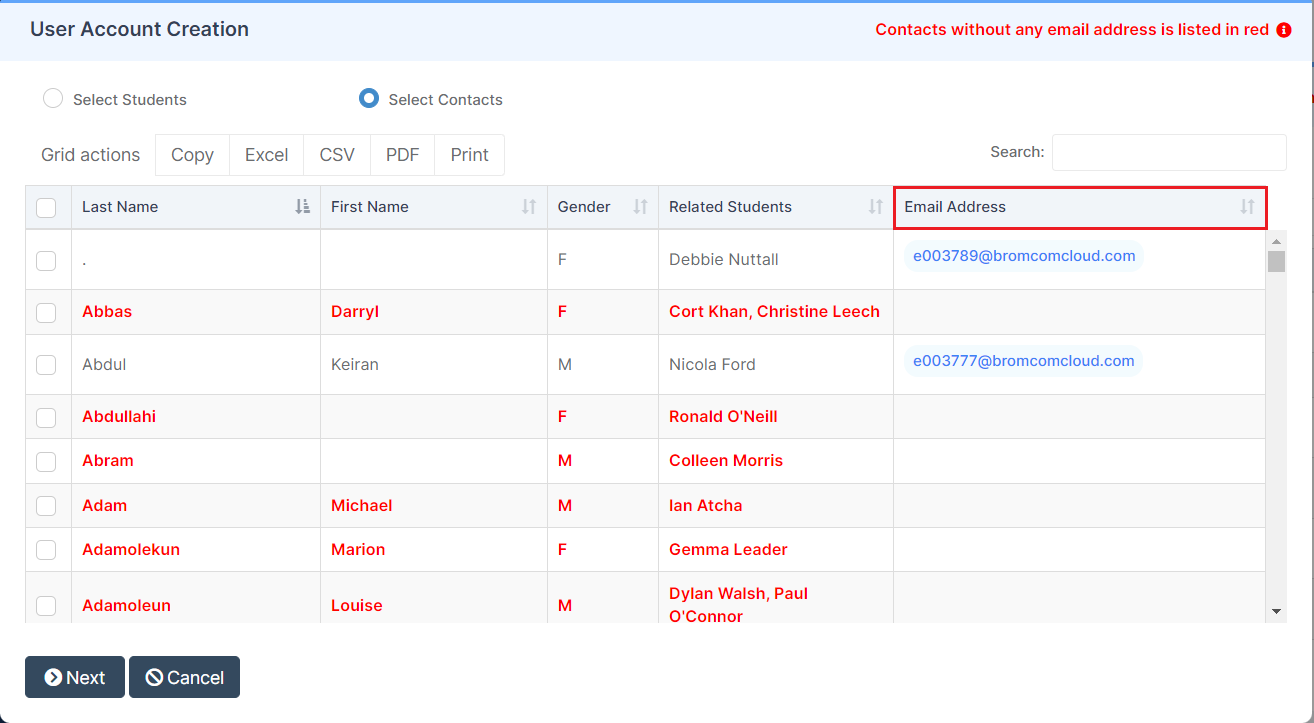
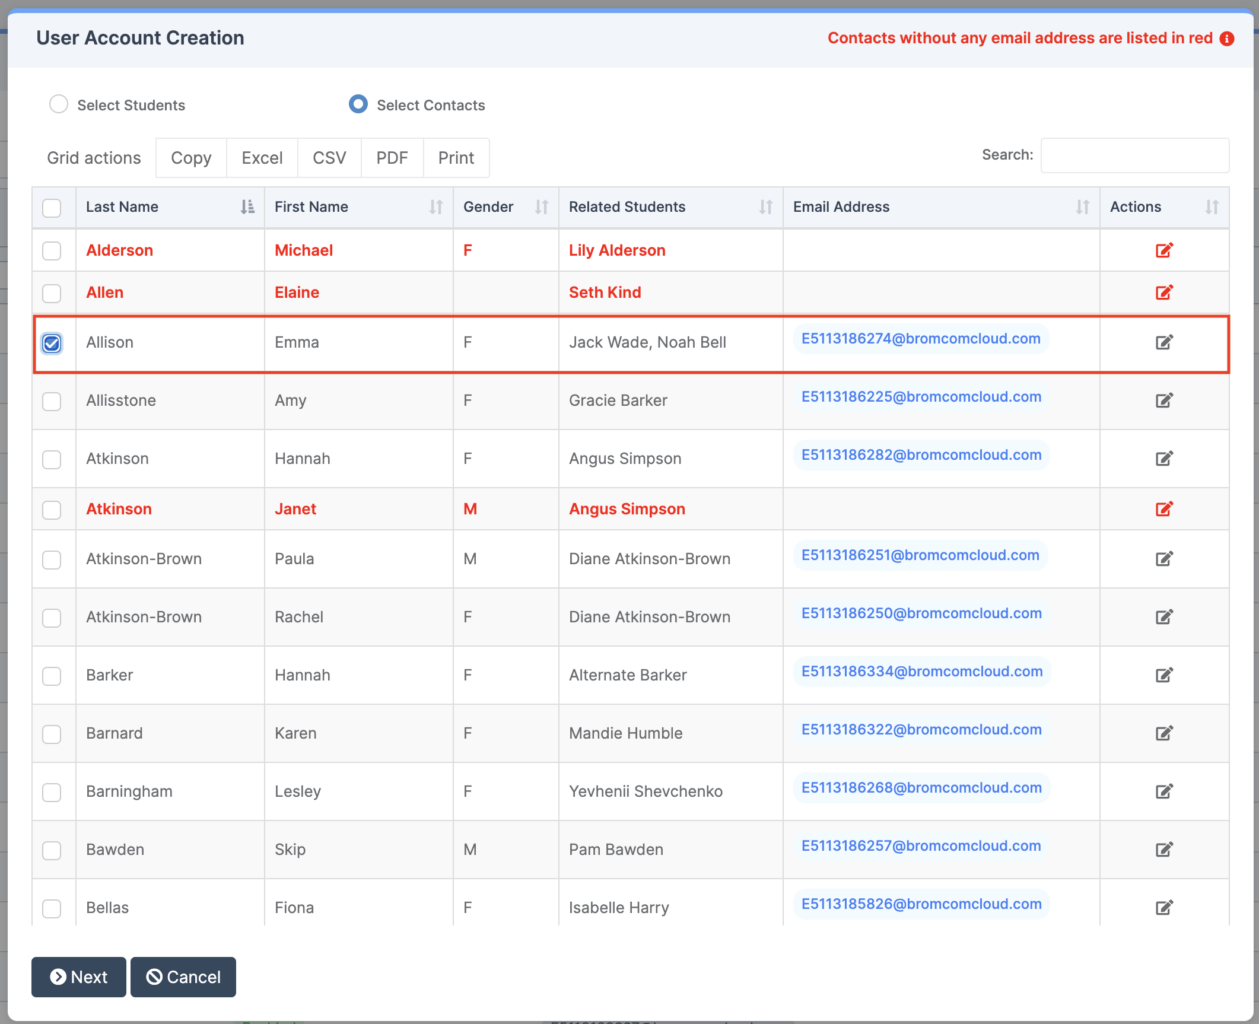
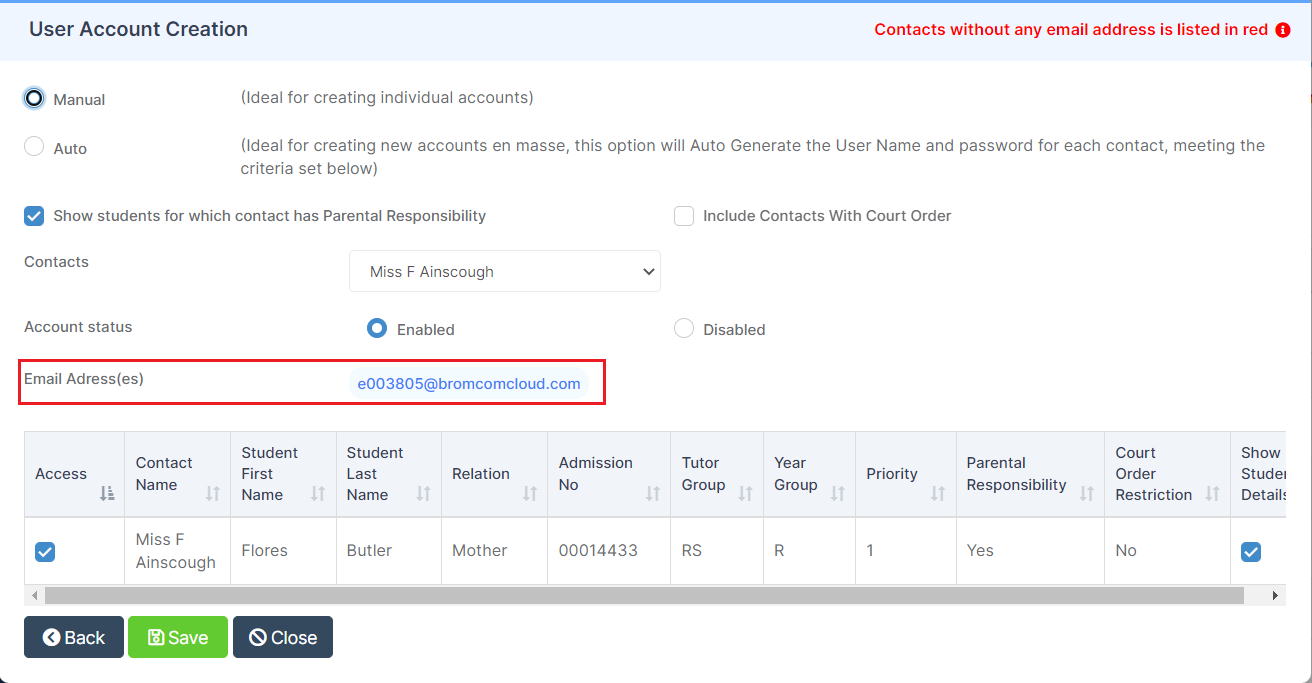
Choose Select Contacts. You will now see the Email Address column. Contacts without an Email Address appear in bold, red text in the table. If more than one Email Address is associated with this Contact – you will see all Email Addresses separated by a comma.
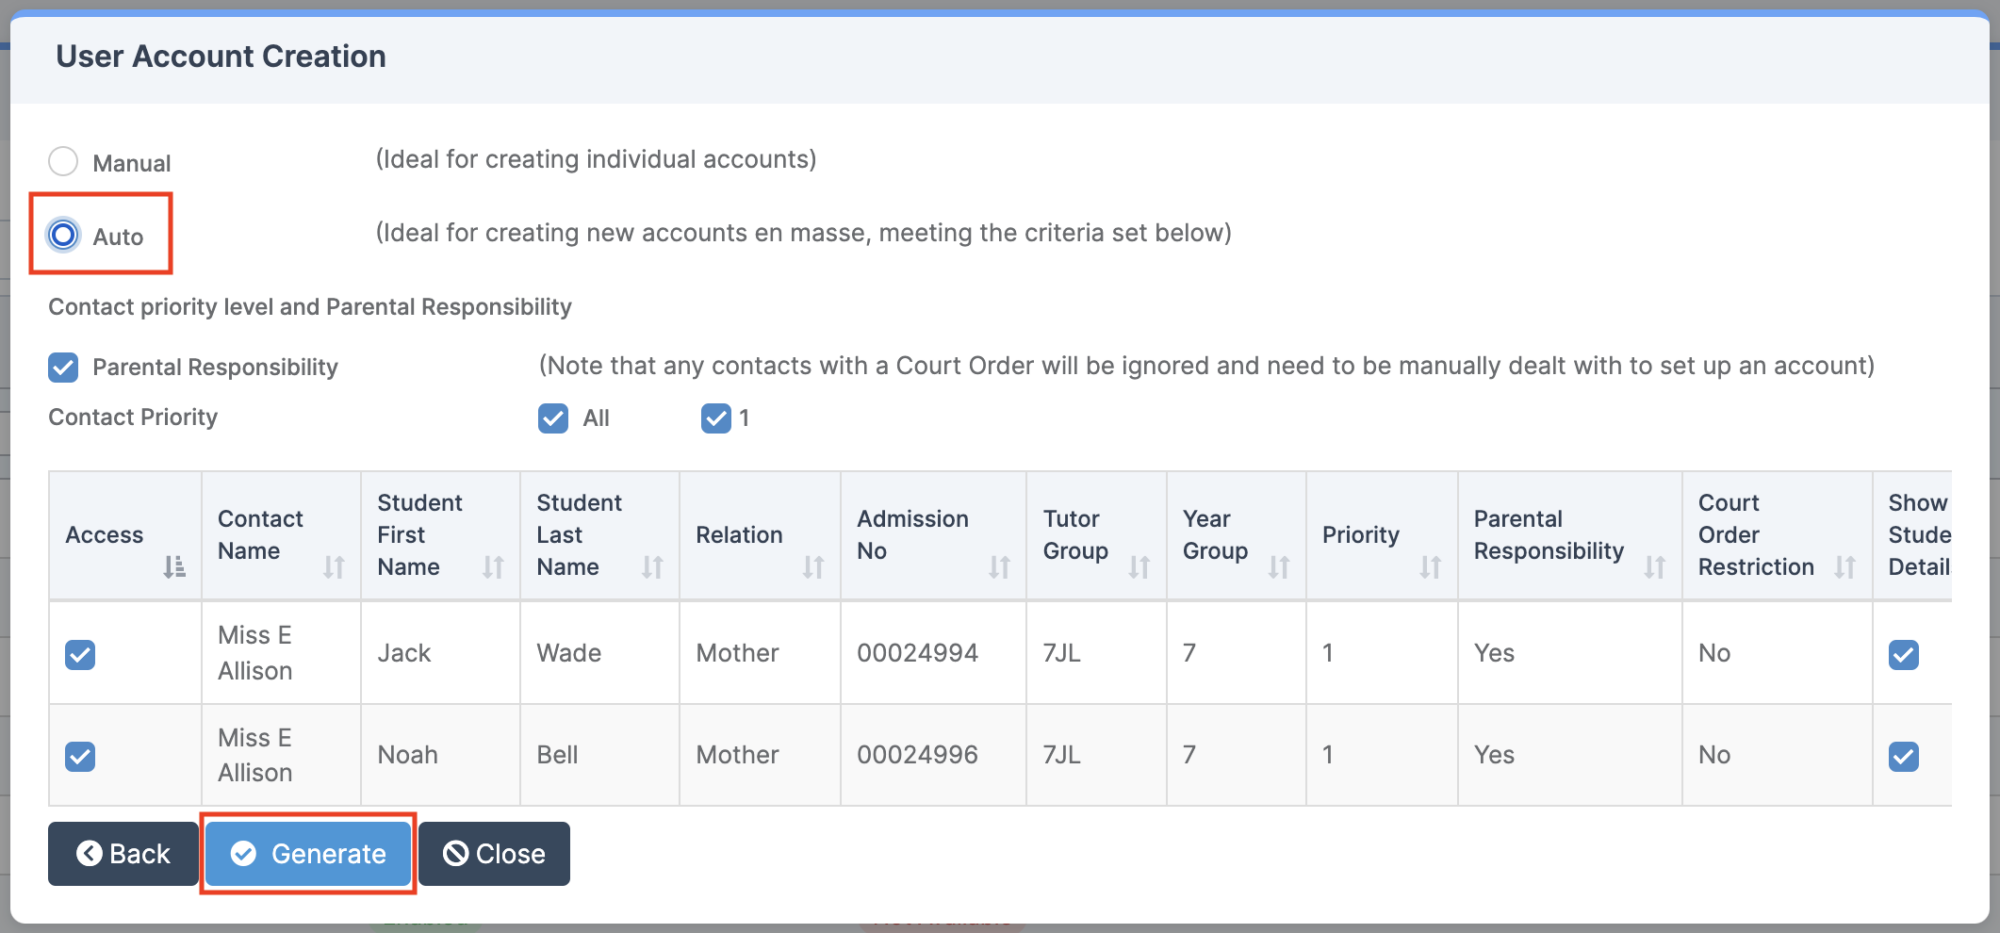
Auto User Account Creation
Select a Contact and click Next.
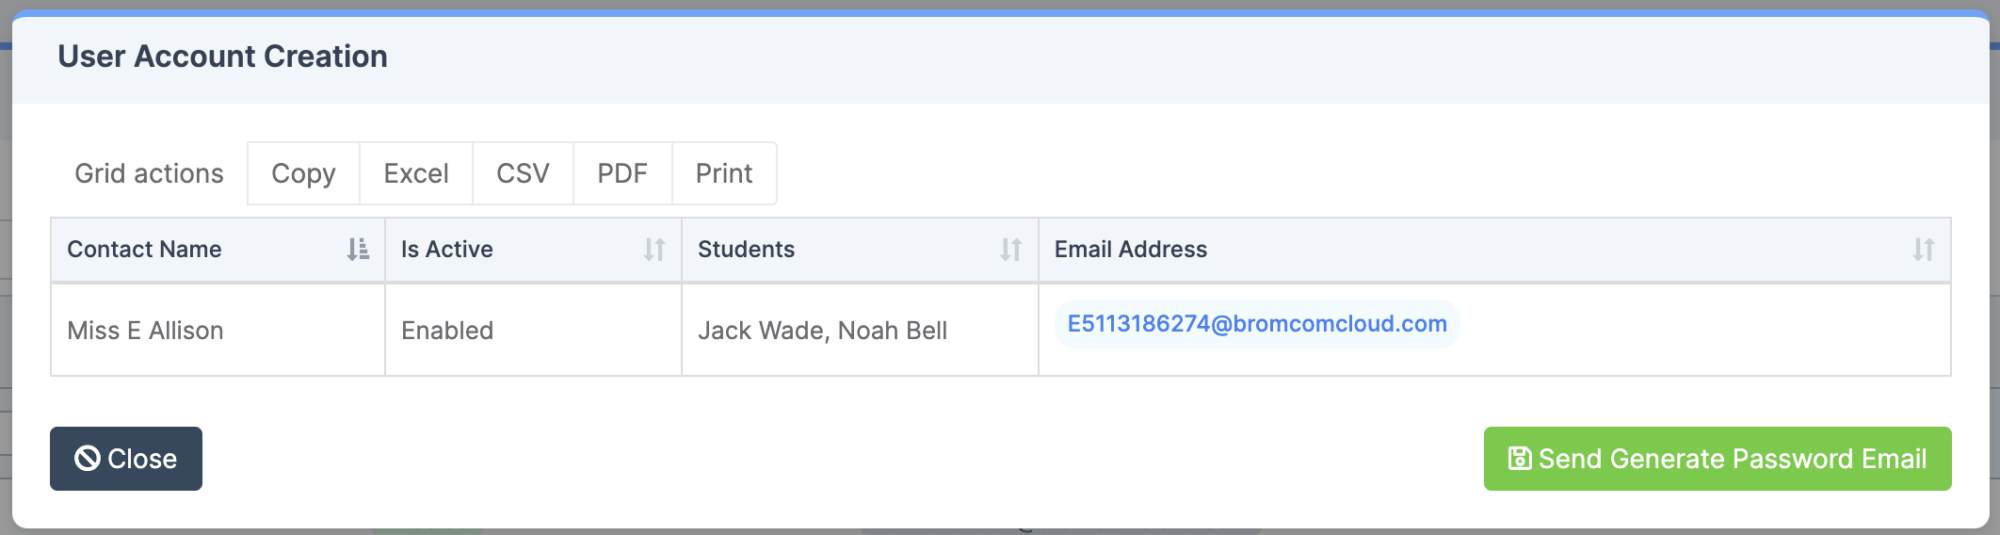
When you click Generate you will see Email Address column in the User Account Creation popup.
Manual User Account Creation
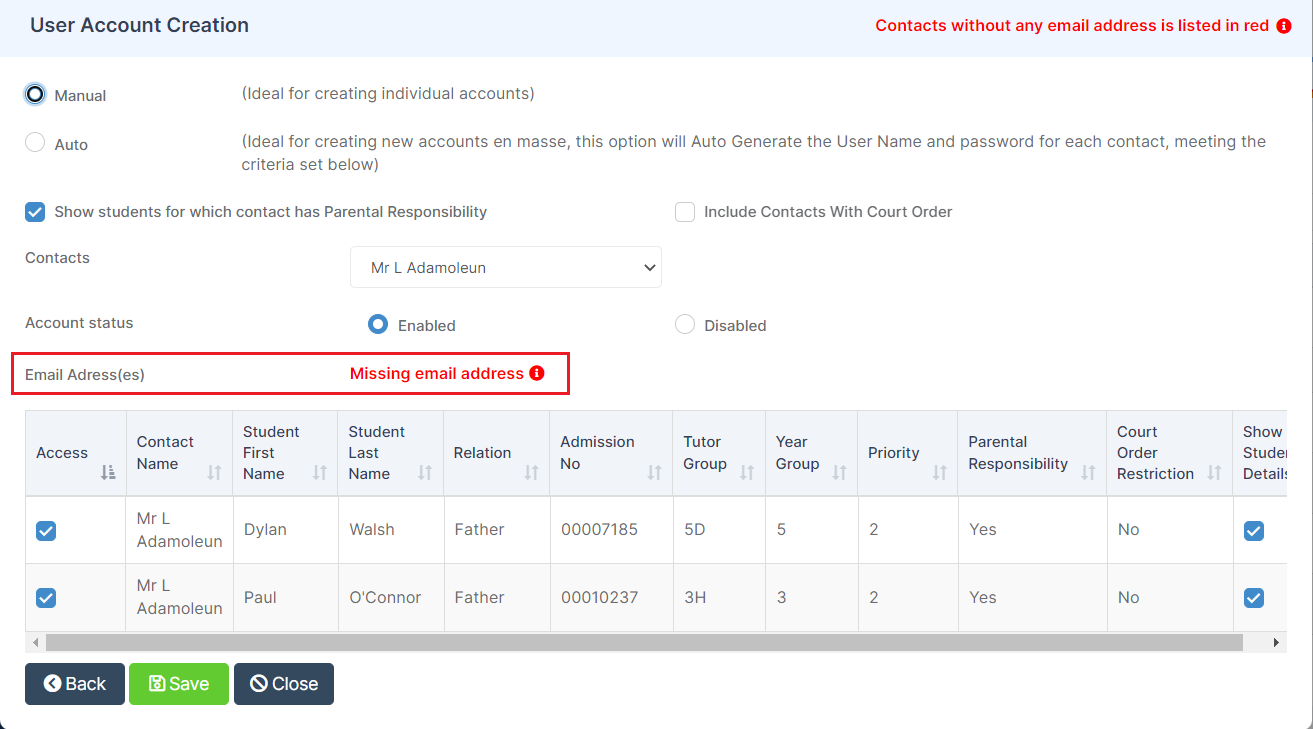
When you switch the radio button to Manual you will now see Email Address(es) field.
If there is not an Email Address for this Contact you will see a red alert Missing email address. The Contact details will need to be updated with an Email Address.
To begin, go to Modules>MCAS>User Accounts.

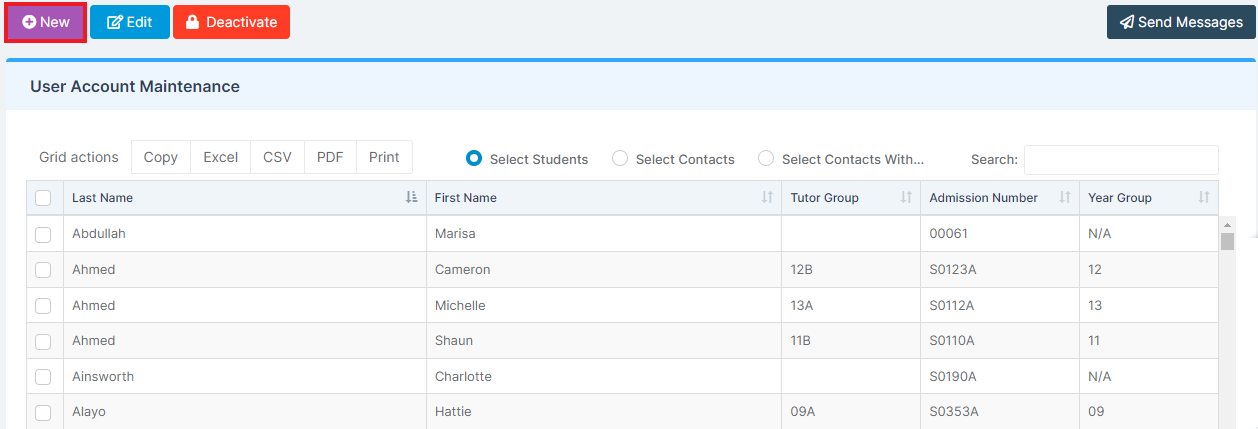
Any existing User Accounts will be listed on the page.
To create New User Accounts, press New.
This opens up User Account Creation which offers a radio button with three choices;
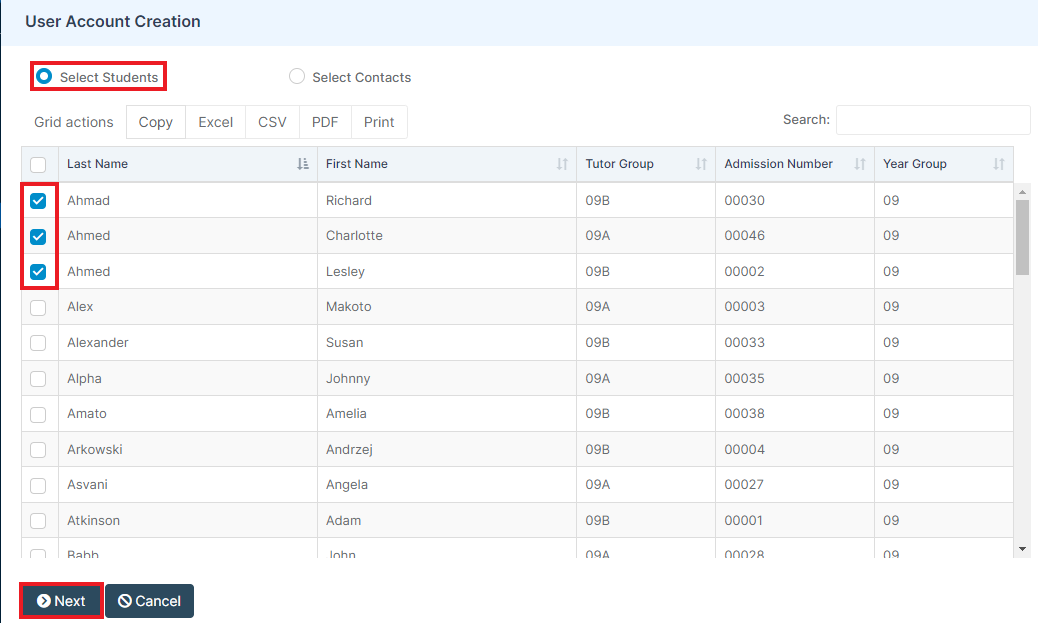
- Select Students – Provides a list of the Students that are not linked to an MCAS Account.
- Select Contacts – Provides a list of the Contacts that are not linked to an MCAS Account.
- Select Contacts with no linked Students
Whichever of the 3 radio buttons you choose the system will remember this choice and the next time you access this page it will default to the choice you made the last time you logged in.
For the first time creating User Accounts, Select Students is fine. With the Radio Button on Select Students, tick at least one Student in the list and press Next.
Note: to create User Accounts for Pre Admission Groups, type Pre in the Search field to see Students with a Pre Admission Number or sort by the Admission Number column.
Complete the following options:
- Manual or Auto: As we are creating several Accounts at the same time, we select the Auto radio button. If we want to create Accounts for only one Student we would select Manual.
- Contact priority level and Parental Responsibility: These options allow you to filter the list of Contacts so that only Contacts of a certain Priority or with Parental Responsibility are eligible to have an MCAS Account created for the selected Student(s).
- Access and Show Student Details: These tick boxes are located in the far left and far right columns within the table. Access allows the Contact to see the Student on MCAS, Show Student Details allows the Contact to see the Student’s personal details on MCAS.
User Accounts can be managed post creation if you need to make changes.
When you’ve made your selections and are happy with the Contacts that will have User Accounts created, click Generate.
Once you press Generate, you will receive a success notification and you will see a list of the Contacts who now have an MCAS Account.