
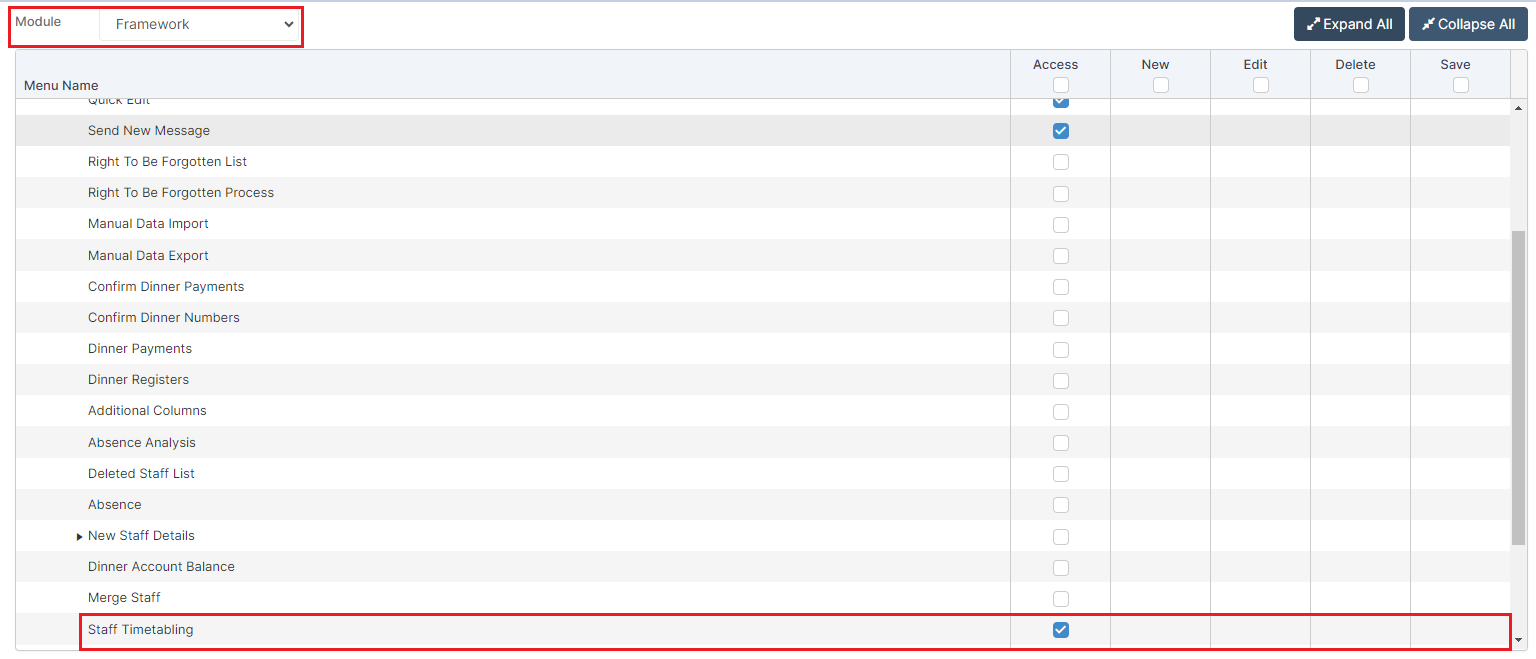
Access: The minimum permissions required to access Staff Timetabling are found in the Framework Module of Config>Setup>Roles & Permissions.
Staff Timetabling allows you to manage a staff member’s timetable using the following options:
See also: How To Add Staff to Teaching Classes and/or Groups and How to Add and Edit Contact and Duty Codes for Staff.
From the left Menu select Staff, click on one or more members of Staff, who will then show highlighted. Then click on the Actions button and select the Staff Timetabling option.

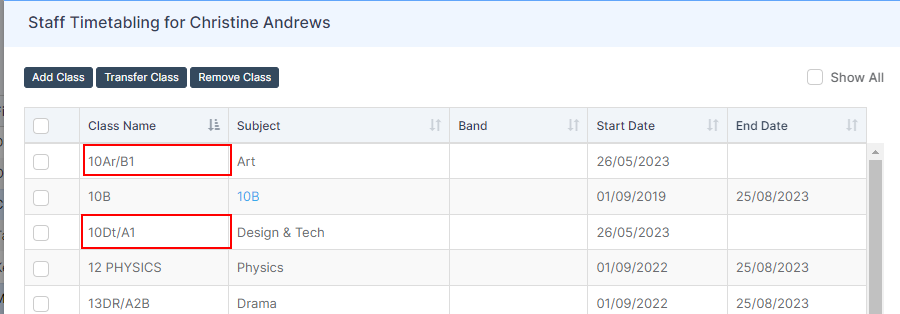
The Groups list and Timetable view for the current week will be displayed for the first Staff member selected.
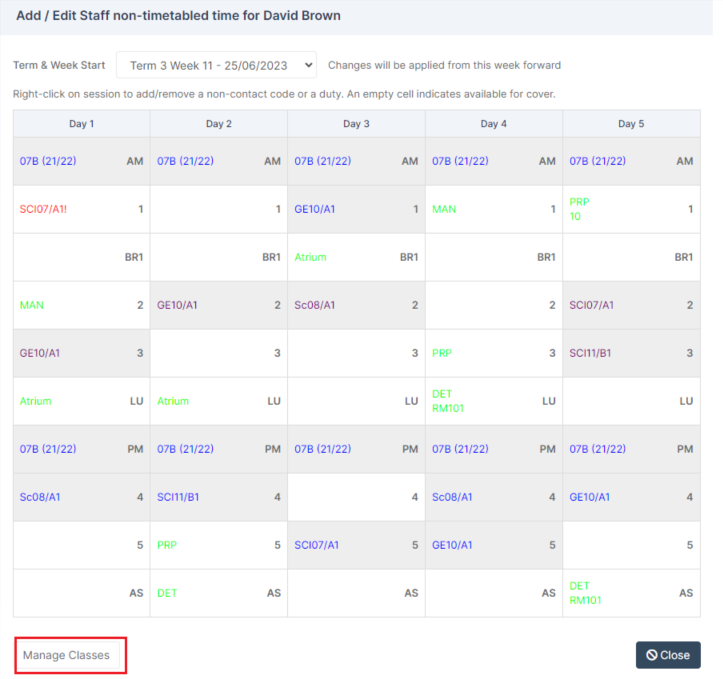
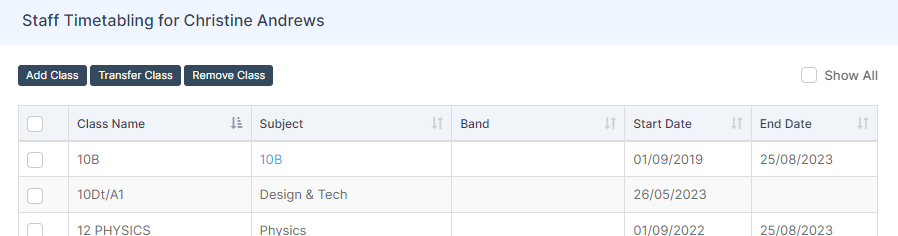
Note: Use the Manage Non-Timetabled Time and Manage Classes toggle button at the bottom left to move back and forth between the list of Groups and Timetable displays:
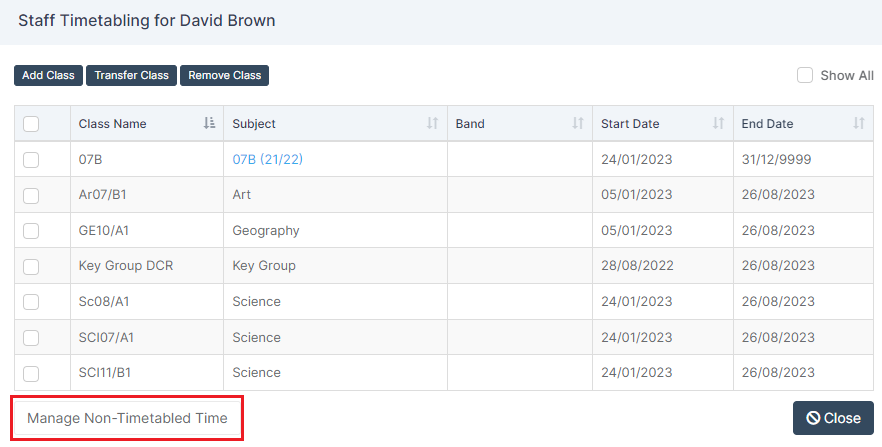
Add a Class
From the Groups list view, additional Classes can be added to the Teacher Timetable by selecting the Add Class button. This will open the Assign Class(es) to Teacher Name pop-up.

Enter the Name of the Class or click on the Magnifying Glass icon to open the Group Selector. Any Classes selected will be displayed in the Selection List. Enter a Staff Role, Main Teacher, Teacher or Support from the dropdown list, a Start Date and click Save. The new Classes will now display in the Groups list.
Transfer a Class
Selecting one or more Classes and clicking the Transfer Class button, will open the Transfer Teacher Name’s Class(es) pop-up. Enter the Name of the member of Staff to Transfer the Classes to or click the Magnyfying Glass icon to open the Staff Selector and select the member of Staff. Tick the Transfer all Non Contact and Duty codes as well? box if required and click Save.

The selected Classes are no longer displayed in the Groups list.
Remove a Class
Selecting one or more Classes and clicking the Remove Class button, will display a Confirmation Message, select Cancel or Proceed.

Note: Using the Remove option will remove the History of the Staff Association to the Group and should be used with caution. You may wish to consider managing the end date of the staff’s association via the group details page instead. Please speak to the Helpdesk if you are unsure.
The Classes are no are no longer displayed in the Group list.

Manage Non-Timetabled Time
Note: Staff Non-Contact and Duty Codes can be edited in Config > Curriculum > Staff Non-Contact and Duty Codes, for more information on how to do this please see How to Add and Edit Contact and Duty Codes for Staff.
Click the Manage Non-Timetabled Time button to View the Weekly Timetable.

The Term & Week Start can be changed using the dropdown list.

Add/Edit or Remove Non Teaching Sessions
- Non-Teaching sessions can be added by right clicking on a session and selecting the option from the Menu list.
- Existing Codes can be Edited or Removed by selecting Remove Code from the list.

Once added right click again to Allocate a Room if required.

Multiple Session Changes
You can click on multiple sessions and then right click to make a bulk change
