
In this guide we’ll look at how you can Save and Confirm dinner numbers. This is usually done once any Dinner Registers have been taken.
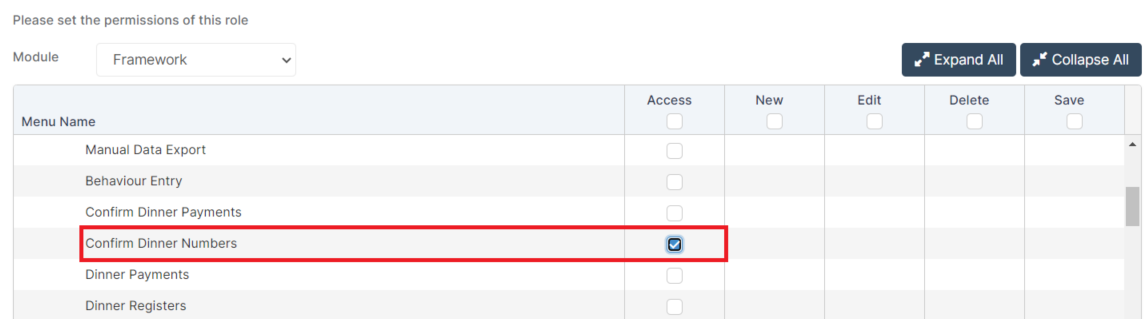
Access: The minimum permissions required to access Confirm Dinner Numbers can be found in the Framework module from within Config > Setup > Roles and Permissions.
See Also: How to Reset Dinner Numbers, How to use the Kitchen Statistics Report
Go to the Student List Page.

If you would like to run this process for one specific group of students you can go to Search Filters in the top right hand corner and use the filters to narrow down the search. Alternatively, if you want to run the process for the whole school you can skip this step.

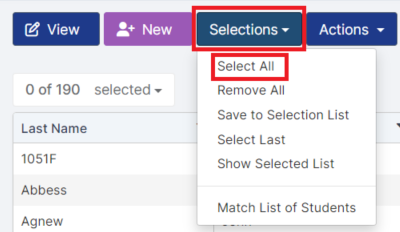
Next, you can either select specific students by clicking on each of them individually to highlight them blue. Alternatively, you can select all the students in the list by going to Selections > Select All. This will highlight all students in the list.
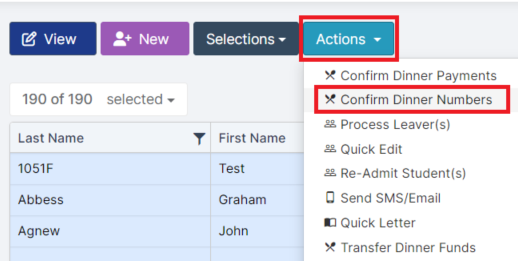
Next, go to Actions > Confirm Dinner Numbers.
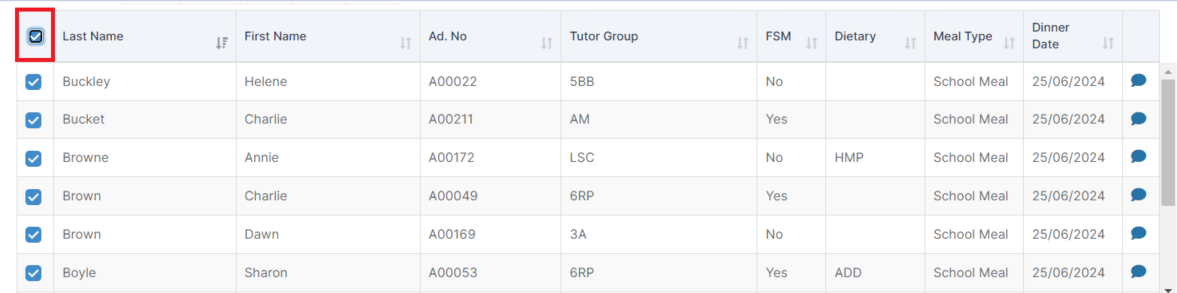
This will display a list of all unconfirmed Dinner Numbers for the selected Students.
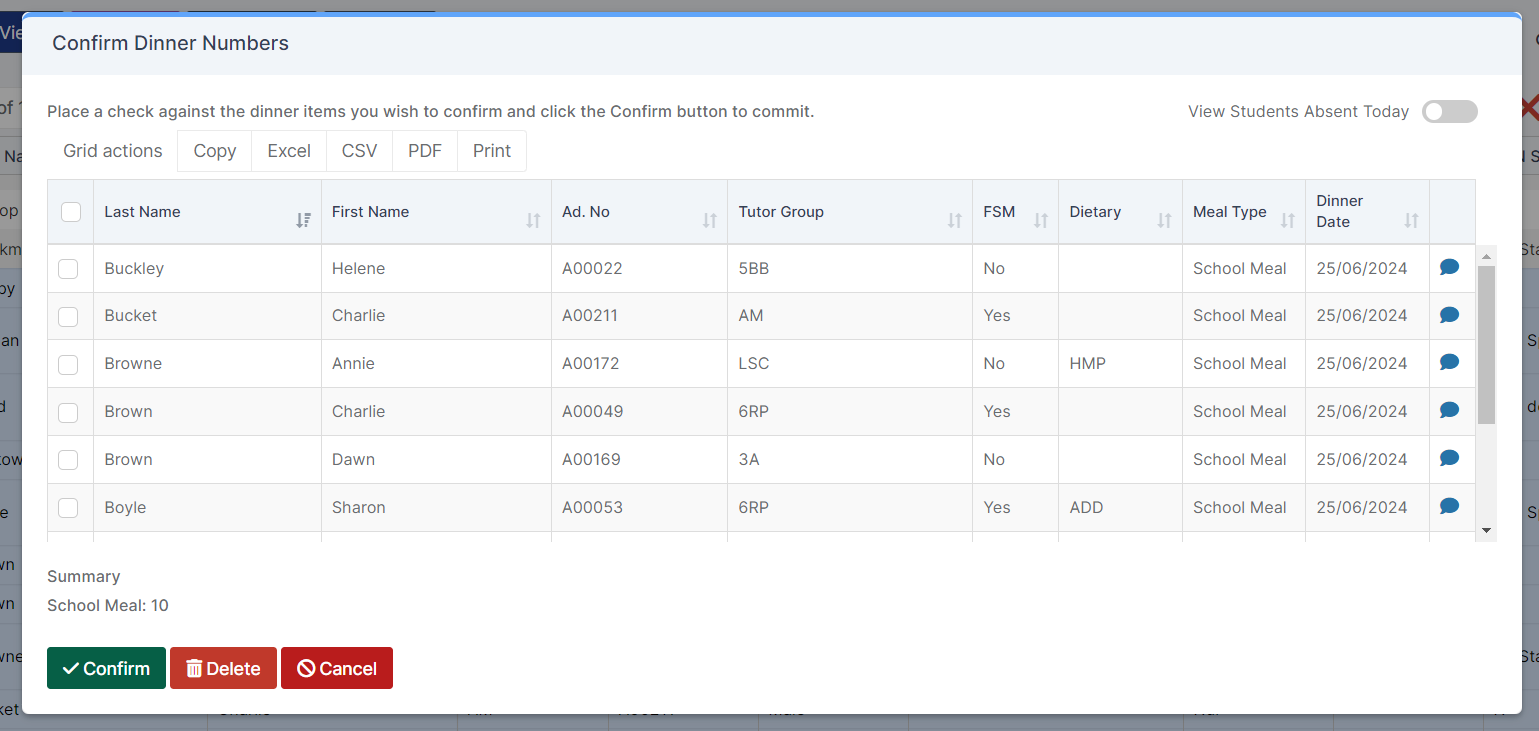
Next, use the tick boxes on the left hand side to select which dinners to confirm. You can either do this individually, or you can use the tick box in the top left hand corner of the table to select all of them.
Once you’re happy with your selections click Confirm.
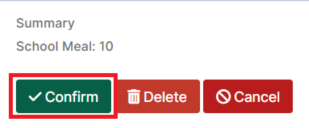
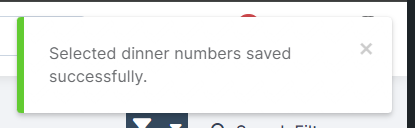
You’ll receive confirmation in the top right hand corner that the meals have been confirmed successfully.
This means the Dinner Numbers have been confirmed and will now display on the Kitchen Statistics report so you can provide accurate figures to the kitchen. For more information on this please see How to use the Kitchen Statistics Report.
Within the Confirm Dinner Numbers pop-up, you also have the option to View absent students so you can update their Meal Type to absent, to do this use the toggle in the top right hand corner.

This will display any of the selected students who have received an absent mark. Use the tick boxes on the left to select any students who’s meal type you would like to update to Absent and press Mark Absent & Confirm once you’re happy with your selection.
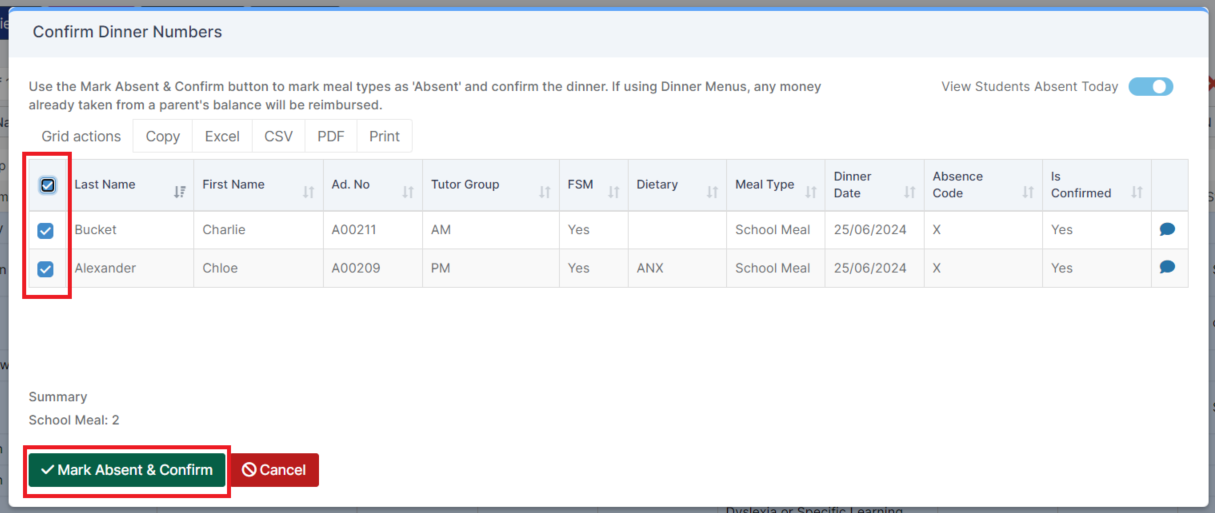
This will update the selected students Meal Type to absent.