
In this guide are going to look at the use of OWM – One Way Messages to send a short (maximum 40 characters) message to a Student, Staff member or a pre-defined Message Group.
Note: The One Way Messages feature is not available in Primary systems
Access: To access the One Way Messages feature, you will need the following minimum permissions from within the Administration Module of Config>Setup>Roles & Permissions.

See also How to Send an SMS Message or Email and How to Purchase SMS Messages.
OWM One Way Messages
From the Home Screen go to Modules>Administration>OWM


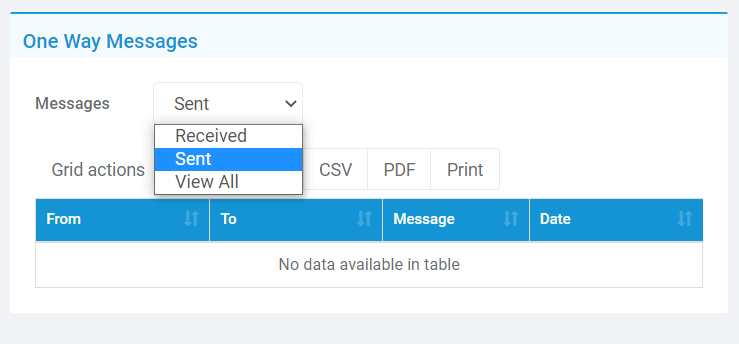
Within the One Way Messages panel click on the Messages drop down to see Sent, Received or View All. Note the drop down defaults to Sent.
To Create a new OWM first click on the Select Message Recipient drop down to choose either Student, Staff or Msg Group.
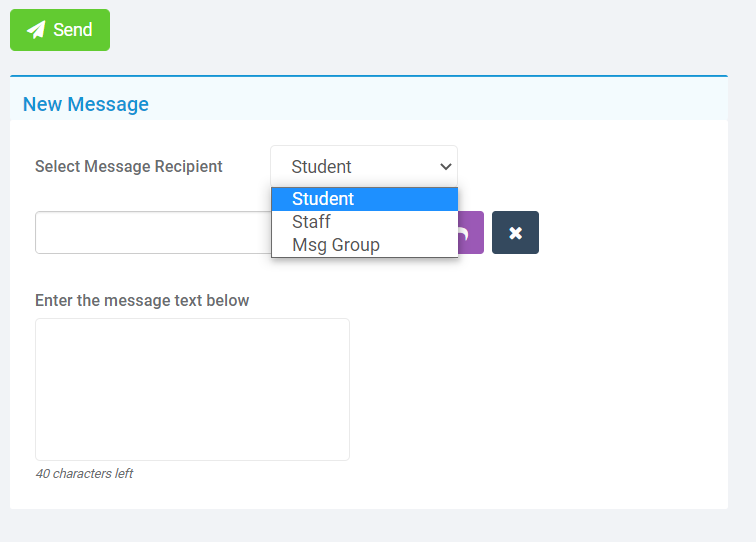
Then either type in a single Student, Staff or Msg Group name or click the Find button to open the Student Selector, Staff Selector to choose multiple Students or Staff.
For sending to a Msg Group choose the required Msg Group from the drop down.
Type the message text (maximum 40 characters) into the box and click Send.
Message Groups
From the Home Screen go to Config>Administration>Message Groups


Click on a Name in the Message Groups Table to view or edit the Recipients in the Edit Message Group panel.
Use the Grid Actions to Copy, Export or Print the Groups/Recipients.
