
Note: All pages shown below are subject to having relevant Roles & Permissions.
In this guide, we will cover the processes for;
- Creating new Medical Condition Types
- Creating new Medical Conditions
- Assigning Medical Conditions to a Student
See also: How to Edit Lookup Tables and How to use the Lookup Tables for Safeguarding.
What are the differences?
Before we begin, it is important to note the difference between Medical Condition Types and Medical Conditions.
Medical Condition Types act as a folder/category and this is where the actual Medical Conditions will be stored – Examples are Serious, Dietary or Physical.
Medical Conditions are the specific/individual conditions that a Student may have, and are stored within the Medical Condition Types.
Adding a new Medical Condition Type
To begin, you will need to go to Config>Administration>Lookup Tables.
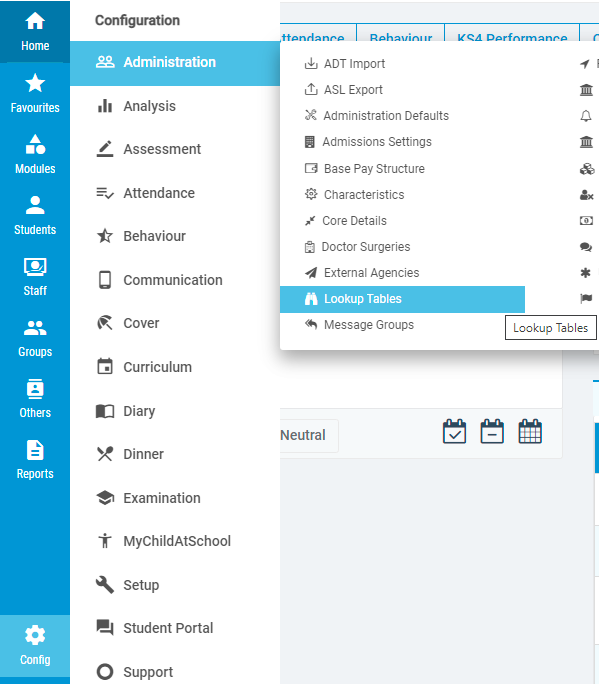
This is where all of the configurable Menu options within the MIS are stored.
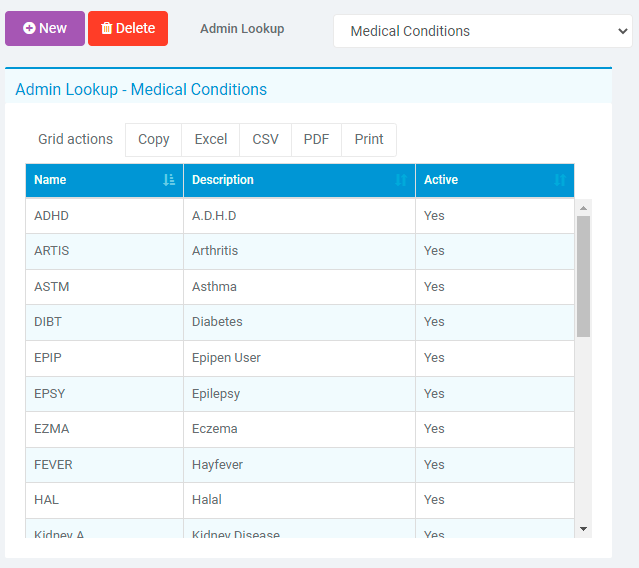
From the Admin Lookup list on the page, please select Medical Condition Types.
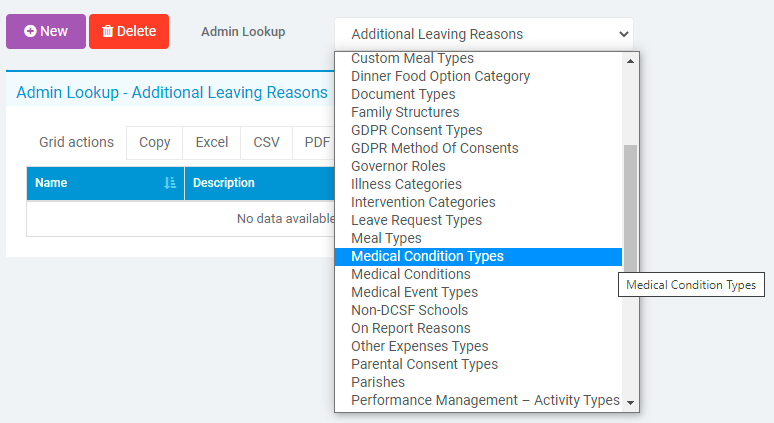
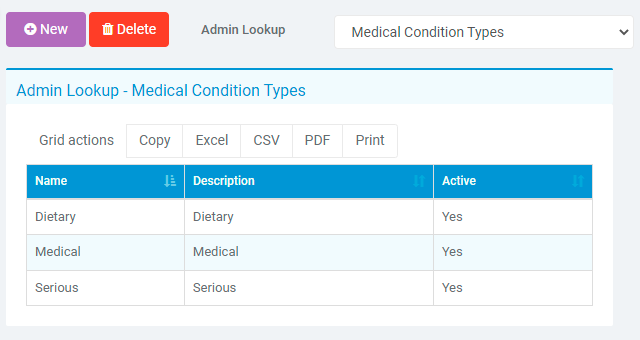
This will display all of the Medical Condition Types currently stored on your system in a table.
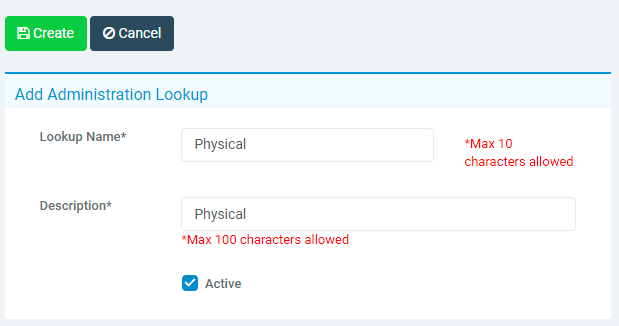
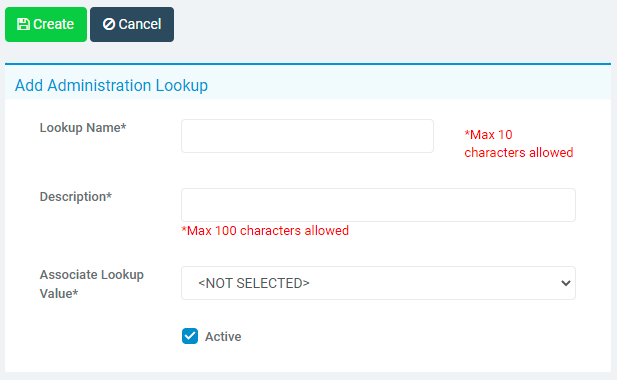
To add another, press New.
An additional section on the right of the page will appear, which allows you to Name the new Medical Condition Type.
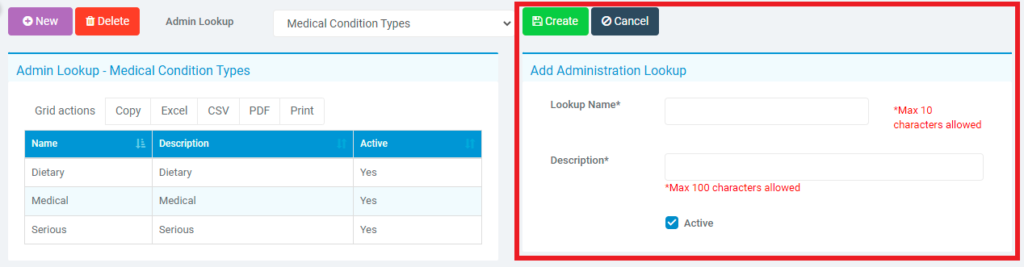
The description is useful for Reporting, so populate this as you see fit.
The Active tick box dictates whether the Medical Condition Type can be used/is active yet
Once you are done, press Create.
You will now see the newly created Medical Condition Type visible in the table, which will be available to use moving forward.
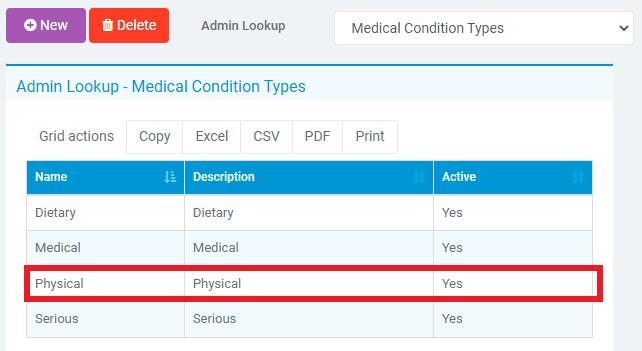
You can now repeat this process to create all of the Medical Condition Types that you desire.
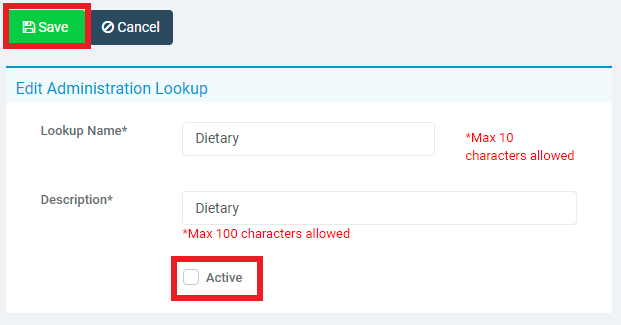
Note: You can return here at any time and make a Medical Condition Type inactive by clicking on it, unticking the Active tick box and pressing Save.
It will remain in the Lookup Table but won’t be visible when you carry out the next steps in this guide.
Adding new Medical Conditions
Now that you have new Medical Condition Types in place, you can move on to adding Medical Conditions.
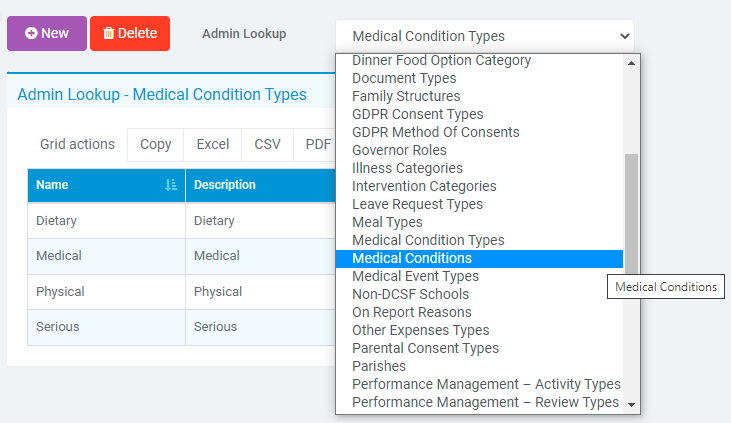
Staying on the same page (Config>Administration>Lookup Tables), you would need to select Medical Conditions from the Admin Lookup list at the top of the page.
In the same way as before, this will display all of the Medical Conditions currently stored on your system, in a table.
To add another, press New.
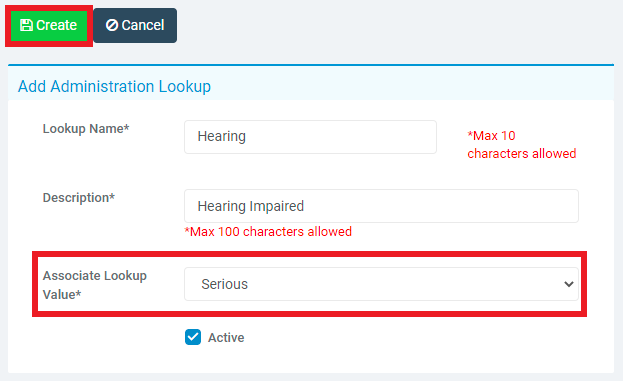
An additional section will appear on the right of the screen again, where you would give the Medical Condition a Name/Description.
The key difference here is the Associate Lookup Value.
The options for this field are determined by your Medical Condition Types, which is why they were added first, as it allows for better organisation.
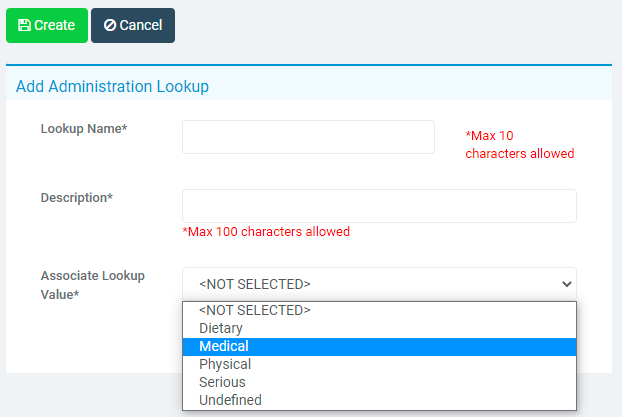
Note: Undefined is a system default Medical Condition Type/Lookup, which is used to store the default Medical Conditions before Schools add their own Medical Condition Types. It cannot be Edited or Deleted from the Lookup Tables.
Once you have populated all of the required information, you can press Create.
Your Medical Condition will now be available for selection within the Medical Condition Type that you have created earlier and selected now.
Assigning Medical Conditions
Now that you have created new Medical Condition Types and Medical Conditions, we will cover how to assign them to Students.
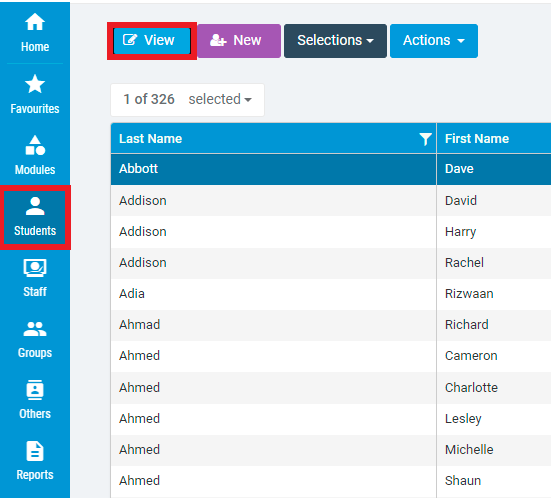
To do this, you will need to View a Students Record from the Students List page.
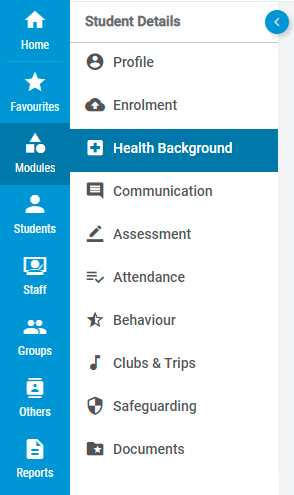
You then need to go to the Health Background tab from the Student Details Menu.
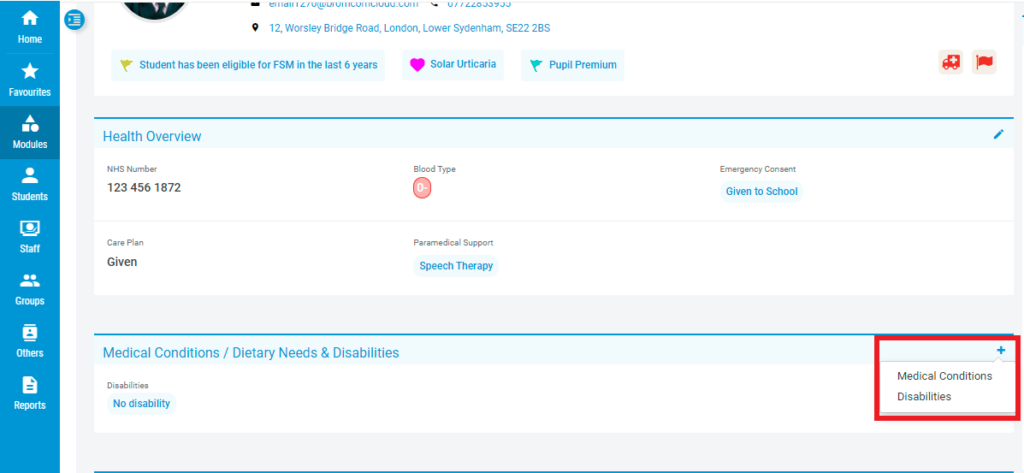
Once this page is open, scroll down slightly to the Medical Conditions area, press the + icon and select Medical Conditions.
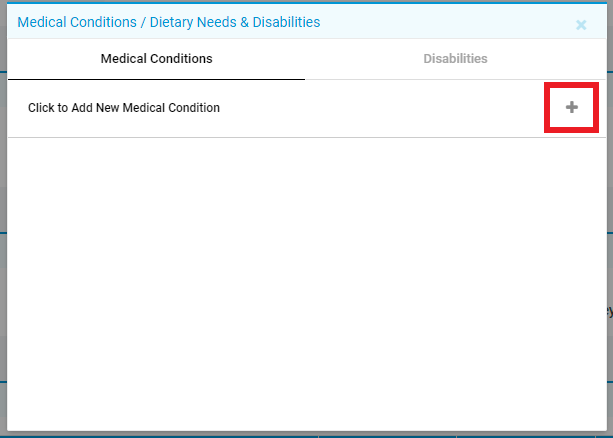
This will open a new screen where you need to press the + icon next to Medical Conditions.
You will then have the following options available to select from, where you determine the Medical Condition Type and Medical Condition.
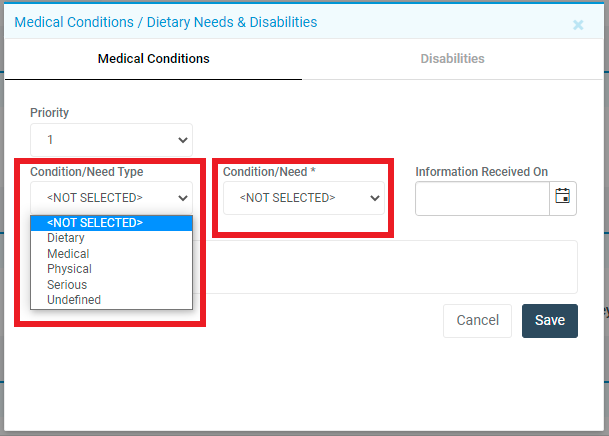
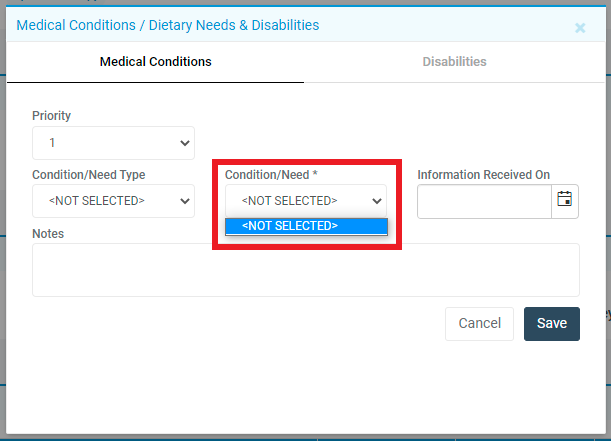
Something important to note here is that the Condition/Need field is showing Not Selected.
This is because I have not selected a Condition/Need Type yet, which pulls from the Medical Condition Types in the Lookup Tables.
This again shows how important the Medical Condition Types are and how they house the actual Medical Conditions.
Once you select the Condition/Need Type, you will be able to select one of the available Conditions/Needs, which pull from the Medical Conditions in the Lookup Tables.
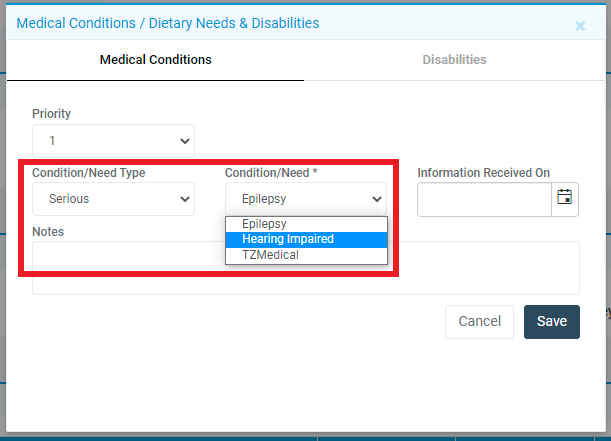
The Priority and Information Received On fields should also be completed.
They will allow you to keep a timeline of the Medical Conditions for the Student, as well as any Notes you may want to Include.
Press Save to finish assigning the Medical Condition to the Student.
This concludes the process for adding Medical Condition Types and Medical Conditions to your MIS, as well as assigning a Medical Condition to a Student.