
In this guide, we show How to Manage Online Payment Mapping in MCAS. It is split into the following sections:
3.1. How to Process Payments for the First Time
3.2. How to Manually Process Payments
3.3. How to Schedule the Processing of Payments
Access: The minimum permissions required to Manage Online Payment Mapping are found in the Finance Module section of Config > Setup > Roles & Permissions.
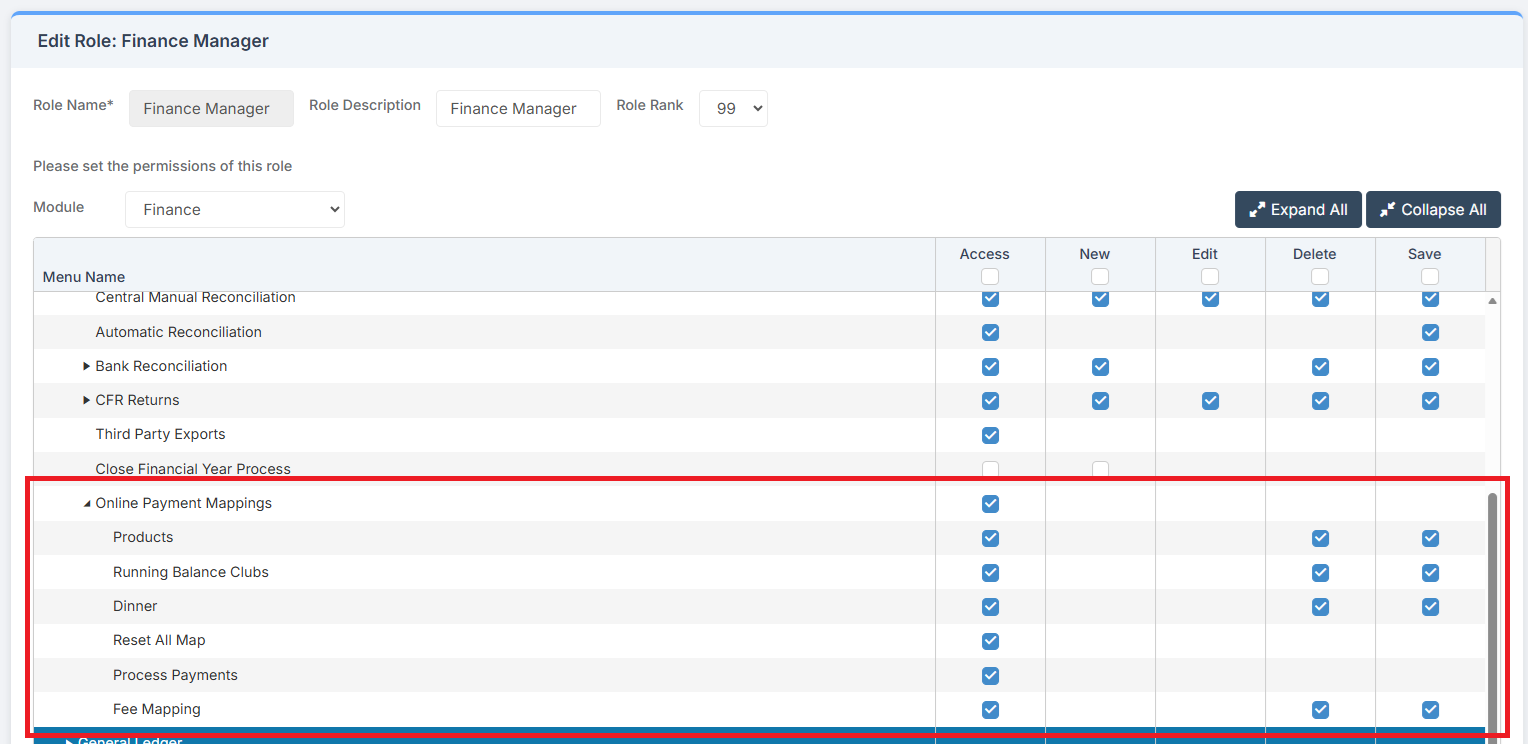
Pre-requisites:
1. Ensure Products, Clubs or Dinner are set up. See: How to Configure Online Payments.
2. Check the Bank Accounts in the MCAS setup. Go to Config > MyChildAtSchool > Online Payments.
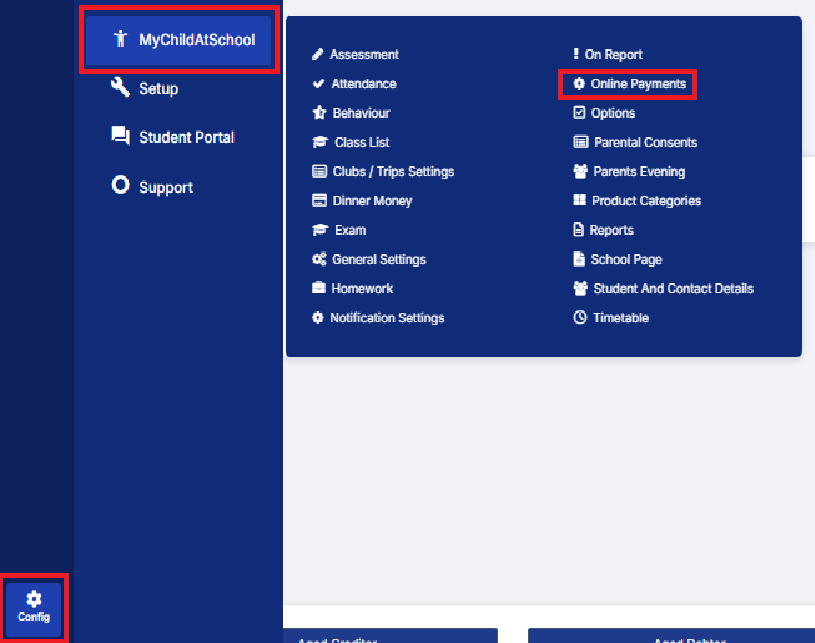
The Bank Accounts appear towards the bottom of the page. For further guidance on adding Bank Accounts, see: How to Configure Online Payments.

1. How to Map Products
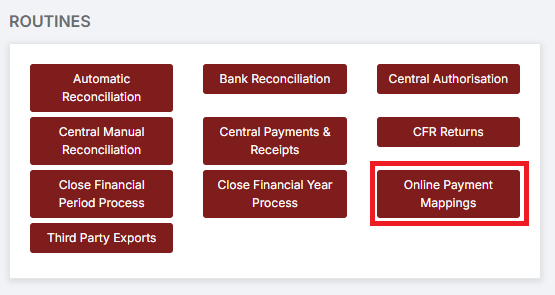
To begin, go to Modules > Finance > Finance Homepage > Routines > Online Payment Mappings.
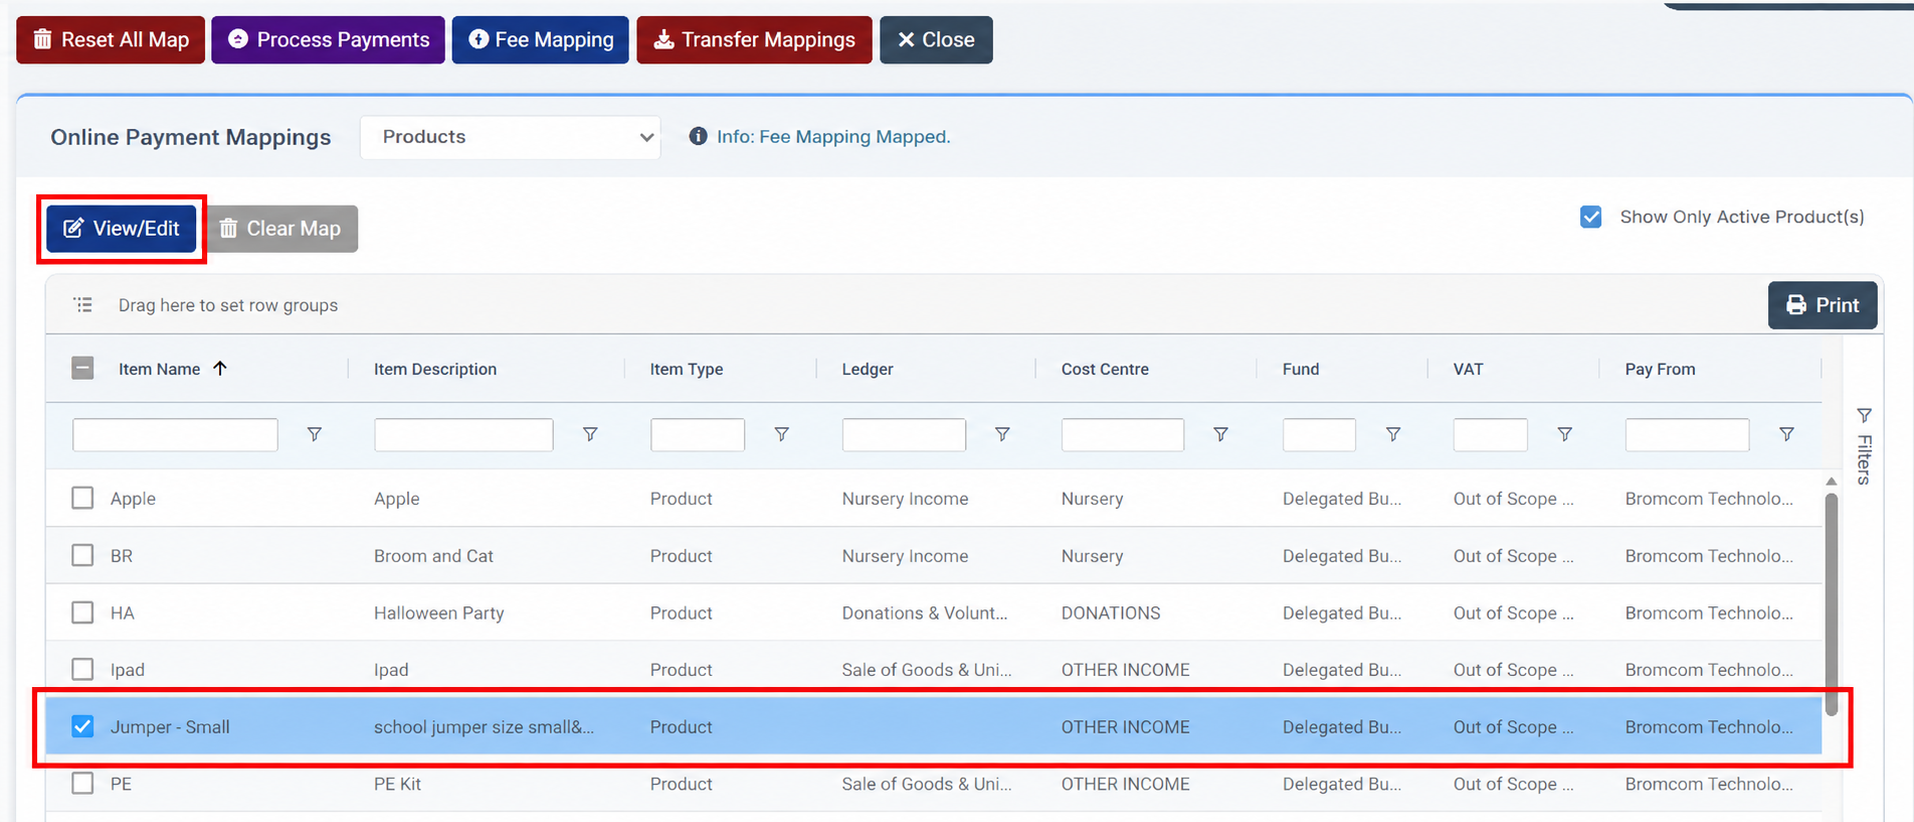
Current Products are shown. If any are missing, they need to be added. See: How to Configure Online Payments. If other products need to be mapped, untick the Show Only Active Products box.
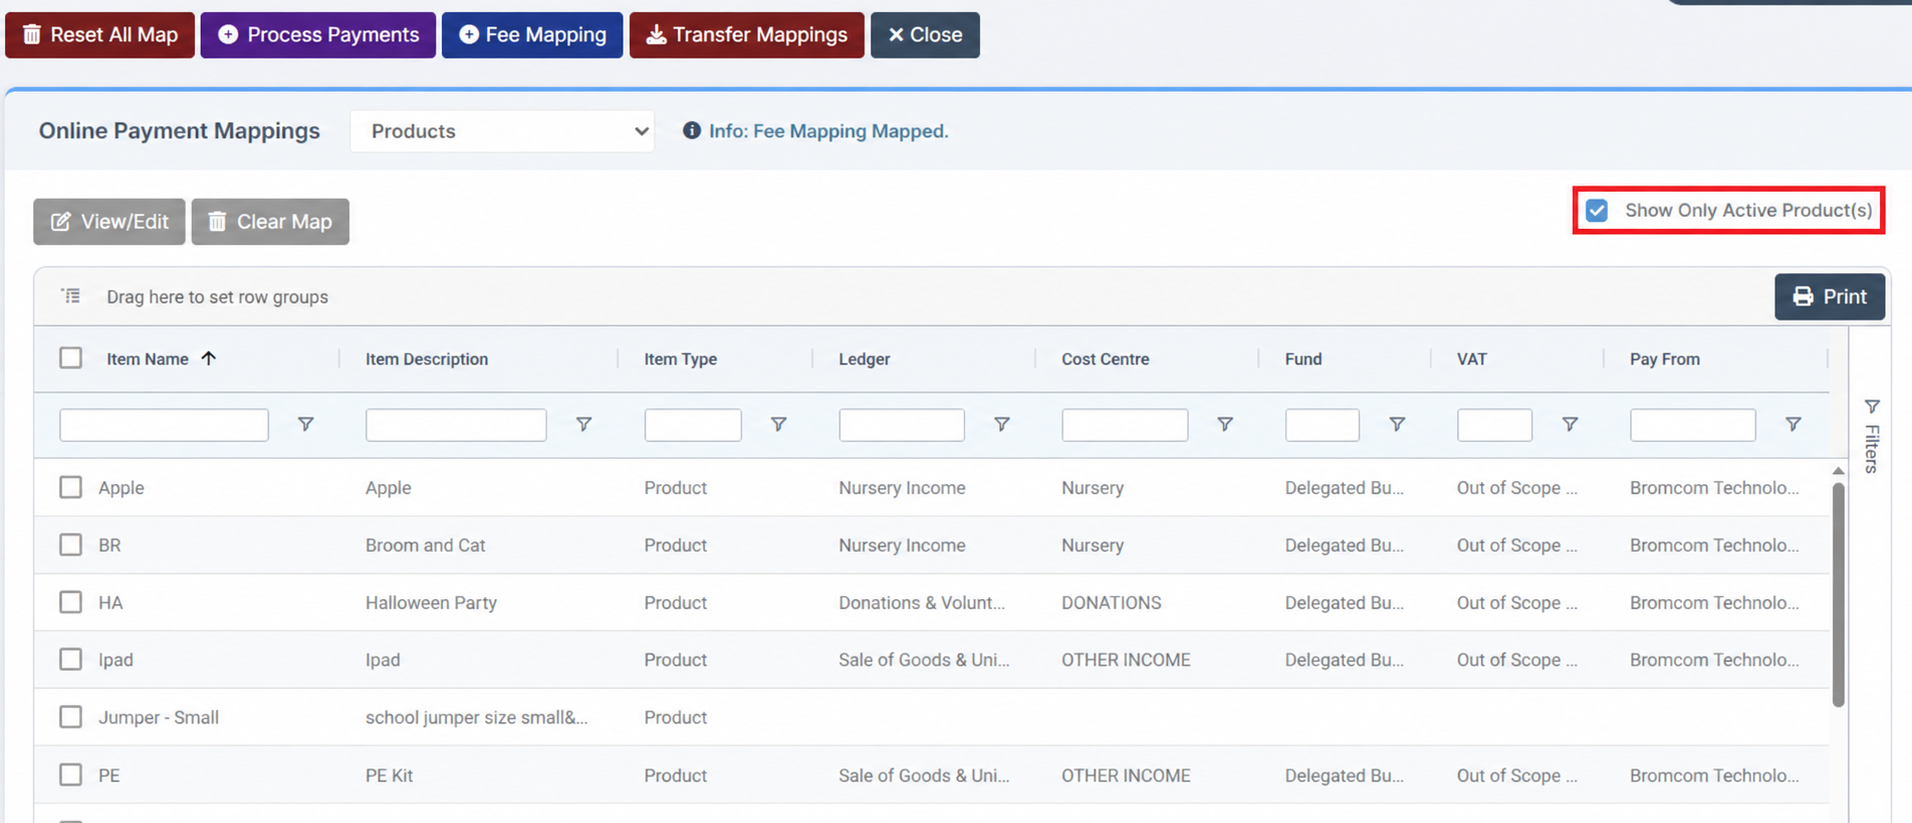
To add a Mapping, highlight the Product and select View/Edit.
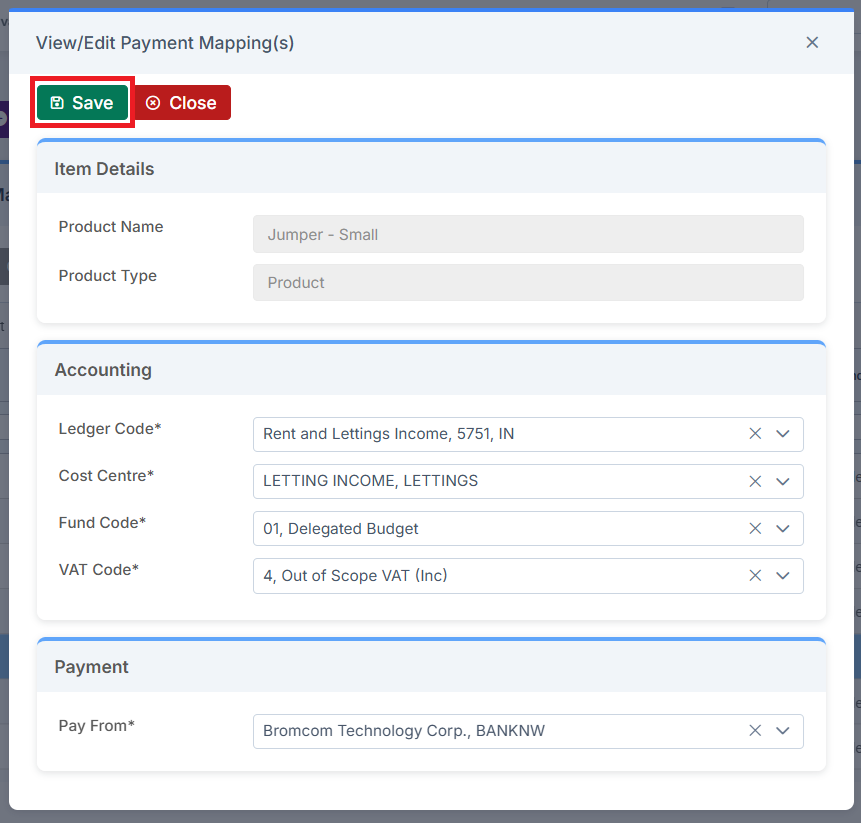
Fill in the relevant details, select the correct Bank Account, and then click Save.
2. How to Map Fees
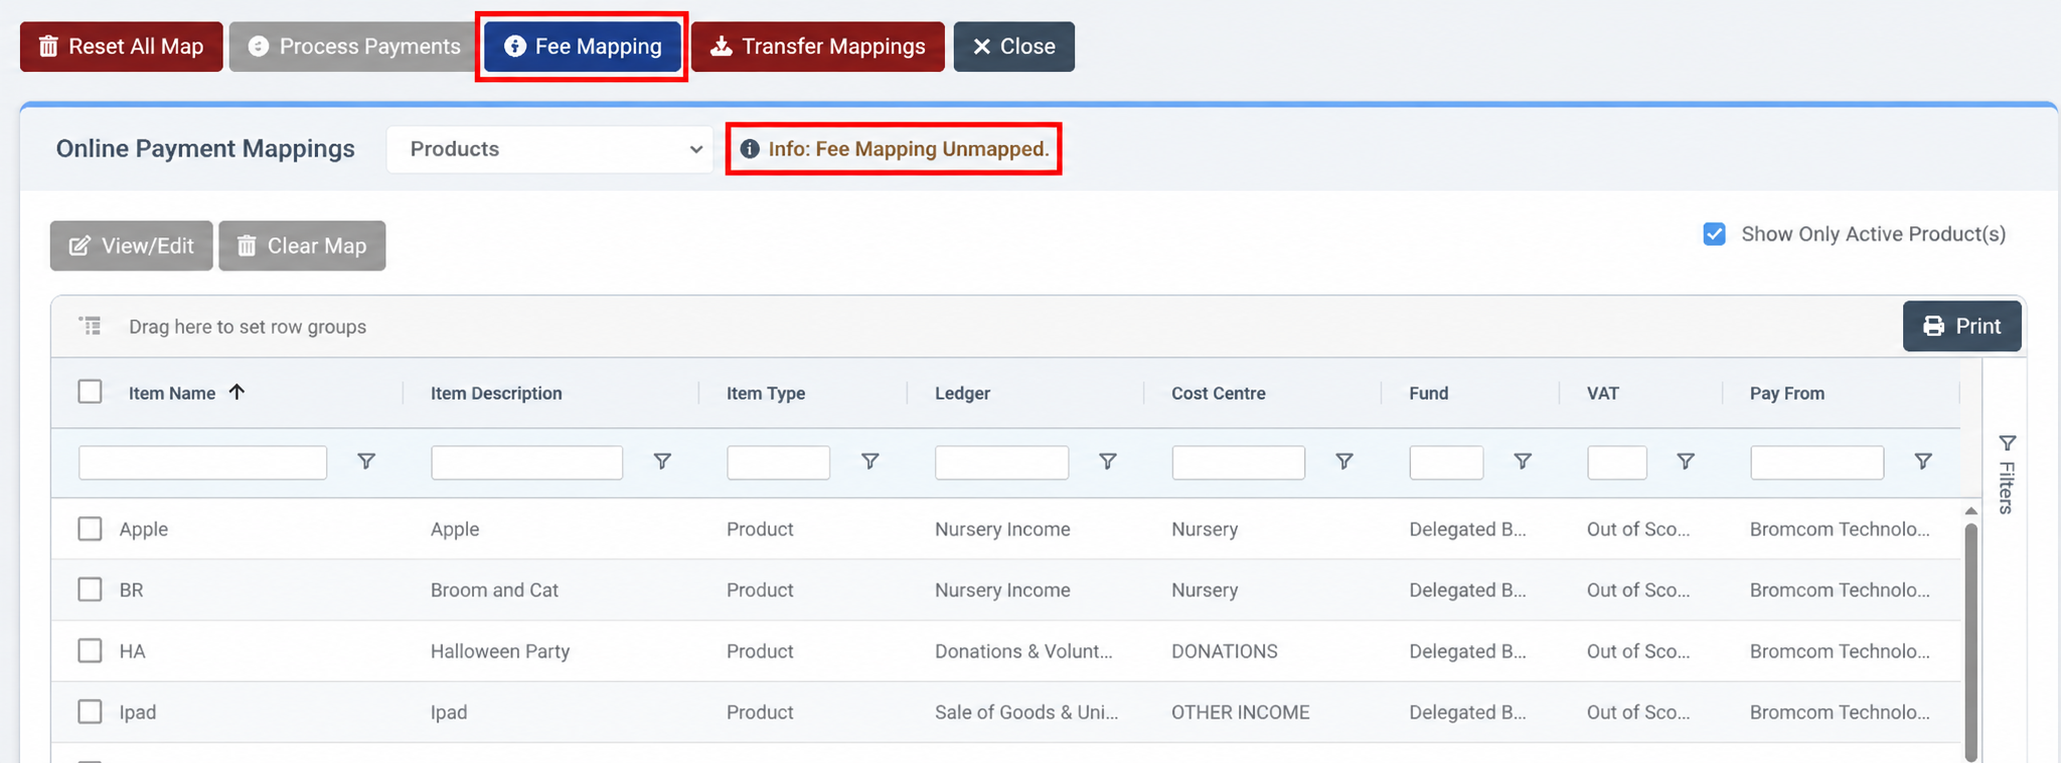
If there is a message saying Info: Fee Mapping Unmapped, click Fee Mapping to complete.
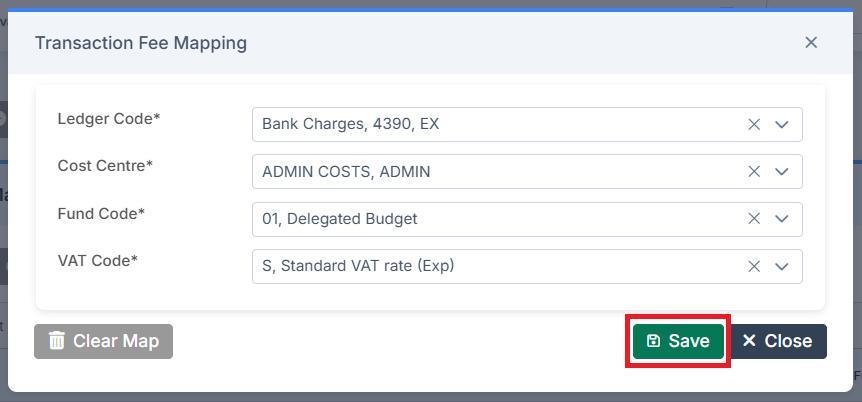
Fill in the details in the Transaction Fee Mapping pop-up and click Save.
Complete for all other Products, Running Balance Clubs and Dinner.

3. How to Process Payments
First, download the BACS Transfer Report so that payments can be checked against it. Go to Reports > MyChildAtSchool > BACS Transfers.
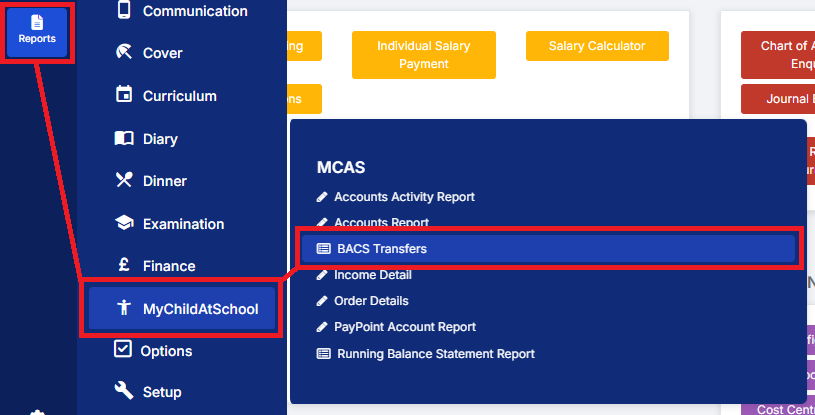
When the BACS Transfer Report has been downloaded, Payments can be processed.
Note: In each of the ways of Processing Payments described below, there is the option to either Manually or Automatically Post the Journals. For the first time that each way is carried out, it is recommended to Check and then Manually Post the Journals. The system can then subsequently be set up to Automatically Post the Journals.
3.1. How to Process Payments for the First Time
To Process Payments for the First Time, and to set the last payment date, go to Modules > Finance > Finance Homepage > Maintenance > Global Configuration.
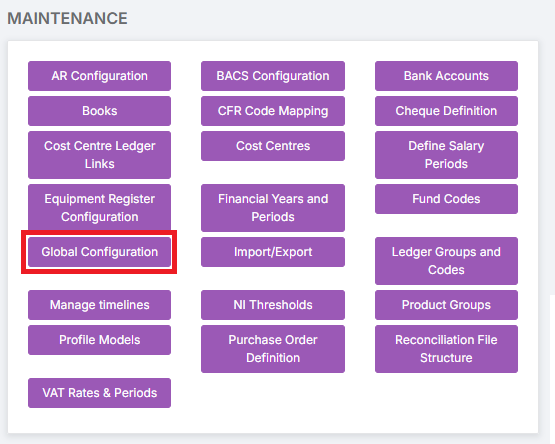
Select the Date of the last payment run and click Save.
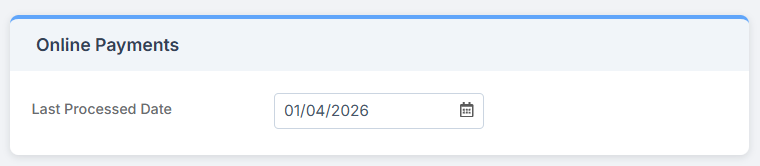
Now go to Modules > Finance > Finance Homepage > Routines > Online Payment Mappings and Process the Payments in one of the two ways described below.
The next time a Payment is received, process payments from the Online Payment Mappings page. This will automatically take the start name as the date of the last time the payment was processed. There is no need to go in and amended the Global Configuration, as this will have been updated automatically.
3.2. How to Manually Process Payments
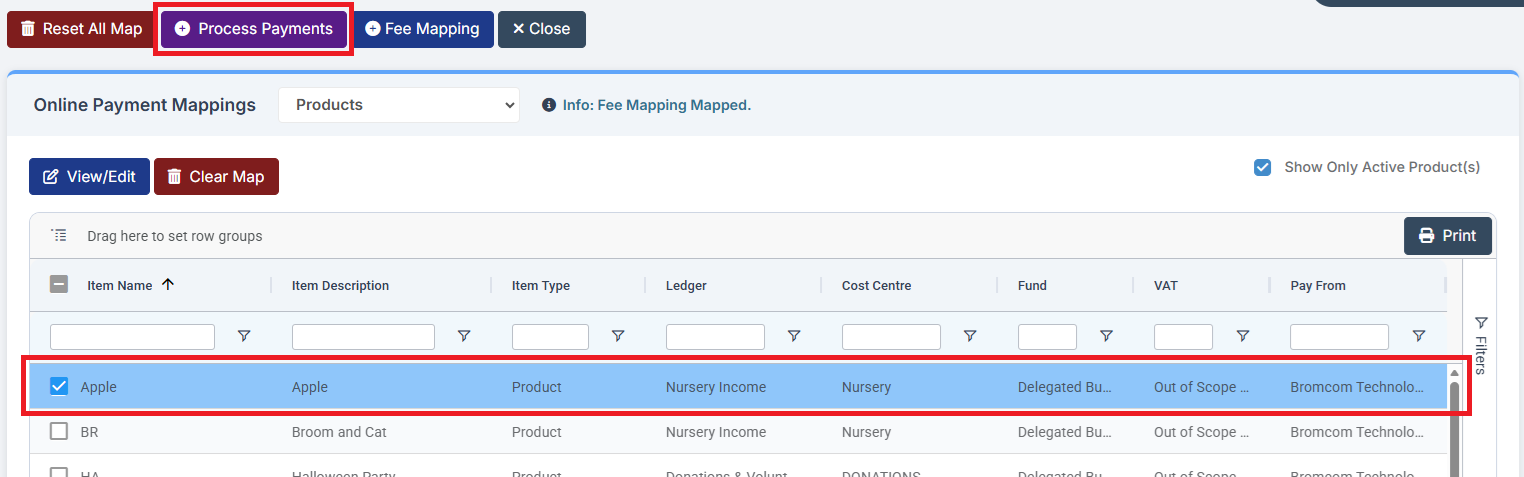
Select an item from the Online Payment Mappings page that has at least one mapping in place. This can be under Product, Running Balance, Club, or Dinner. Selecting one item processes everything that is mapped. There must also be a bank transaction (such as a card payment) via Online Payments/MCAS in the MIS for the mapped item.
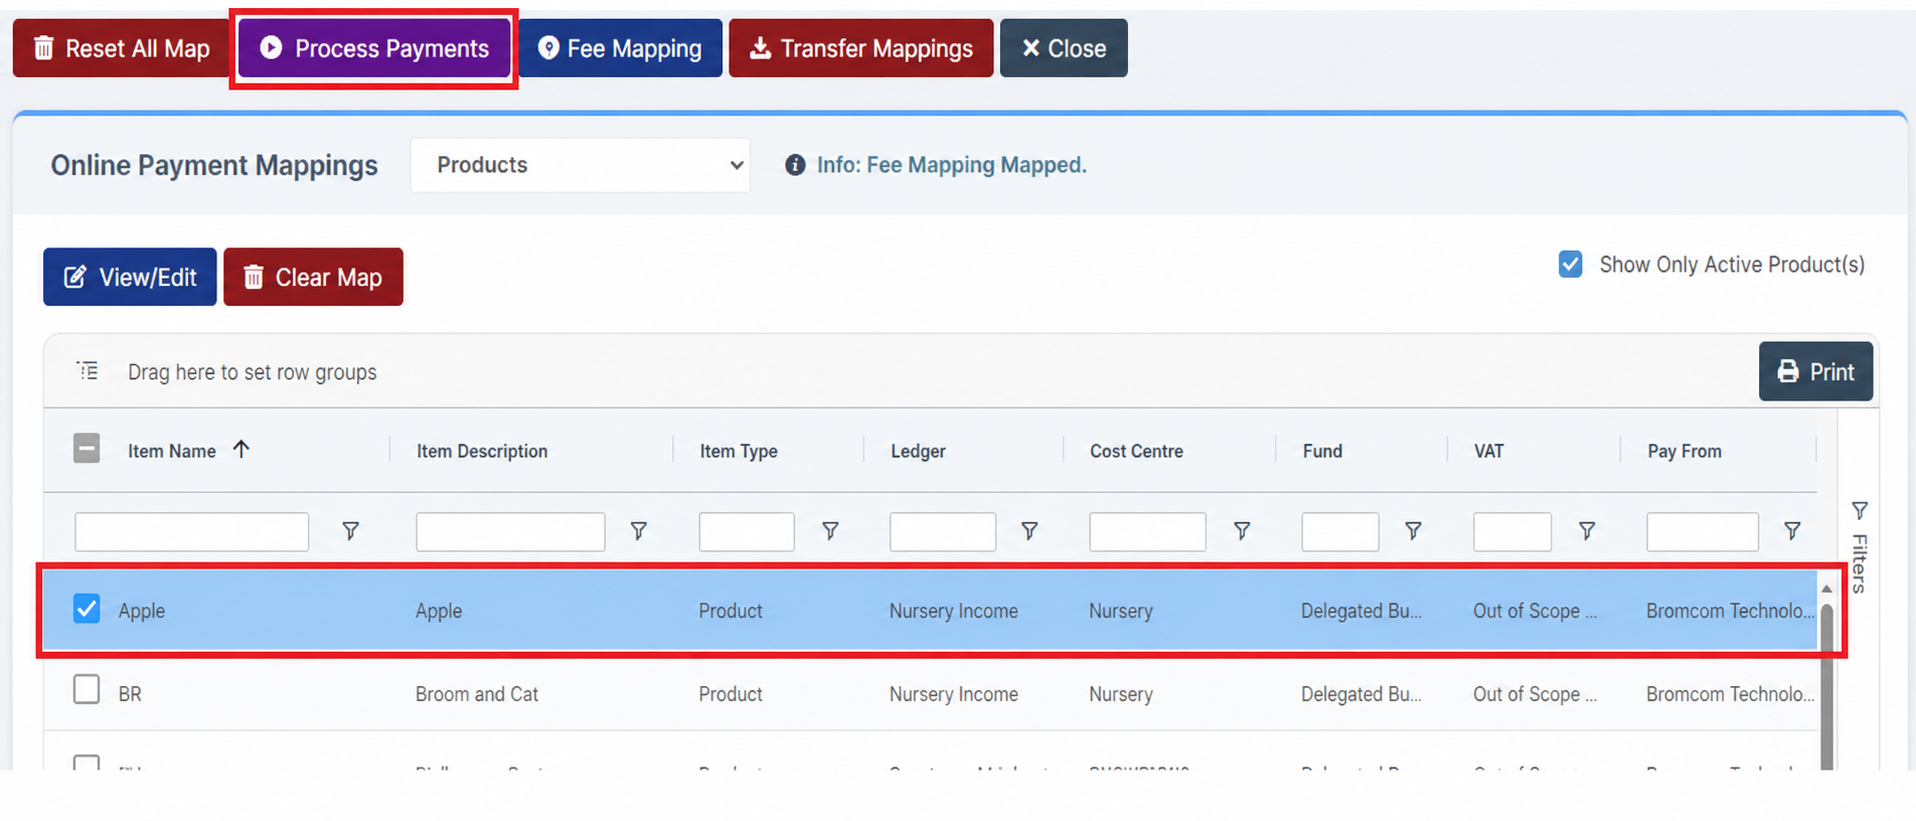
When ready, click on Process Payments.
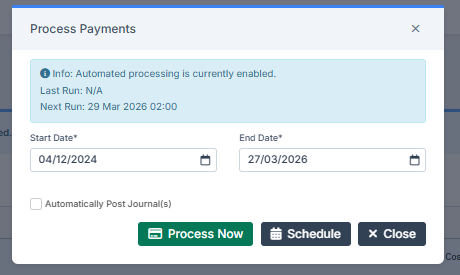
Select the Start Date and End Date and choose whether to Automatically Post Journal(s). Then click Process Now.
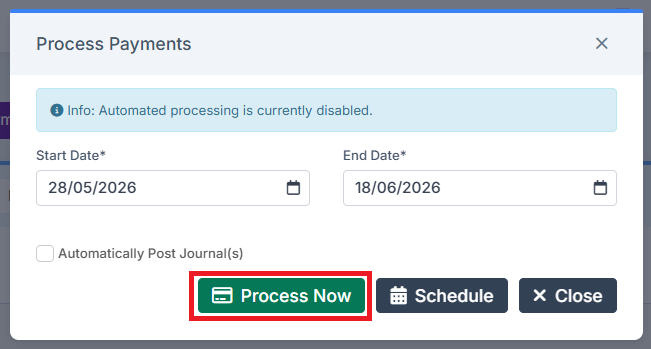
If Automatically Post Journal(s) is not ticked, the Journal that is created needs to be manually posted.
3.3. How to Schedule the Processing of Payments
It is also possible to set a Schedule for the process of making payments, with the option to have Journals posted automatically. An item can only have one Schedule at a time. Select an item from the Online Payment Mappings page that has at least one mapping in place. This can be under Product, Running Balance, Club, or Dinner. Selecting one item processes everything that is mapped. There must also be a bank transaction (such as a card payment) via Online Payments/MCAS in the MIS for the mapped item.
When ready, click on Process Payments.
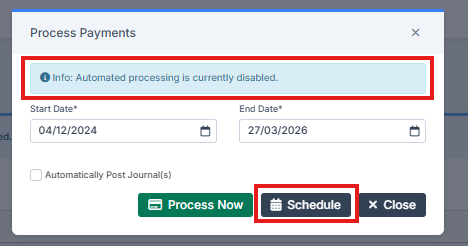
If the pop up says Automated processing is currently disabled, this means no schedule currently exists for the item. Click Schedule to set one up.
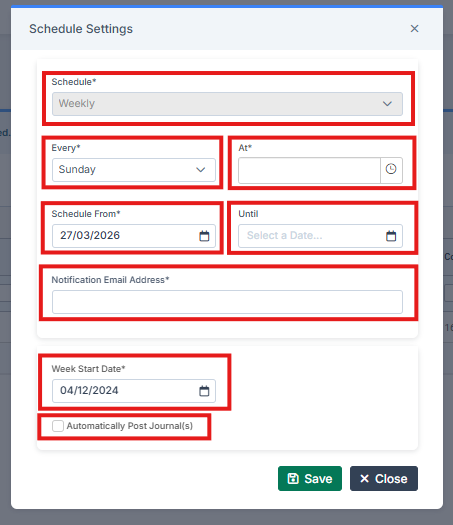
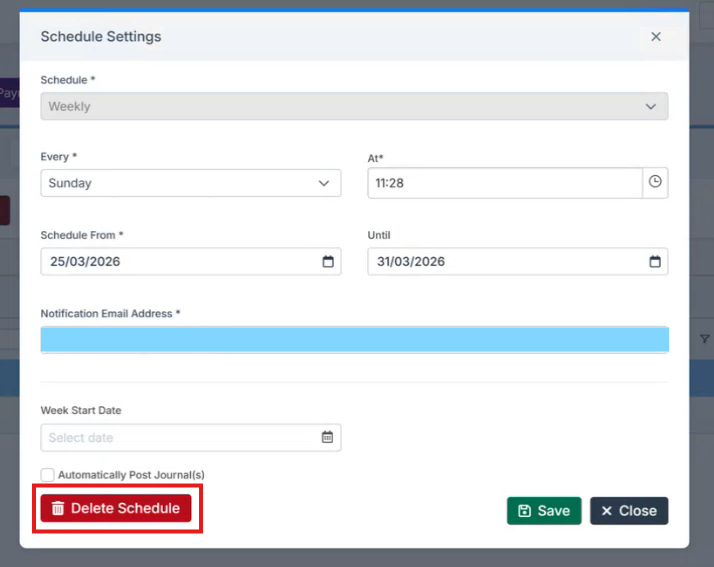
The Schedule Settings pop up allows users to set a schedule for the processing of payments.
- Schedule – this cannot be changed from Weekly
- Every – choose one day
- At – choose which time the Schedule runs on your chosen day
- Schedule From – choose the start date for initial payment
- Until – this is optional and can be in any Financial Year but leave blank to run indefinitely
- Notification Email Address – enter one or more valid addresses using a semicolon to separate them
- Week Start Date – select the starting date from which weekly transactions are to be pulled from
- Automatically Post Journal(s) – enabling this is optional. If not selected, Journals remain unposted until they are manually posted. If the box is ticked, then this becomes the default for future items until it is unticked
When all fields are correct, click the Save button to return to the Process Payments pop up. This gives the confirmation Automated processing is currently enabled from a start date to an end date.
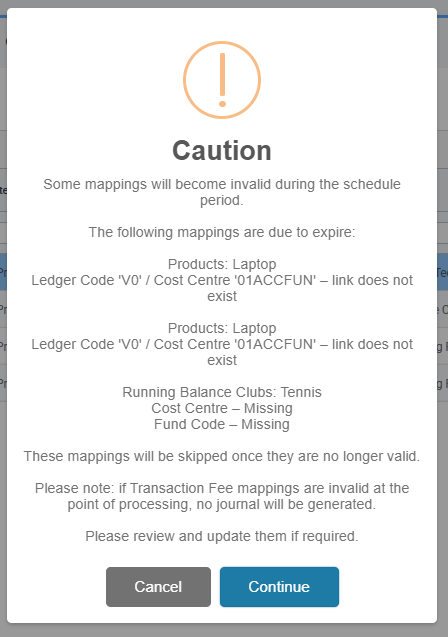
If Mappings become Invalid during the schedule period, a Caution will display showing the origin of the Invalid Mapping. Either Continue with the schedule or Cancel it.
To remove a Schedule, select the item and click Process Payment. From here click Schedule to bring up the settings. Then click Delete Schedule.
The Transfer Mappings button allows the copying of Mappings from the previous Financial Year.
Clicking Transfer Mappings displays a pop up giving the option of whether to Overwrite Existing Mappings or not. Click Transfer from last year to continue.
A Transfer complete summary is displayed when the Mappings have transferred. This is also downloaded to the browser’s downloads folder as a file using the name format: OnlinePaymentMappingTransfer_<Todaysdate>.