
In this guide, we will show you how to create Room Layout Templates for Seating from the Groups Page
These templates can then be used by Teaching Staff directly from their Registration page in their Dashboard for Seating students in that Room.
Note: From the week commencing 31/10/22, the maximum capacity has been changed from 60 to 80 students. Please be aware the Seating Plans do not support zoom or desktop scaling.
Access: The ability to create and edit Seating Plans come from having sufficient access to Groups, the minimum permissions required are found in the Framework Module of Config>Setup>Roles & Permissions.

See also: How To Create and Copy a Seating Plan and How To Create Room Layout Templates for Seating
Creating a Seating Plan
From the left Menu, go to Groups and set the top right Group Type dropdown to one of the following – Teaching Class, Tutor Group or Withdrawal Group.

From the Add/Remove Additional Columns option top right, select Seating Plans and click Save.

This will add the Seating Plans column to the table, where it will show how many Seating Plans are available for each Group.
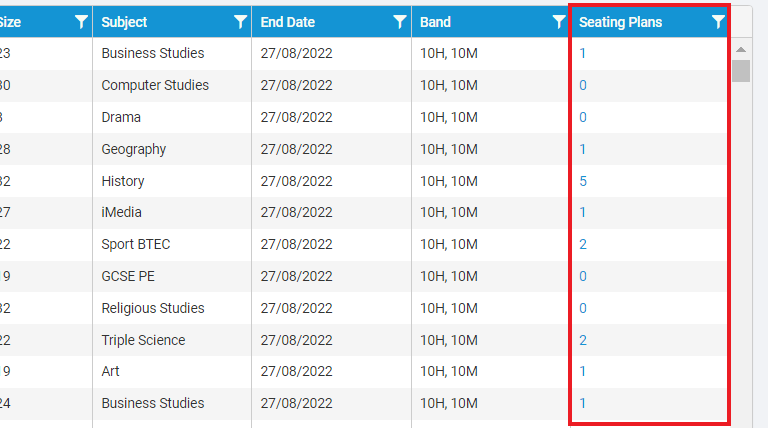
Clicking on the number within the column will open a pop-up, allowing changes to be made to the Seating Plan or a new one to be Created.

If the number is 0, only the option to Create a Seating Plan will be given.

Pressing Create will take you in to the following screen;
It works on a drag and drop basis, the large grey area at the bottom of the page represents the Room and the white boxes represent the Seats.
The green line under the seat is the position of the chair and the circle in the middle allows you to adjust the facing position of the student.
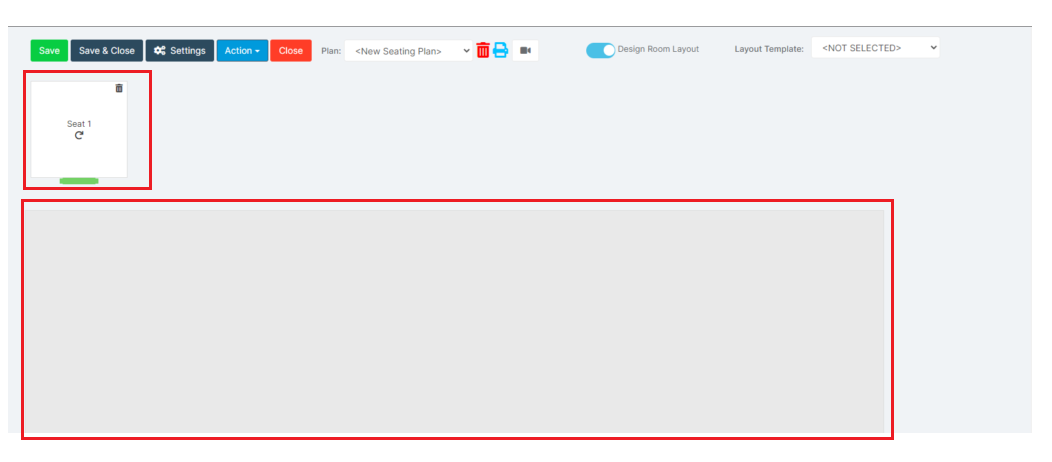
Drag the required number of Seats in to the area below.

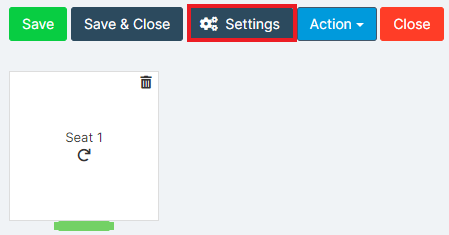
If you need to make the Room bigger to allow for more Seats, click on Settings.
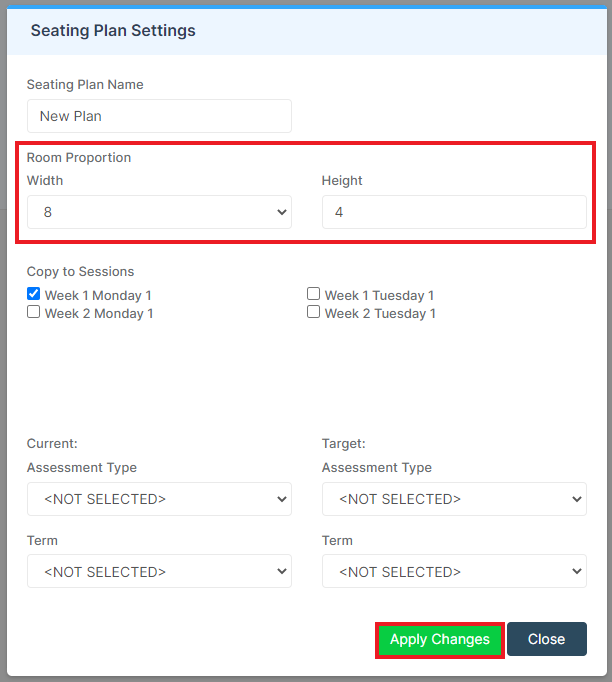
From there, increase the Width and Height of the room by increasing the values and press Apply Changes. In the example below the room is 8 x 4 so seats 32 students.
Once you are happy with the Seating Plan, press Save.

Seating Plans can also be Exported in bulk to PDF by selecting Export Seating Plans under the Actions button.
The option allows you to Export the Seating Plans as a Single PDF Document or as Multiple PDF Documents.

Register View
Now let’s take a look how this shows for the teacher in the register
From My Dashboard (in the new interface) we can select Seating Plan on the left hand menu.

Then click Edit Plan

Please ensure your screen is on 100% in order to edit the plan.
Then either click Auto Allocate from the left to randomly seat the students or drag and drop the students from the left list into the seating plan.
Click either Save to stay in the screen or Save and Close to return to the Dashboard view
