
Note: All pages below are subject to having relevant Roles and Permissions.
In this guide, you will be shown how to edit an existing Tutor Group timetable. This includes making manual or bulk changes, as well as transferring the timetable to another staff member.
Important: Before you begin, please go to Config>Setup>Daily Maintenance Settings, this will load a list of routines that run on your system every day.

If option ten is ticked on your page, your system will automatically try to create a full timetable for every staff member that you add to a Tutor Group timetable.
This means that even if you want to add a staff member to a Tutor Group timetable for just one period, the system will create a full timetable for them for every available period in that Tutor Group.

Untick this option if you do not want every staff member to automatically have a full timetable for every Tutor Group that they are part of/added to (you can re-tick it after you have made the timetable changes if needed).
Editing a Tutor Group timetable.
From the left Menu go to Groups, change the Group Type to Tutor Group.

Next, select a Tutor Group so it is highlighted blue and then click on the View button.

Common changes made to Tutor Group timetables include adding another staff member or changing the room.
Before you can change the timetable, you need to ensure that the required staff/rooms are added in the Associated Staff and Associated Room panels.

Once all of the required staff and rooms have been added, scroll down to find the Associated Timetable panel.

There are two ways to edit the existing timetable, individually or in bulk.
Individual changes
To edit the timetable individually, select the Pencil icon to the right of a period.

This then allows you to change individual elements of the period like the dates, location and staff.
Once you have made any changes, press the Tick icon that appears on the right of the period.
Note: As mentioned at the top of the guide, if option ten is ticked in Daily Maintenance Settings, adding a staff member to even just one period and then pressing Save at the top of the page will add them to every available period for this Tutor Group.
If this is not what you want, make sure to untick option ten in Daily Maintenance Settings before you make changes to timetable periods.
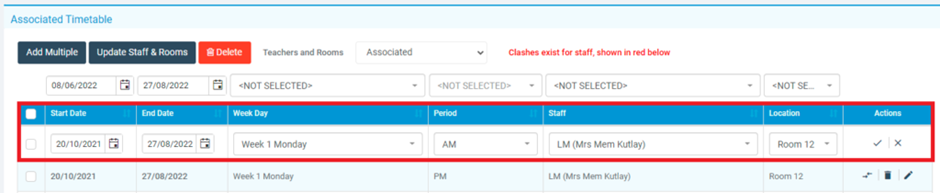
Bulk changes
To edit periods in bulk, you first need to tick the desired periods you wish to change using the left tick boxes.

Once the periods are ticked, select the desired value in the column heading that you wish to change.
In this example, the staff member is being changed.

You can now see that the staff member has updated to reflect the new selection.
You can repeat the process for other values by ticking the periods again and changing the value in another column heading.

Transfer Timetable
You will notice that on the right of each period in the timetable, there is also a Double Arrow icon.


Pressing this open a pop out window which allows you to transfer the timetable for the selected period.
Using this method actually allows you to transfer the timetable to a room and staff member that are not already part of the Tutor Group.

So using this function, you can essentially dictate that the period is being taken over by someone entirely new from a set date.
Once you have made any desired changes, press Save.

Note: If the Start Date is in the future (as shown above), the change will not take place until that date is reached.
Add Multiple
The last method for editing a Tutor Group timetable is to use Add Multiple, which allows you to add a staff member to multiple periods in one process.

Pressing Add Multiple opens the following pop out window.
Select the Staff and Room that you wish to add periods for, you can now either use the table at the bottom of the screen to add individual periods, or press Add Multiple Periods.
Note: Only Staff and Rooms that are already part of the Tutor Group will be available here.

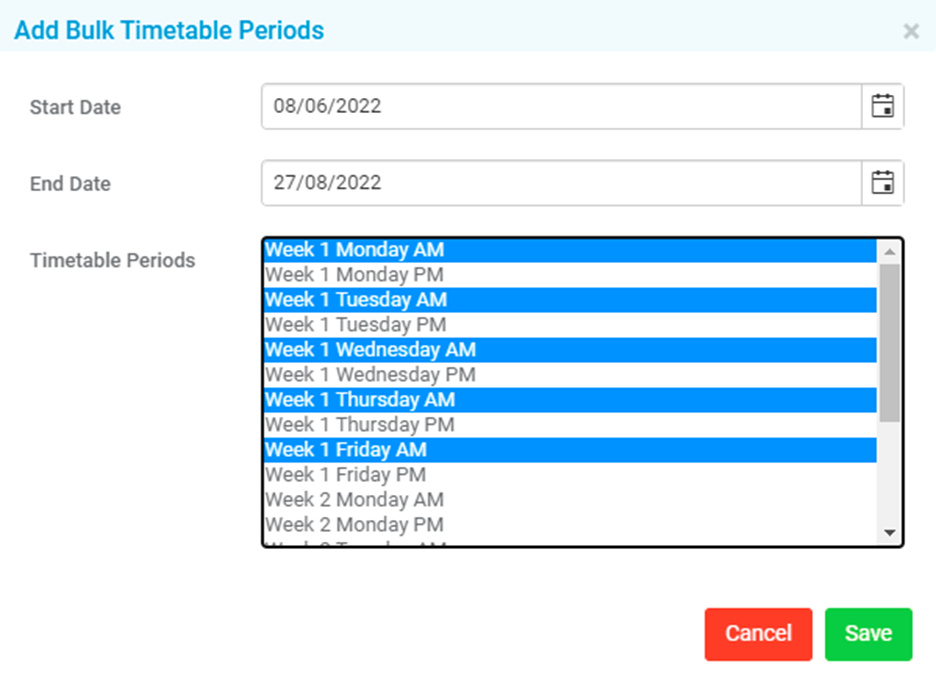
Add Multiple Periods opens another pop out window where you can select all of the periods you would like to add for the required Start/End Date.
Note: You need to press shift or control on your keyboard while you click on periods to select more than one.
Pressing Save takes you back to the original pop out window.
You can now see all of the chosen periods and if you are happy with them, press Save.
