
Note: All pages below are subject to having the relevant Roles and Permissions.
In this guide, you will be shown how to Create, Edit and View User Defined Flags.
- User Defined Flags are visual aids you create in Bromcom that appear on Registers or Student Records to act as an indicator/highlight against a Student who potentially has additional needs or medical conditions etc. You can also filter by User Defined Flags in Reporting.
- An example could be a school creates a User Defined Flag for Free School Meals Students that shows as a Green Flag on the Student Record and Registers.
- In addition you can create a User Defined Flag that references a Dynamic Report Group for example Pupil Premium Boys in Year 11.
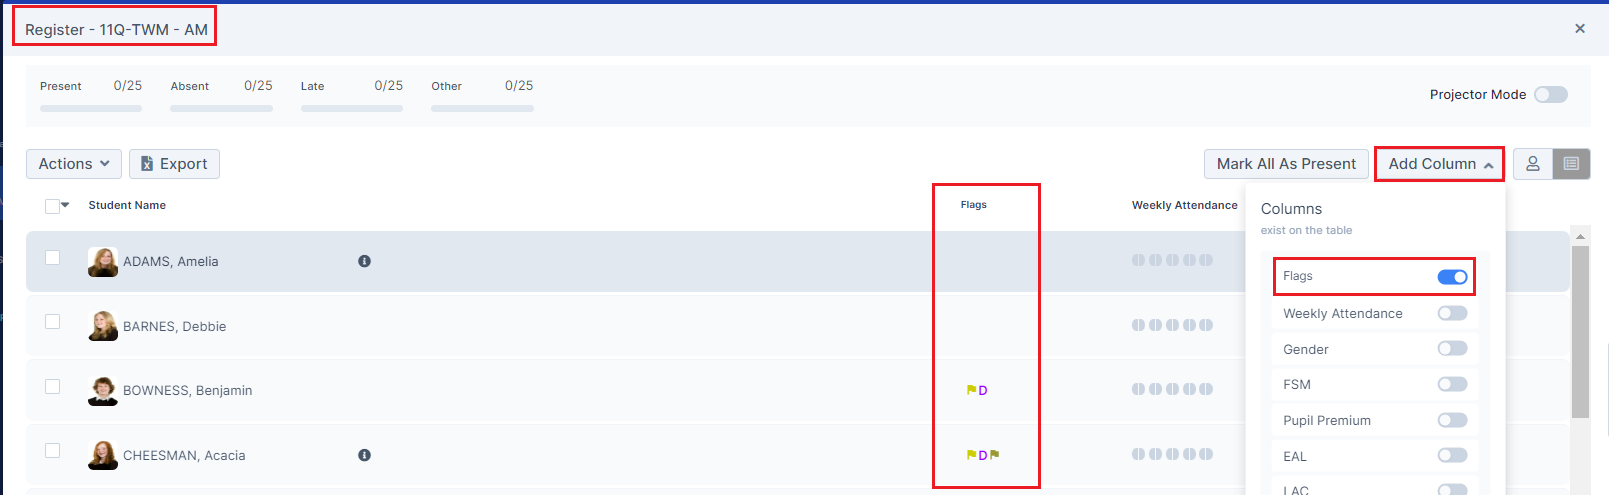
- The User-Defined Flags on the Student Profile show Left to Right with Left being the most frequent User-Defined Flag a student has associated to them and the oldest being the last on the Right. On a Teacher’s Register, it is the reverse of this i.e. the far right Flag is the most frequent
See also: How to Create User Defined Fields, How to Add User Defined Panels and How to use Quick Icons on the a Student Record.
To create a User Defined Flag, from the left Menu go to Config > Administration > User Defined Flags.

This will open the User Defined Flags page. To create a new User Defined Flag, click on the New button

A new section Add User Defined Flags will now be displayed on the right. Enter the details, all fields with * are mandatory.

A User Defined Flag can be one of three types;
- Data Field – assigns the Flag to Students based on a Data Field, such as Pupil Premium, SEND, EAL etc.
- UDF (User Defined Field) – assigns the Flag to Students with a User Defined Field assigned
- Group – assigns the Flag based on a Group within the MIS including Reporting Groups
The other fields you can populate are;
- Name – enter a Name for the Flag
- Description – enter a Description for the Flag
- Flag – select a shape/symbol and a colour for the Flag
- Tooltip Text – enter what will be seen when you hover over the Flag (it is advisable to make this as descriptive as possible)
- Active – ticking this makes the Flag available to use/active
Once you are happy with all of the details for the Flag, press Create.

The User Defined Flag will now be added to the User Defined Flags list. The Count column will be updated to display the Number of Students who meet this criteria.

Click on the column Number to see those Students.

To Edit the User Defined Flag just click on the row and make the changes.

View a Flag
The User Defined Flag will now be displayed in the Student Details.

It will also be visible on any Registers the Student is part of.
Note: User Defined Flags will NOT be displayed on Registers until the following day, after the system overnight update.

Permissions
Config > Setup > Roles & Permissions > Administration > Maintenance.
The option will have to be enabled from the Administration module for the appropriate Roles.
