This guide will show you how to use the My Profile options which can be permitted by the HR Module.
- Basic Information
- My Team
- Contact Information
- Vehicles
- Banking
- Qualifications
- Documents
- Absences & Leave Requests
- Claims
Note: If a User does not have Permissions set to see anything on the Basic Info, My Team, Contacts, Banking or Vehicles tabs they will not be displayed. The Qualifications, Documents, Absences & Leave Requests and Claims tabs will always be displayed. If a User has Permissions set but there is no data for that section the tab will be displayed with a message that there is no data available. You can manage these using How To Manage Access Levels & Permissions
Click on your Image in the top right of the page > My Profile
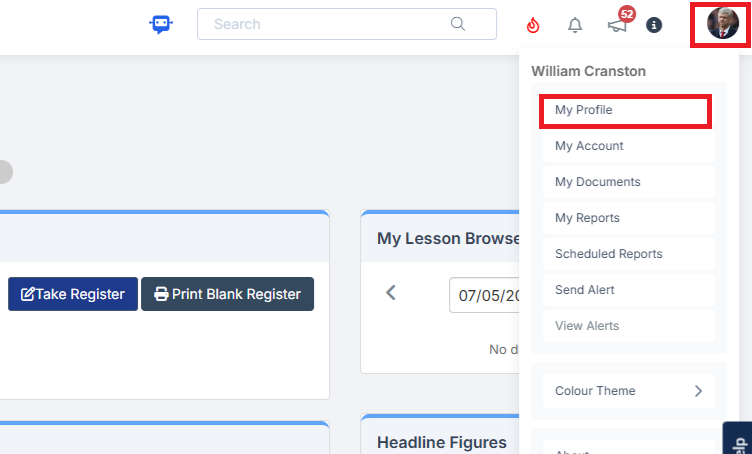
This is where Staff can see information and make changes or requests based on the Access Permissions given under Modules > Administration > HR & Performance Management > Access Levels and Permissions.
If the User has been given Permission to Add new the + icon will be displayed, for Editing the Pencil icon and to Delete the Bin icon. A Field that cannot be edited will be greyed out. The following sections are based on different Permissions given to the User.
Basic Information
The Basic Information tab opens by default and displays the Staff Basic Information.
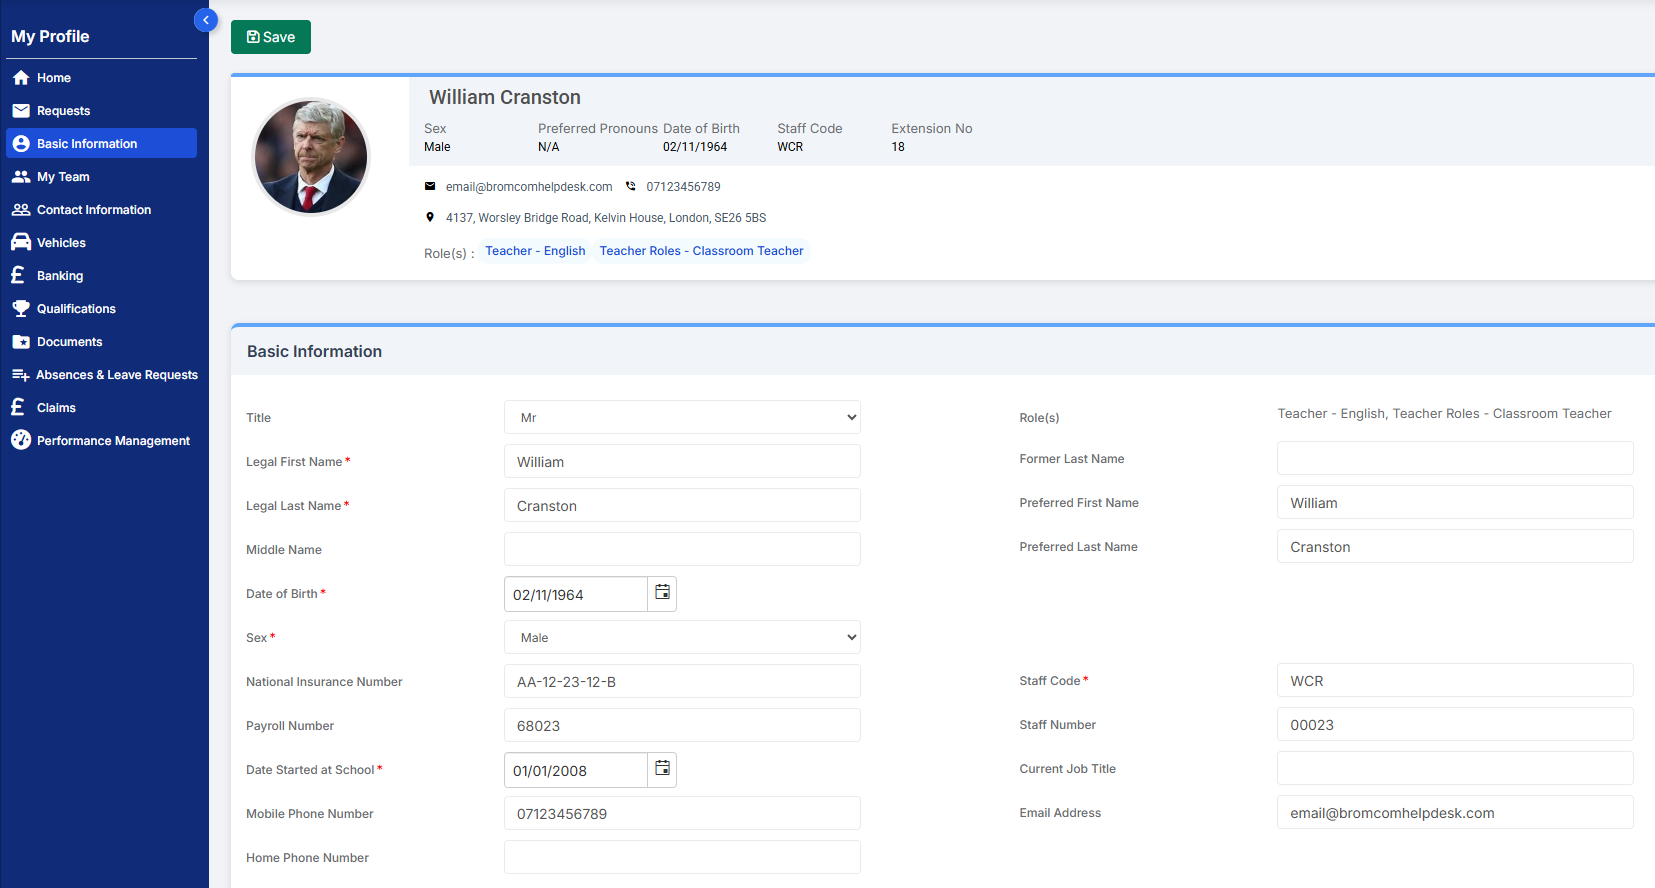
To apply changes, make the necessary edits and click Save. Fields that are greyed out cannot be modified. If the Documentation Required option under Modules > Admin > Access Levels & Permissions is enabled, you must upload the relevant supporting documents before proceeding.
For example, changing to a married name.
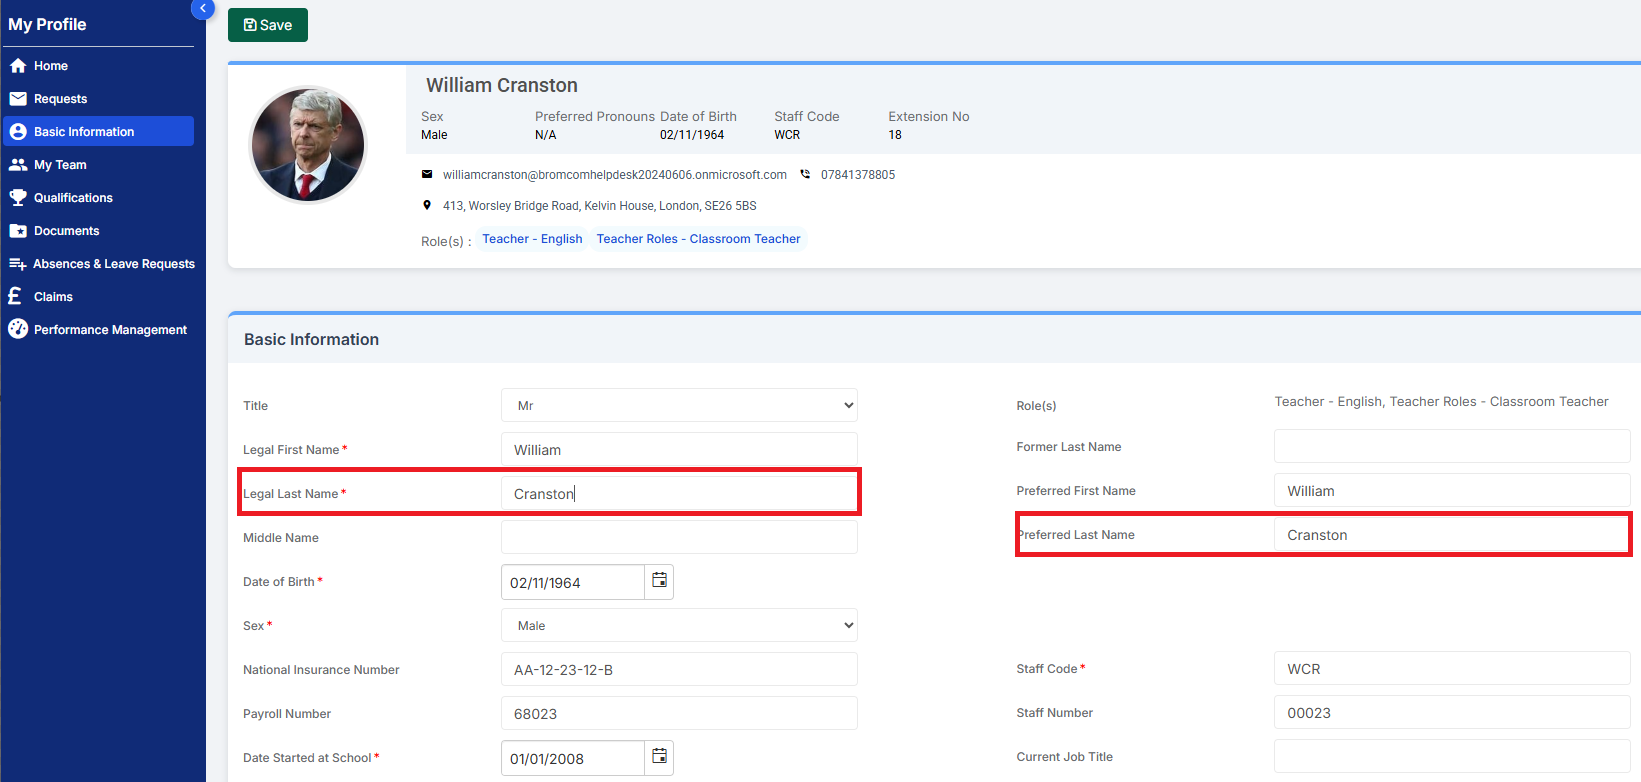
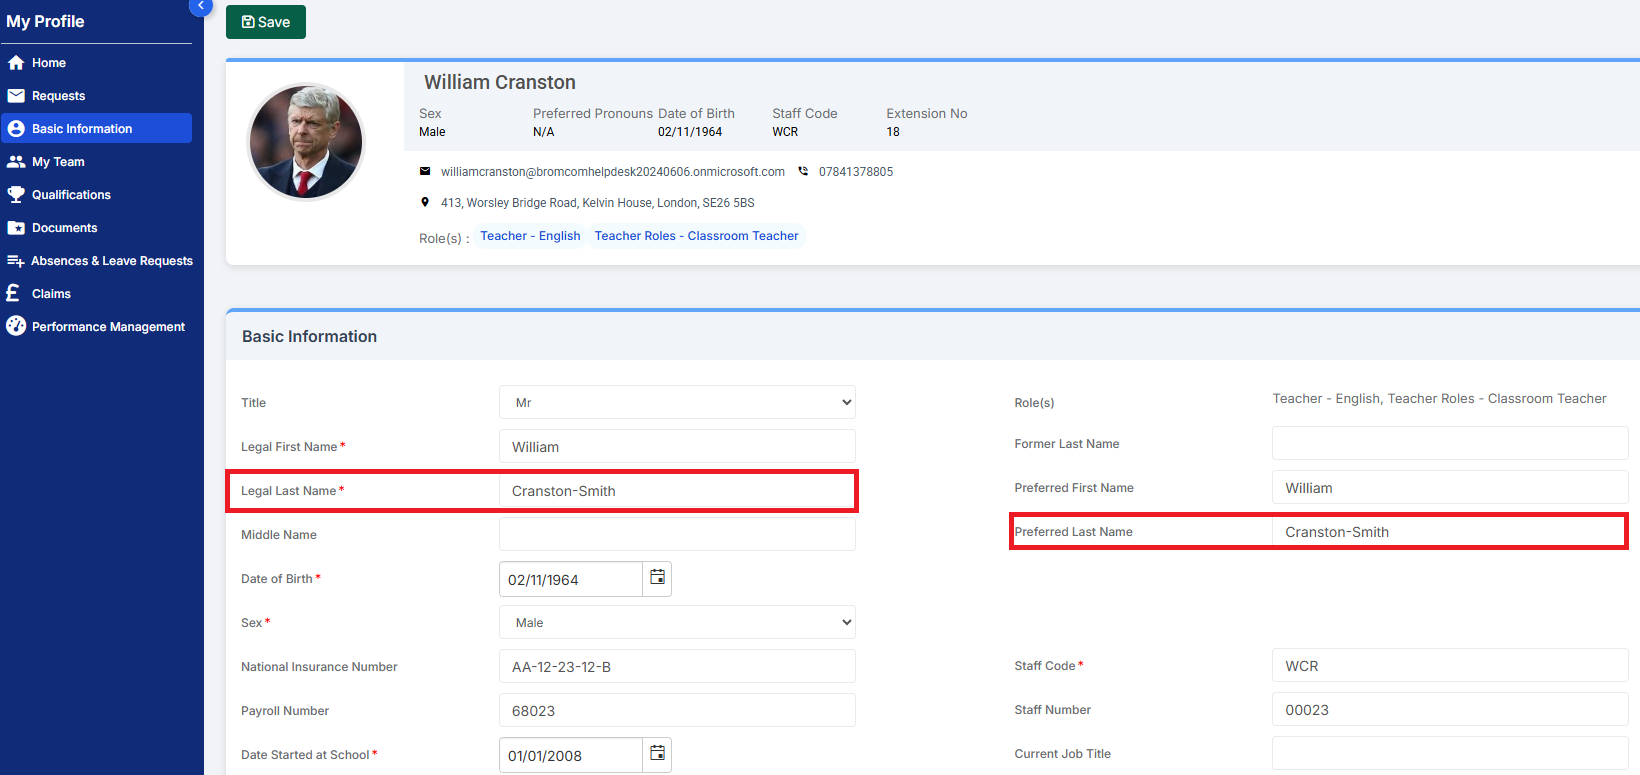
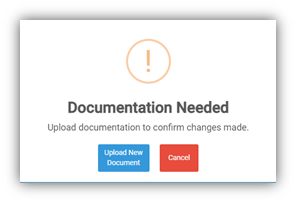
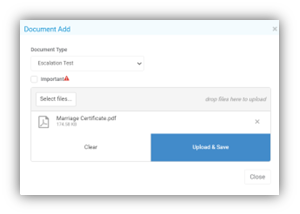
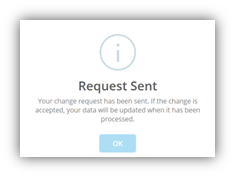
On saving the change, if the Documents Required option was set in the Configurations, you will be asked for the relevant proof, select the Upload New Document button and Upload & Save. A message will be given after saving.
My Team
The My Team tab displays, sections for the Names of your Manager, Department Colleagues, My Direct Reports and Indirect Reports.
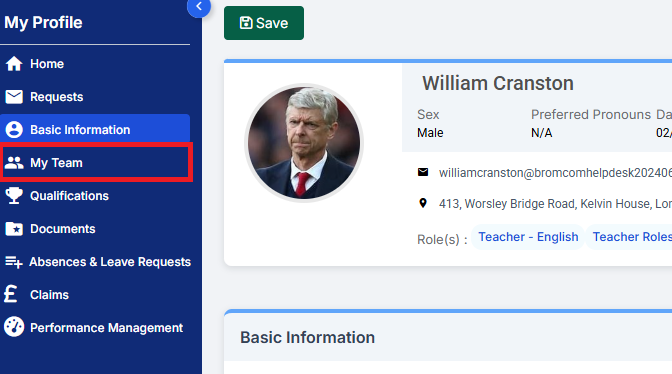
If there is a View button to the right, you can click on this to open a new browser page displaying the Profile page of that person. Clicking on any of the other available tabs will display that information.
Note: What you will be able to see on these pages depends on the Access Level Permissions set for the When Viewing Others option on the Access Levels and Permissions page.
Contact Information
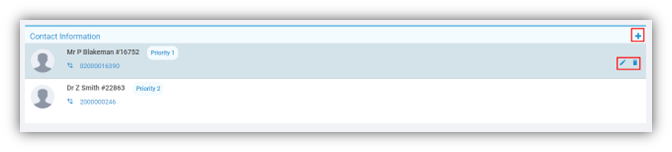
The Contact Information tab displays the Emergency Contact Information. In this example the option to Add a new Contact or Edit an existing Contact are the only options available and the changes do not have to be Approved. Move pointer over section to be amended, which will highlight and display the options.
Vehicles
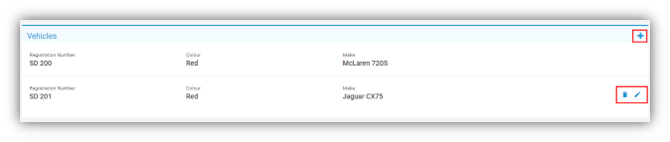
The Vehicles tab displays the Vehicle Information. In this example the member of Staff has the options to Add a new Vehicle and Delete or Edit existing ones and the changes do not have to be Approved. Move pointer over section to be amended, which will display the options.
Banking
The Banking tab displays the Banking Information. In this example the member of Staff has the option to Edit existing details and the changes do not have to be Approved. Move pointer over section to be amended, which will highlight and display the options.

Qualifications
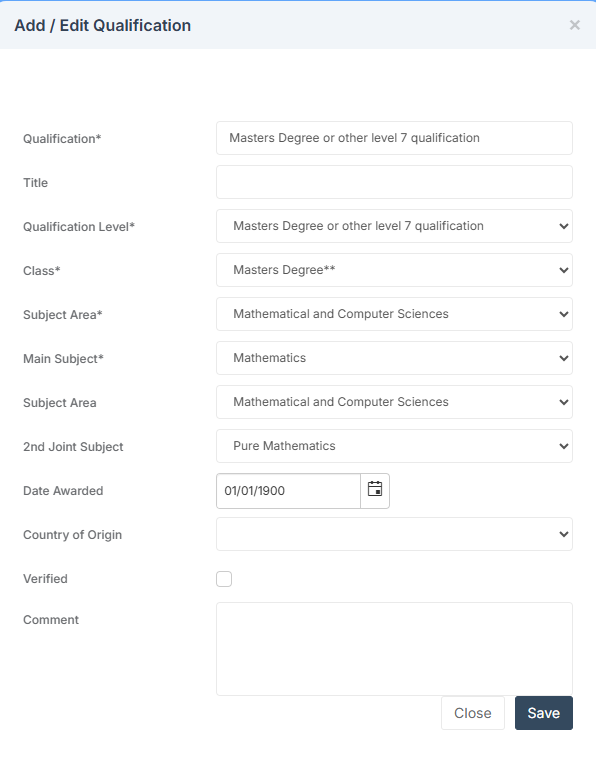
The Qualifications tab displays the Qualifications information. In this example the member of Staff only has the option to View the information.

Double clicking on a Qualification will display more details, still in View Only.
Documents
The Documents tab displays any added Documents. In this example the member of Staff can Download an existing or Upload a new Document, but does not have the option to Delete a Document or to Remove an Important Flag.

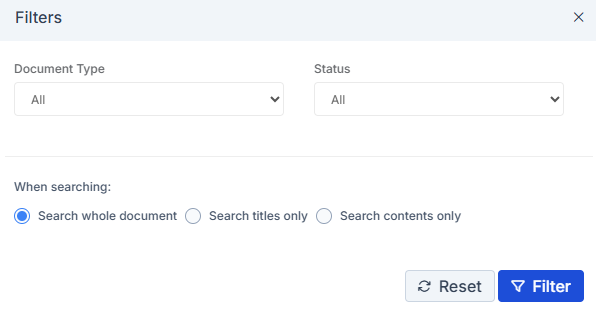
The Search option is available to Search for a specific Document and the View can be selected from the Document Type dropdown when clicking on Filters and the Status dropdown which will display either All Documents or Important Documents.
Clicking the Download icon will download the Document to your downloads area. Clicking the Add new Document icon will open the Add Document section.
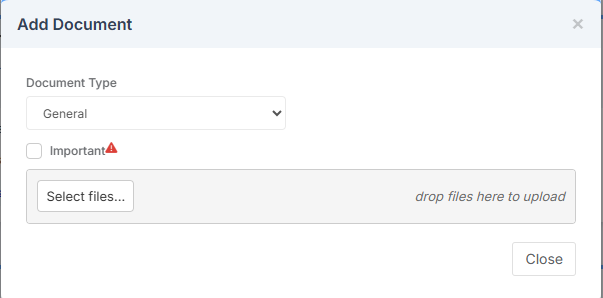
- Document Type – is selected from the dropdown list
- Important – if ticked marks the Status of the Document as Important
When finished click the Upload & Save button.
Note: Any new Document Types are created in the Lookup Tables which can be found under Config > Administration > Lookup Tables > Document Types.
Absences & Leave Requests
The Absences & Leave Request tab has two sections Absences, which gives a View Only list of Absences and if the Include Trainings box is ticked Training Days as well and the Leave Request section.
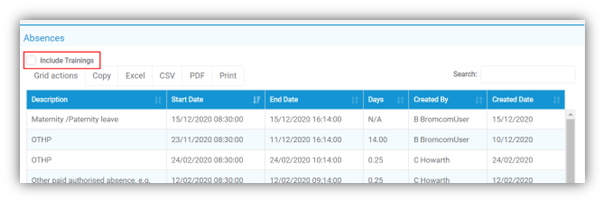
The Leave Request section displays the Requested Leave and the Status of that Request.

To Request Leave click on the + icon top right to open the Add/Edit Leave Request pop-up, enter the details and click the Save button.
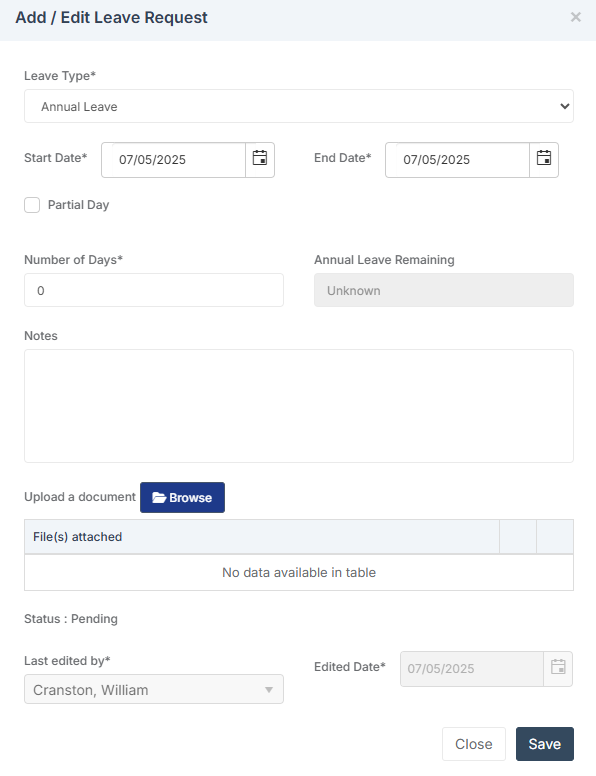
The Request will now show as Pending under the Status column. A Pending Request (that is not a past Date) can be edited by double clicking on the row.

Claims
The Claims tab gives the option to make a Claim for Expenses or Additional Hours. Click the Dustbin icon to Remove Expense Claims or Additional Hours, there will be a Warning Message select Cancel or Proceed, click the + icon to Add Expense Claims or Additional Hours.
Note: Claims with a past date cannot be Deleted or Edited.
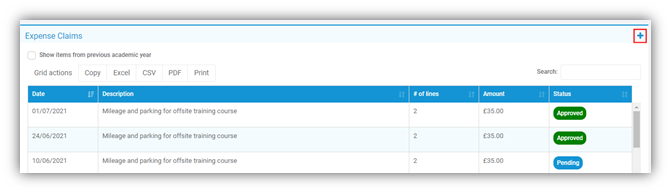
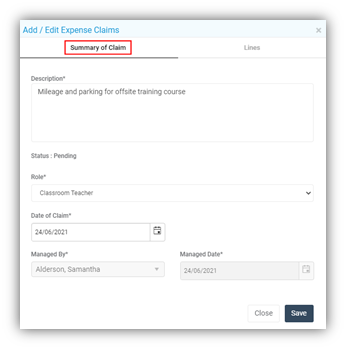
Click on the + icon top right to make an Expense Claim. When adding an Expense Claim there are two sections to the Claim, the Summary of Claim and Lines. The main details are added under the Summary of Claim section and the actual amounts claimed for under the Lines section.
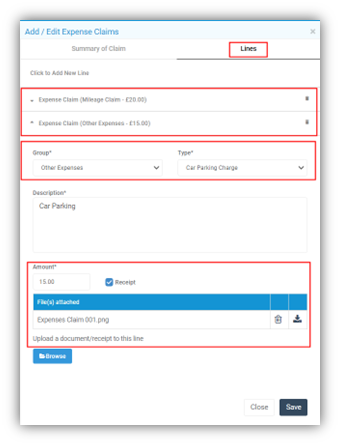
Click to add a New Line then enter the details of the Claim, if there is more than one amount to be claimed for, add another Line, select from the Group and Type dropdown lists for Claim Groups and Types, click on the Line to view the Details. If you have any documents or receipts etc., these can be added by clicking the Browse button and uploading the files, once Uploaded they will be displayed in the File(s) attached table with the options to Delete or Download to the right, when finished click Save.
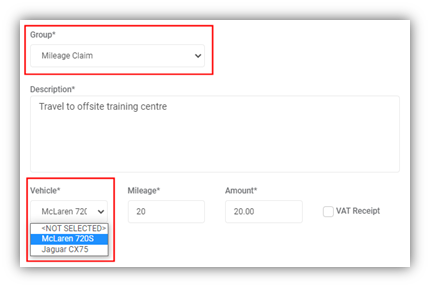
When making a Claim for Mileage the Vehicle information will be displayed for the claimant, if the Vehicle information has not been entered for that member of Staff a Message will be given asking for it to be added. This is done in the Vehicle section of the Staff Profile.
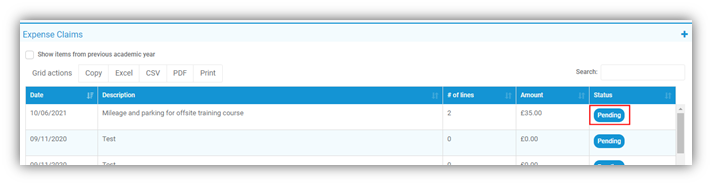
Once saved the Expense Claim will be listed in the Expense Claim table as Pending. To view or Edit the Details of the Claim double click on the Claim row.
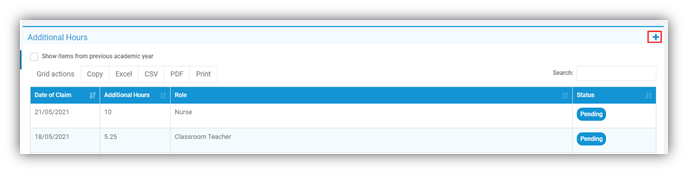
To Claim for Additional Hours click the + icon top right.
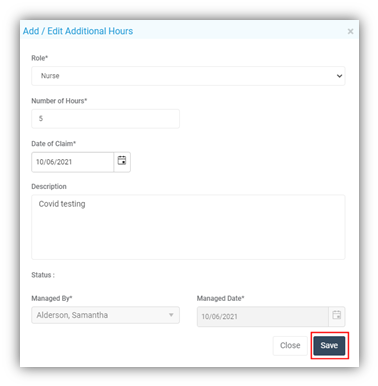
Use the dropdown list to add the Details.
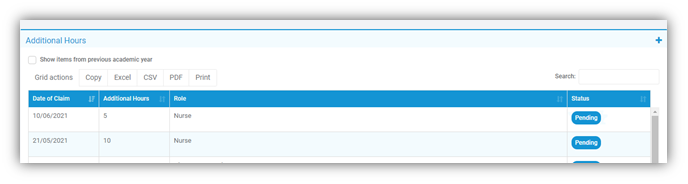
The Claim will now be displayed as Pending.
Request Alerts – Requester
When a Request has been made, if the Approval Alerts options under the Manage Approval Processes section are Active, an Alert and e-mail will be sent to you, confirming the type of Request you have sent.
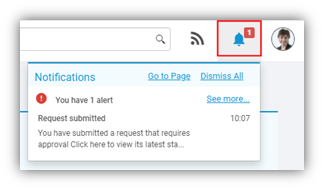
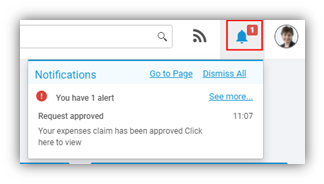
When the Request has been completed an Alert and e-mail will be sent to you, confirming the outcome of the Request.
Requests Non-Approval
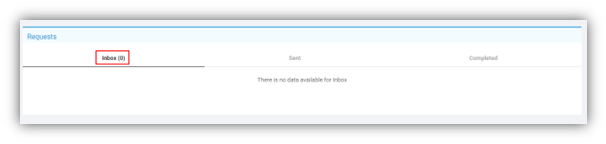
The Requests tab displays the Requests you have made, the results of the Requests. If you have not been listed to Approve Requests the Inbox and the Completed sections will remain empty. By default the Requests page will open on the Inbox.
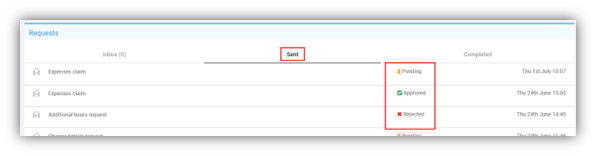
The Sent section will display a list of Requests you have sent for changes to your Information or Claims.
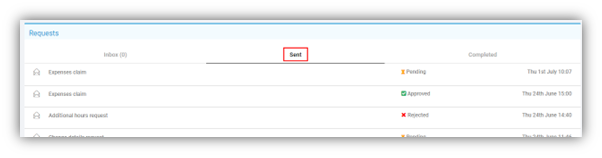
Click on a row to open it and view the Request details.
The status of the Requests will be updated here to show those Pending, Approved or Rejected.
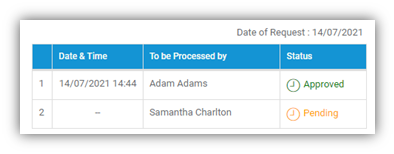
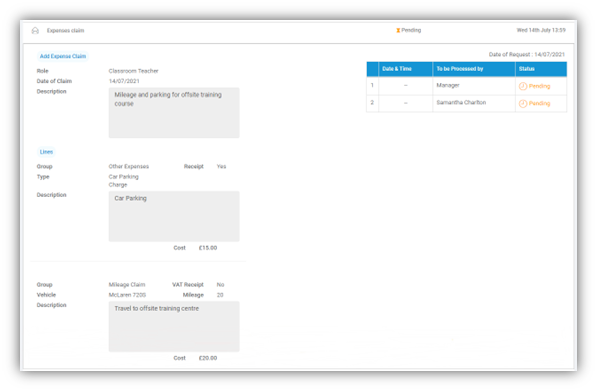
You can also see how far your Claim has progressed, by clicking on the row and looking at the table top right will show the latest activity.