Note: All pages shown are subject to having the relevant Roles and Permissions.
This guide has been created to show you how to amend and add a UPN for a single student.
To begin, go to the Students List page.
Next, select a Student so they are highlighted blue and press View.

On the Student record, Select the Enrolment tab.

You will see a Key Data panel, which can be found on the right hand side of the page.
Click on the Pencil Icon to edit the information.

If you know the Student’s UPN, you can add this to the UPN field, and Click Save.

If the UPN is blank, Click on the Magnifying Glass.
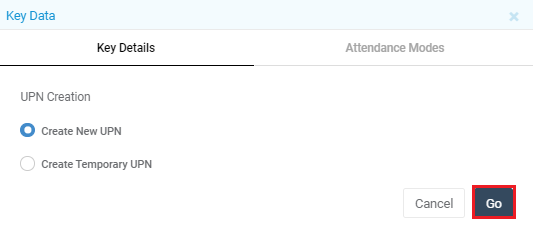
This will give you the option to Create New UPN or Create Temporary UPN.
Select the option you require and click Go.

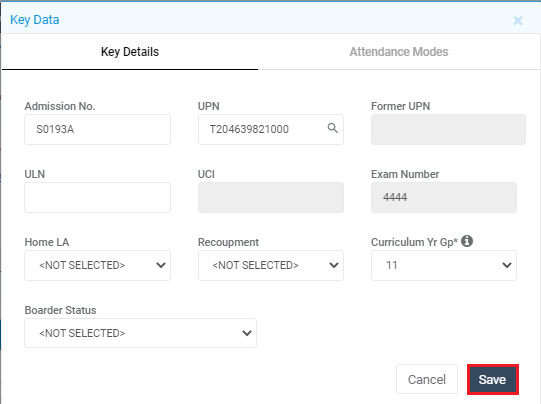
You will be taken back to the Key Data page.
Click Save to complete the change.

Note: The Former UPN can also be add or Edited here.

You also have the ability to assign multiple UPNs to new Students using the following method.
Note: The UPNs assigned are random using this method and you will only be able to see what they are after they have been assigned.
Go to the Students List page and select/click on the required Students.
Once they are highlighted, press Actions>Quick Edit.

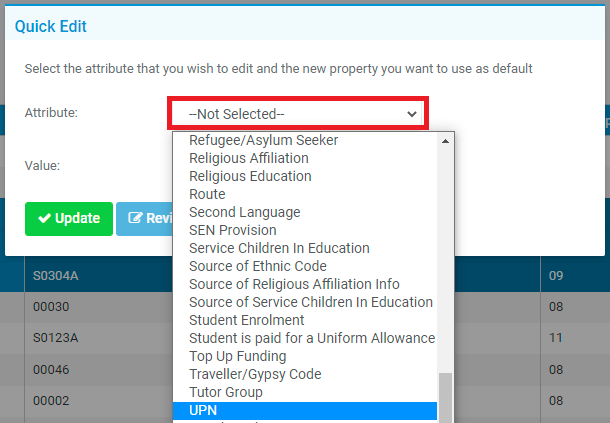
Once Quick Edit is open, change the Attribute drop down from Not Selected to UPN.

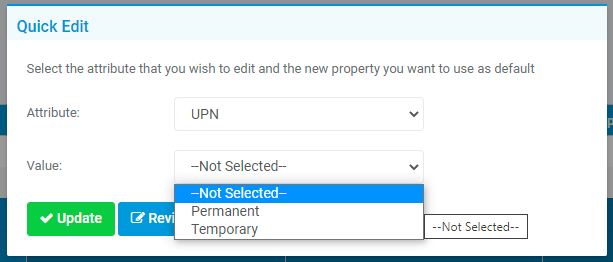
After selecting UPN, you can select either Temporary or Permanent.
Once you have selected the value (Temporary or Permanent), press Review.

This will show you a table of the Students, summarising the change you are about to make.
If you are happy, press Update.

UPNs will be created for each Student, these will now be visible if you repeat the process or go to the Student’s Records to view them.

The UPNs have now been assigned to three Students, this process can be repeated in bulk for new Students or Students without UPNs.
