Note: All pages shown below are subject to having relevant Roles and Permissions.
In this guide, you will be shown how to correctly change a Student’s Enrolment Status individually and in bulk. This would need to be carried out when a Dual Registered Student becomes Single Registered or Guest for example.
Important: DO NOT use this process to make a Student a Leaver. To make a Student a Leaver see here.
See also: How to View a Students Enrolment Status and How to add Schools to your MIS.
We will also explain School History which is closely connected to the Enrolment Status.
Enrolment Status
To begin, go to the Students List page, select a Student and press View.
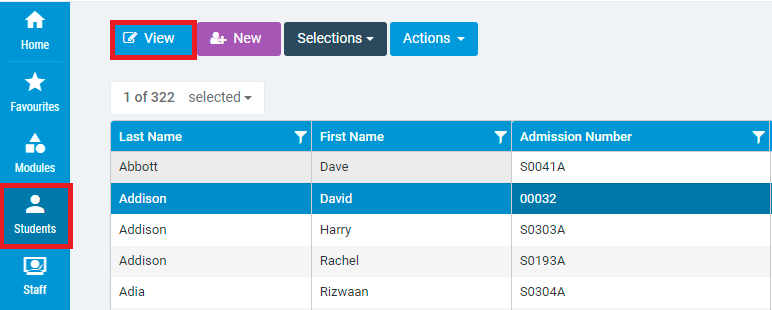
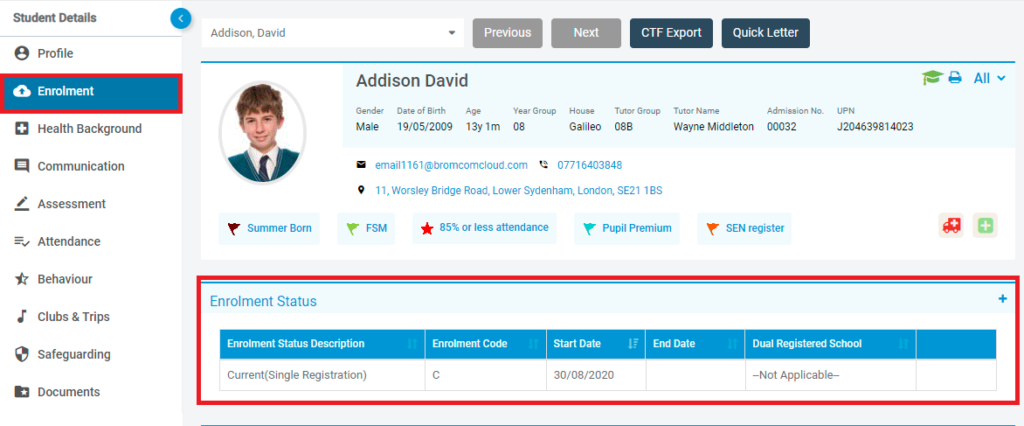
Once the Student record is open, click on the Enrolment tab from the side menu. This will allow you to see the Enrolment Status panel.
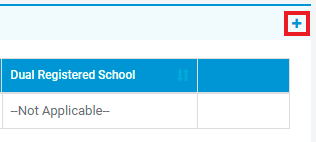
In the example below, you can see that the Student has an Enrolment Status of Current (Single Registration).
In our example scenario, the Student will be made Dual Registered on the last day of the current week (01/07/22).
Before we can do this, the current Enrolment Status must be given an End Date of the day before (30/06/22) as there cannot be any gaps.
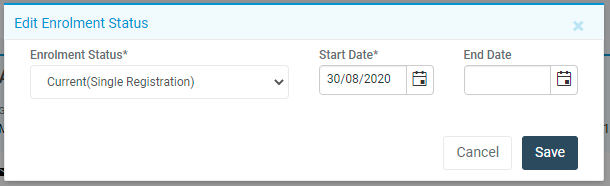
To do this, we need to enter an End Date for the current Enrolment Status. You can do this by hovering over the Enrolment Status and clicking on the pencil/edit icon.
Important: Please never delete an Enrolment Status, they must only ever be End Dated.

Pressing this will provide you with a small pop out window where you can give the Enrolment Status an End Date and press Save.
You can see below that the current Enrolment Status now has an End Date.

You can now add another Enrolment Status by pressing the + icon to the right of the panel.
This will open another pop out window where you can add the details of the new Enrolment Status.
Note: By default, the Start Date will be set as your current day so make sure you change it. For our example scenario, the Start Date needs to be 01/07/22.

If you are adding a Dual Registration, the Destination/Dual School will need to exist or be added to your MIS within Config>Administration>Schools.
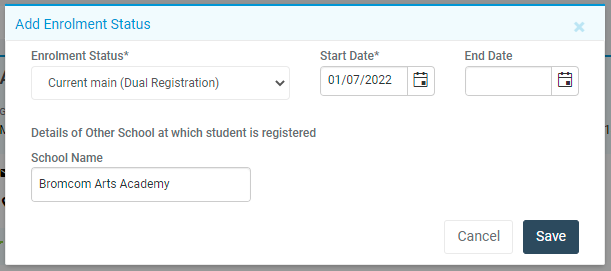
Once you are happy with the new Enrolment Status details, press Save.
You will see now that the previous Enrolment Status was ended, while the new Enrolment Status starts the day after.

Note: Regardless of the scenario you face, Enrolment Status‘ must never be deleted and if one is being ended for a Student, the next must start the following day (no gaps).
Also, giving an End Date to an Enrolment Status DOES NOT make the Student a leaver and is incorrect. The correct method for making Students leavers can be found here – How to process a Student as a leaver.
School History
Staying in the Enrolment section of the Students record, you will also see the School History panel.
This panel shows all of the School records that a Student has for their previous Schools, as well as an active School record to show that they are at your School.
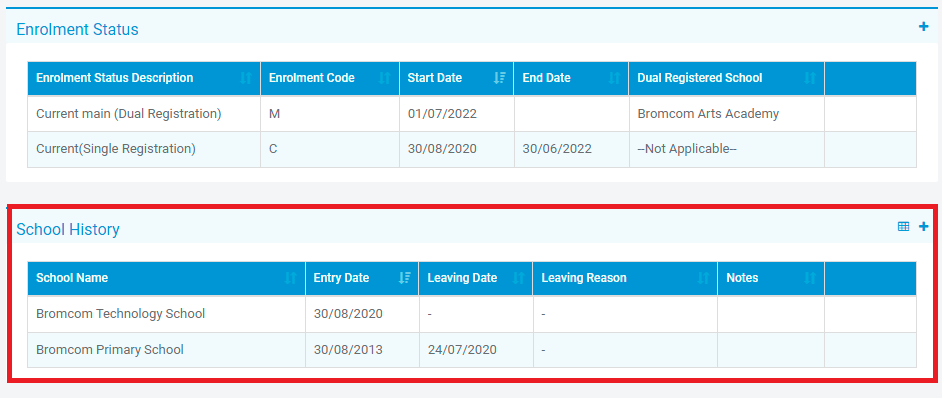
Making changes to a Student’s Enrolment Status will not affect their School records but the School record for your School should encompass all of the Enrolment Status‘.
So even if a Student’s Enrolment Status has changed four times, there should only be one School record through out this time.
When the time comes for the Student to leave your School, they should be processed as leaver which will end their Enrolment Status and School record automatically.
Important: As with the Enrolment Status panel, please never delete a School record. Please use the Process Leavers function once a Student is due to leave your School – How to Process Students as a Leaver.
Enrolment Status – Bulk
Moving back to Enrolment Status’ briefly, they can also be amended for multiple Students at one time should you ever need to.
It is important to note that this method will apply the same Enrolment Status and Dates for all Students selected, so only use this method in such a scenario.
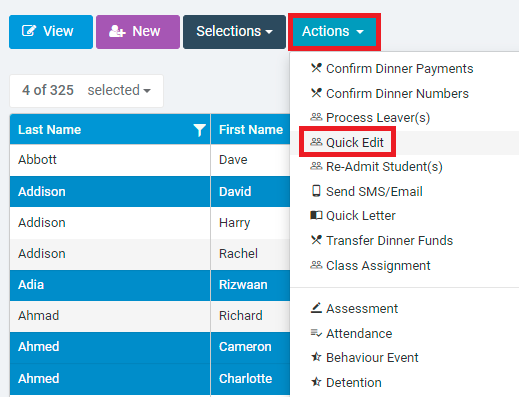
For this, you need to go to the Students List page and select the desired Students.
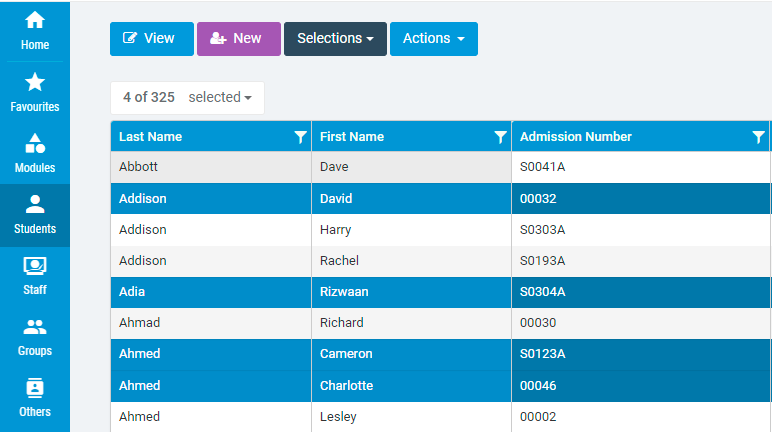
Once they are selected, press Actions>Quick Edit.
This will open the Quick Edit window where you will need to change the Attribute drop down to Student Enrolment.
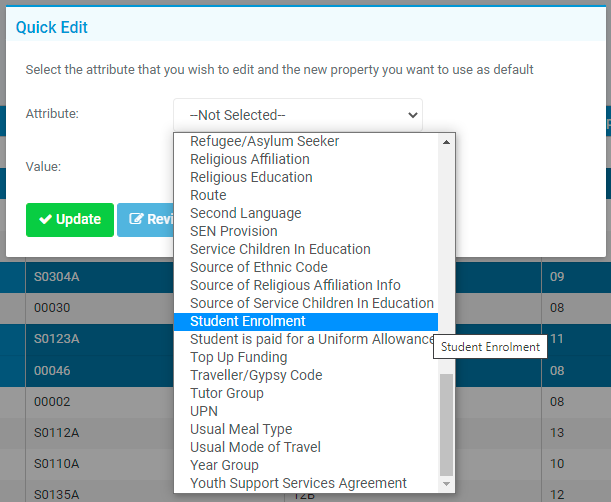
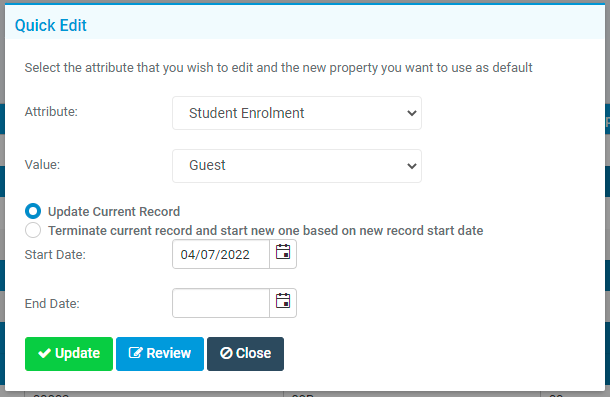
Once you have selected Student Enrolment, you need to set the Value and Start Date.
Once again, this will apply to all selected Students so make sure the details are correct and then press Review.
Note: Pressing Update makes the change straight away, while pressing Review lets you see/approve the change first).
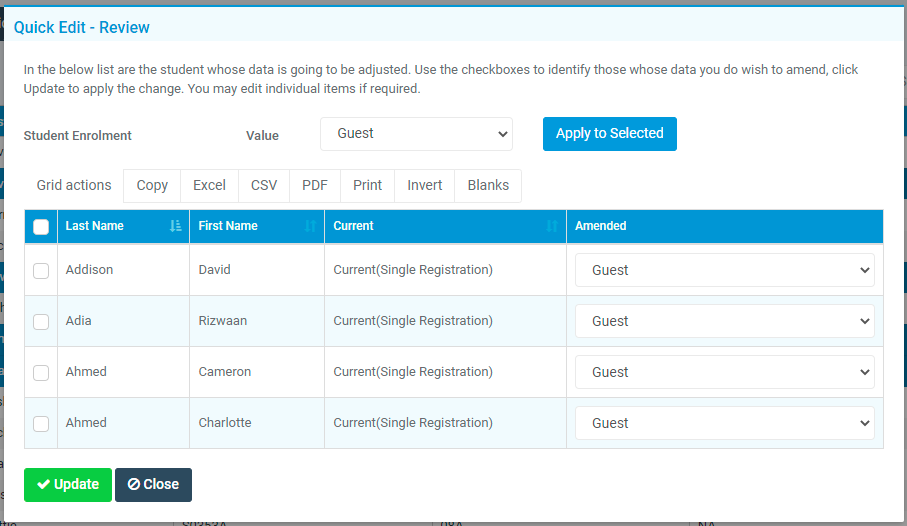
As stated above, pressing Review gives you a visual breakdown of the proposed change.
Once you are happy, press Update.
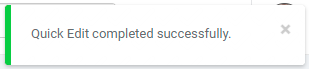
You will then receive a success notification on the top right of your screen to let you know that the process is complete.