
In this guide, the entire process for setting up MyChildAtSchool (MCAS) and creating User Accounts for Parents/assisting them with signing up will all be detailed as below:
School Administration
MCAS
- Navigating MCAS – App Version
- Navigating MCAS – Web Version
- How to change Profile
- Students attending Multiple Schools
- Shopping Basket
Access: The permissions required to get started with MCAS are found in the MCAS Module of Config>Setup>Roles & Permissions. Each tick box on the right determines which functions are visible/available on the page for users with the selected Role.

Prerequisites:
- Ensure the MCAS Module is enabled/accessible on your MIS and that you/the MCAS lead has a role with sufficient MCAS Access and Permissions.
- From the side menu, go to the Others page and ensure you do not have duplicate records for any Parents/Contacts see: Duplicate MCAS User Accounts.
- If you have Staff with children at your School, you must create a separate Contact Record for these Staff, do not link their MCAS Account to their Staff Record. They must exist on the system as Contacts to link with MCAS successfully.
See also:
User Account Creation
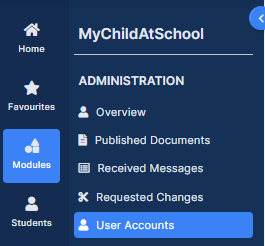
To create new User Accounts go to Modules > MyChildAtSchool > User Accounts
From User Account Maintenance page click New to get to the User Account Creation popup.

Choose Select Contacts, where you will see the Email Address column. Contacts without an Email Address appear in bold, red text in the table.

A new Edit Contact Details icon in the new Actions column opens the Contact Details popup where you can more easily update the Email Address, which will enable parents to gain access to their online parent account.

When creating a new MCAS User Account – the new Send Generate Password Email button replaces ‘Send Invitation Code Emails’.
Note: The Send Generate Password Email button appears in both Manual and Auto mode.

User Account Maintenance
Modules > MyChildAtSchool > Administration > User Accounts

The following changes have been made to the User Account Maintenance page to coincide with the new MCAS log in process:
- When you choose Select Contacts or Select Contacts with… radio buttons the table now displays Email Address (previously named Account Email).
- If more than one Email Address is associated with a Contact – you will see all Email Addresses separated by a comma.
- Where you see the Email Address in User Account Maintenance tables – you will see a link to the Contact Details page where you can update the Email Address. Image coming soon.
- Contacts without an Email Address will appear in bold, red text in the table.

A dropdown appears on the Select Contacts With… option:
- No Email Addresses the NEW (default) option that returns all parent accounts whose Contact details do not have an Email Address
- No Linked Students this option continues to work in the existing way and list all accounts without students linked

Action button: When you click on Action you now only have the option to Enable and Disable.

Edit button: When you click on Edit you now see Email Address(es), read only field.

View Recovery Email Accounts: A new option shows all the recovery Email Addresses that are not linked to a Contact, and allows the user to add Email Addresses to Contact Details with a click of a button. Image coming soon.
Court Orders – How they affect MCAS
Adding Court Orders is something that can be done within the Contacts section of a Students record.
When you hover over a Contact and use the Pencil Icon highlighted below, there is an option to mark the Contact as having a Court Order.

Once you press Edit and you have the screen shown below, the Court Order tick box will be visible/accessible.

With regards to MCAS, Court Orders have the following affect;
If a Parent is given a Court Order BEFORE they have an MCAS Account, that Parent can still have an MCAS Account created but they WILL NOT be able to see or access the Student they have a Court order against.
In this situation, even though the Parent can still have an MCAS Account created and view other Students that they are linked to (if any), they WILL NOT be able to see the Student they have a Court Order against in any capacity.
Below is an example of trying to create a User Account when there is a Court Order;

And this is an example of trying to create a User Account when there is no Court Order;

If a Parent is given a Court Order AFTER they already have an MCAS Account, that Parent WILL STILL be able to see or access the Student they have a Court Order against.
In this situation, you MUST manage this manually by going to Modules>MCAS>User Accounts and using removing the Access and/or Show Student Details ticks against the Parent.
To do this, find the Contact in question and press Edit. Then untick the Access and Show Student Details tick boxes shown below and press Save;

Removing the above tick boxes will prevent the Parent from being able to see the Student in any capacity via MCAS.
If the Parent is not linked to any other Student in the School and has become problematic/abusive, there is also the ability to Disable or Delete their MCAS Account.
Disabling or Deleting the MCAS Account would be a last resort AFTER you have already unticked Access and Show Student Details for that Contact (unticking both will ensure the Student is not visible on MCAS) but the option is there should you deem it appropriate.
To do this, you can go to Modules>MCAS>User Accounts. Once there, find the Contact in question and press Action. Within Action there is the option to Disable the User Account, or next to Action there is an option to Delete the User Account as shown below;

Note: The Contact must be selected/ticked for either of these actions to have affect.
MCAS Charges – Bank Statements and Orders
When Parents make a purchase or payment on MCAS, their Bank Statements will show Bromcom MCAS.
It is common for Parents to forget this and get confused or think they are being charged for a subscription, but they can be reassured that this is coming from an MCAS Purchase they made and is a one off amount.
If you ever need to verify a payment that a Parent has made or check that they have been charged, you can go to Modules>MCAS>View Orders.
See also: How to Manage Existing Orders and How to Create Orders.

Navigating MCAS – App Version
Now that the MCAS Account has been created, Parents can log in to the Web Version or App Version any time they wish.
To log in via the MCAS App, Parents will need to download it from the App Store (Apple) or Play Store (Android).

Once the App is launched, Parents can choose to log in via Username and Password or Magic Link which is a new feature as of October 2021.

Note: The Purpose of the Magic Link is to provide a 24 hour shortcut where Parents can access the App using just the School ID and their Email Address instead of entering their full credentials, this feature will be covered in more detail further in this guide.
Once the App is launched, Parents will select the Username and Password log in option.
They will then need to enter the School ID, their Username and their Password.

Entering these credentials will store them on the Phone and they will not be needed again to log in to the MCAS App.
Parents can now create a five digit pin, as well as enable Biometric Authentication (Touch/Facial Recognition) which allows them to log in with greater ease and security.
Note: Each Phone is different so Parents may not be prompted to enable Biometric Authentication the first time, they can enable this within Profile section of the App at any time
Navigating the App version of MCAS works slightly differently to the Web Version of it because there is no Dashboard or Widgets, only Modules within the side Menu.

Instead, Parents will arrive on a Module straight away such as Attendance.
To navigate to a different Module, they would need to use the side Menu which is accessed by using the three horizontal lines on the top left of the App.
Note: The Modules within this Menu are controlled within the MIS via Config>MCAS, any Modules that are enabled there will be visible on the App when the Parent logs in.

There is also a fixed Menu at the bottom of the App which will allow Parents to view Announcements, view their Profile and view/manage their Accounts (Some Parents will have another MCAS Account with another School that they can add to their MCAS App).
This will allow you to see all of the Orders your School have either received from MCAS or created internally, with the Order Status showing on the right.

The Order Status’ on this page have the following meaning;
- Paid – The Parent has created an Order and has paid via MCAS, or the School have marked the Order as paid after receiving the money outside of MCAS.
- Refunded – The Order has been fully or part Refunded to the Parent by the School.
- Processing – The Parent has created an Order but Payment is Pending on MCAS.
- Failed – The Parent has created an Order but Payment has failed on MCAS.
- Outstanding – The Parent has created an Order but chose to pay Offline (Cash/Cheque) or has an Outstanding order against them/their Child that they have not yet paid.
- Cancelled – The Parent previously had an Order but it has since been Cancelled by the School.
Using this page and knowing what the Order Status means, you can now check to confirm when a Parent says they have been charged twice or claim to have Paid an Outstanding Order.
Note: To set up and use Online Payments with Bromcom, there must be an Authenticated Bank Account configured within Config>MCAS>Online Payments.
If this is not the case, please contact our Customer Care Team to begin the processing of configuring an Authenticated Bank Account at customercareteam@bromcom.com
See also: How to set up Online Payments
Note: There is a £1 minimum checkout amount on MCAS, meaning any purchasable items, Clubs, Trips or Products must cost £1 or above.
Navigating MCAS – Web Version
Now that the MCAS Account has been created, Parents can log in to the Web Version or App Version any time they wish.
Logging in via the Web version can only be done through the following Web Address – https://www.mychildatschool.com/MCAS/MCSParentLogin
Once the Parent logs in to MCAS, they will see Widgets on the Dashboard and a side Menu.
The Widgets on the Dashboard will either display data that can be viewed at a glance, and/or have a More button which will redirect the Parent to the full page for that Module (i.e Reports or Assessment).

Pressing More on a Widget will take you to the specific page for that Module. Below is an example of the Assessment page after pressing More.

Going back to the Dashboard, the other Navigation tool aside from the Widgets will be the Side Menu.

This Menu can be amended/is configured by School Staff from within the MIS by going to Config>MCAS and selecting a specific Module underneath the Configuration options.
Within the Module, you can decide if you want it to be visible to Parents via MCAS by using the Enable Module tick box shown below;

Navigate the side Menu within Config>MCAS to control which data you wish to be visible to Parents.
Note: Ensure you Save each page before you move to another.
Once you are happy with everything, MCAS is now fully configured to your Schools preferences and Parents can log in regularly to view the Data as it updates.
Note: If a Parent has more than one Child at the School, they will all be visible via the same MCAS Account.
To switch to their other Child, Parents need to click on the Child’s name on the top left of the Dashboard.

This will provide a drop down where they can select another Child as seen below;
By clicking on the Child’s name, the Parent can now select one of their other Children to view on MCAS.

Finally, by selecting the other Child, Parents will be able to view their data and switch between their Children whenever they please.

How to change Profile
Click on the Account name in the top left-hand corner of the parent portal and select Change Profile from the dropdown menu to change Profile.

The profile popup opens, select a Profile and click Change Profile.

Students attending multiple schools
If a Student attends multiple schools – the Homework, Exams (Results and Timetables) and Timetable pages will show the data for all schools merged together.

Shopping Basket
If there are any items in the Shopping Basket and a parent switches to a student who attends a different school , a message will appear Changing school will clear your basket.